Dell™ PowerEdge™ 1955 Systems Hardware Owners Manual w w w. d e l l . c o m | s u p p o r t . d e l l .
Notes, Notices, and Cautions NOTE: A NOTE indicates important information that helps you make better use of your computer. NOTICE: A NOTICE indicates either potential damage to hardware or loss of data and tells you how to avoid the problem. CAUTION: A CAUTION indicates a potential for property damage, personal injury, or death. ____________________ Information in this document is subject to change without notice. © 2006 Dell Inc. All rights reserved.
Contents 1 About Your System . . . . . . . . . . . . . . . . . . . . . . . . . . . . . Other Information You May Need System Overview . . . . . . . . . . . . . . . . . . . . . . . . . . . . . . . . . . . . . . . . . . . . . . . . . . . . . . . . . . 9 9 10 System Status Features . . . . . . . . . . . . . . . . . . . . . . . . . . . . . 10 Server Module Features . . . . . . . . . . . . . . . . . . . . . . . . . . . . . 12 . . . . . . . . . . . . . . . . . . . 16 . . . . . . . . . . . . . . . .
2 Using the System Setup Program Entering the System Setup Program . . . . . . . . . . . . . . . . . . . 43 . . . . . . . . . . . . . . . . . . . . . . 43 . . . . . . . . . . . . . . . . . . . . . 43 44 . . . . . . . . . . . . . . . . . . . . . . . . . . . . . . 44 Responding to Error Messages . . Using the System Setup Program . System Setup Options Main Screen . . . . . . . . . Memory Information Screen . CPU Information Screen . . . Integrated Devices Screen . .
KVM Module . . . . . . . . . . . . . . . . . . . . . . . . . . . . . . . . . . . Removing a KVM Module . . . . . . . . . . . . . . . . . . . . . . . . Installing a KVM Module . . . . . . . . . . . . . . . . . . . . . . . . Tiering an Avocent Analog KVM Switch or Avocent Digital Access KVM Switch From a Analog KVM Switch . . . . . . . . . . . Tiering an Avocent Analog KVM Switch From a Dell Console Switch . Tiering an Avocent Digital Access KVM Switch From a Dell Console Switch . . . . . . . . . . . . . .
Server Module Control Panel Assembly (Service-Only Procedure) . . . . . . 96 . . . . . . . . . . . . . . . . . . . . . . . . . . . . . . . . 96 97 . . . . . . . . . . . . . . . . . . . . 98 . . . . . . . . . . . . . . . . . . . . . . . . 98 99 Removing the Server Module Control Panel Installing the Server Module Control Panel System Board (Service-Only Procedure) Removing the System Board Installing the System Board. 4 . . . . . . . . . . . . . . . . . . . . . . . .
5 Running System Diagnostics . . . . . . . . . . . . . . . . . . . . . Using Server Administrator Diagnostics System Diagnostics Features . . . . . . . . . . . . . . . . . . . 117 . . . . . . . . . . . . . . . . . . . . . . . . . 117 When to Use the System Diagnostics . . . . . . . . . . . . . . . . . . . . . 118 . . . . . . . . . . . . . . . . . . . . . . . 118 . . . . . . . . . . . . . . . . . . . . . . . . .
Before You Call . . . . . . . . . . . . . . . . . . . . . . . . . . . . . . . . . 129 Contacting Dell . . . . . . . . . . . . . . . . . . . . . . . . . . . . . . . . . 132 . . . . . . . . . . . . . . . . . . . . . . . . . . . . . . . . . . . . . 149 . . . . . . . . . . . . . . . . . . . . . . . . . . . . . . . . . . . . . . . 157 Glossary Index .
About Your System Other Information You May Need CAUTION: The Product Information Guide provides important safety and regulatory information. Warranty information may be included within this document or as a separate document. • The Rack Installation Guide or Rack Installation Instructions included with your rack solution describes how to install your system into a rack. • The Getting Started Guide provides an overview of system features, setting up your system, and technical specifications.
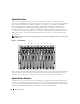
System Overview Your system can include up to ten server modules (or blades) (see Figure 1-1). Each server module functions as an individual server encompassing up to two microprocessors, up to two hot-pluggable hard drives, and up to eight memory modules.
Figure 1-2. Front-Panel Control and Indicators 1 2 3 4 1 system power indicator 4 identification button 2 system power button 3 identification indicator Table 1-1. System Status Features Indicator Type Icon Indicator Indicator Code System power button N/A None Turns the system on and off. Press to turn on the system. Press and hold 10 seconds to turn off the system. NOTE: The system power button controls power to all of the server modules and I/O modules in the chassis.
Table 1-1. System Status Features (continued) Indicator Type Icon Identification indicator Indicator Indicator Code Off Chassis is not being identified. This is the default. Amber, slow Chassis is being identified. Either the front or back blinking identification button has been pressed. This indicator can be turned off by pressing the identification button. Amber, fast System error. Will stop blinking when the error is resolved.
Figure 1-3.
Table 1-2 provides information about the status indicators. Table 1-2. Server Module Features and Indicators Indicator Icon Server module power indicator Server module power button N/A Activity Indicator Indicator Code Off Power is not available to the server module, the server module is not turned on, or the server module is installed incorrectly. For detailed information on installing a server module, see "Server Modules" on page 73. Green The module is turned on.
Table 1-2. Server Module Features and Indicators (continued) Indicator Icon KVM selection indicator Activity Indicator Indicator Code Off The server module is not selected by the KVM. Green The server module is selected for the KVM. Amber blinking The server module is not selected by the KVM and a power fault exists. Green/amber blinking The server module is selected for the KVM and a power fault exists.
Table 1-2. Server Module Features and Indicators (continued) Indicator Icon Network indicators Activity Indicator Indicator Code Off Indicates that the server module does not have a link to the Ethernet switch or pass-through module. Green on Indicates that the server module has a valid link to the network switch module. Green blinking Indicates network activity between the server module and the network switch module. NOTE: External network activity is not reported by this indicator.
Figure 1-4. Hard-Drive Features and Indicators 1 2 1 drive activity indicator 2 drive status indicator NOTE: The hard-drive status indicator is only functional for RAID hard drive configurations. For non-RAID configurations, only the drive-activity indicator is active. Table 1-3. Hard-Drive Status Indicator Patterns (RAID Configurations Only) Status Indicator State Indicator Code Off • Drive is ready for removal. • Drive bay is empty. • Power is off to the server module. Green Drive is online.
Back-Panel Features The back of the chassis supports four I/O module bays, the DRAC/MC, fan modules, and power supply modules. Figure 1-5 shows a sample configuration and the numbering for the bays. Table 1-4 provides information about the back-panel features. Figure 1-5.
Table 1-4. Back-Panel Features and Indicators Component Indicator Description Power supply modules Provide information about power status (see "Power Supply Indicator Codes" on page 20). Fan modules Provide information about status of the system fans (see "Fan Module Indicators" on page 21). KVM module Provides information about the KVM module (see "KVM Modules" on page 22).
Figure 1-6. Power Supply Indicators 1 3 2 1 fault indicator 2 AC power present indicator 3 DC power indicator Table 1-5. Power Supply Indicator Codes Indicator 20 Icon Activity Indicator Indicator Code DC power indicator Green The power supply is operational. Fault indicator Amber The power supply is in a fault condition. The fault condition can result from either a failed power supply or a failed fan within the power supply. See "Power Supply Modules" on page 58.
Fan Module Indicators Each hot-pluggable fan module contains two redundant fans (see Figure 1-7). Table 1-6 lists the fan indicator codes. Figure 1-7. Fan Module Indicators 2 1 3 4 1 fan 1 fault indicator 4 fan 2 fault indicator Table 1-6. 2 fan 1 present indicator 3 fan 2 present indicator Fan Module Indicator Codes Indicator Activity Indicator Indicator Code Fan 1 present indicator Off Fan 1 is not installed. Green Fan 1 is installed. Off Fan 1 is operating normally.
Table 1-6. Fan Module Indicator Codes (continued) Indicator Activity Indicator Indicator Code Fan 2 fault indicator Off Fan 2 is operating normally. Amber Fan 2 has failed. See "Fan Modules" on page 59. KVM Modules Your system includes one of the KVM modules described in this section: • Avocent Analog KVM switch module (standard) • Avocent Digital Access KVM switch module (optional) NOTE: Earlier versions of KVM modules are not supported on your system.
Figure 1-8 shows the external features on the Avocent Analog KVM switch module. Figure 1-8. Avocent Analog KVM Switch Module 1 2 3 4 1 ACI port 2 4 power indicator custom connector for custom cable (PS/2 [2] and video) 3 identification indicator The Avocent Analog KVM switch module also includes an identification indicator (see Figure 1-8). Table 1-7 describes the indicators and features on this switch module. Table 1-7.
Avocent Digital Access KVM Switch Module The optional Avocent Digital Access KVM switch module allows you to configure and manage the server modules through a single keyboard, monitor and mouse. You select server modules using the On-Screen Configuration and Reporting (OSCAR) graphical user interface (GUI).
Figure 1-9 shows the external features of the Avocent Digital Access KVM switch module. Figure 1-9.
DRAC/MC Module The DRAC/MC provides serial and Ethernet management ports, a status indicator when redundant DRAC/MCs are installed (when available), and status indicators for the DRAC/MC and for the link to the system's onboard network interface controller (see Figure 1-10). See the documentation for the DRAC/MC module for specific information on serial port redirection of server modules and switches. Table 1-8 provides information about the status indicators. Figure 1-10.
Table 1-8. DRAC/MC Module Indicators (continued) Indicator Type Icon Primary/secondary indicator Fault indicator Serial connector Activity Indicator Indicator Code Off The DRAC/MC is a backup for the master DRAC/MC. NOTE: For information on availability of dual (redundant) configurations for the DRAC/MC, see www.dell.com. Green The DRAC/MC is active for system management. Green blinking The DRAC/MC is in special or manufacturing mode. Off The DRAC/MC is operating normally.
DRAC/MC Firmware Requirements The minimum DRAC/MC firmware requirement for your system is version 1.3 or later. If you are adding a second DRAC/MC module with version 1.0 to support redundancy, you must upgrade the module’s firmware to version 1.1, then upgrade the firmware to version 1.3 (or later). NOTE: A DRAC/MC module’s firmware version is displayed on its web-based GUI or by typing the command getsysinfo or racadm getsysinfo.
Table 1-9 lists the valid I/O module configurations. See Figure 1-5 for I/O bay locations. Table 1-9.
Figure 1-11. PowerConnect 5316M Ethernet Switch Module Indicators and Features 2 1 3 11 12 13 14 15 16 1 speed/link activity indicator 2 duplex mode indicator 3 system/diagnostic indicator Table 1-10. PowerConnect 5316M Ethernet Switch Module Indicators 30 Indicator Type Activity Indicator Indicator Code Speed/link activity indicator (bicolor) Off Not connected. Green The port is connected to a valid link partner on the network.
Fibre Channel Pass-Through Module The Fibre Channel pass-through module provides a bypass connection between the Fibre Channel daughter card in the server module and optical transceivers for direct connection into a Fibre Channel switch or a storage array. (see Figure 1-12). The Fibre Channel pass-through modules are hot-pluggable. The Fibre Channel pass-through module in I/O bay 3 connects to port 1 on the optional Fibre Channel daughter card installed in a server module.
Table 1-11. Fibre Channel Pass-Through Module Indicators Indicator Type Activity Indicator Indicator Code Fibre Channel indicator (green/amber) Off Power is off to the system. Green/amber System has power. Green/off Fibre Channel connection is online. Off/amber The port is connected to a valid link partner on the network. Off/flashing (twice per second) Connection has lost synchronization.
Gb Ethernet Pass-through Module The Gb Ethernet pass-through module has 10 RJ45 ports. When installed in I/O 1 bay or I/O 2 bay, the Gb Ethernet pass-through module provides a connection between the server module and an external Gb Ethernet device.
Table 1-12. Gb Pass-through Module Indicators Indicator Type Activity Indicator Link Green/amber indicator/activity blinking indicator Green/off Indicator Code The Gb Ethernet connector is linked to the server module and there is network activity The Gb Ethernet connector is linked to the server module and there is no network activity. Off/amber blinking The Gb Ethernet connector is not linked to the server module and there is network activity.
Table 1-13. Server Module Messages Message Causes Ensure that the memory modules are installed in matched pairs. See "General Memory Module Installation Guidelines" on page 78. Alert: DIMM_n and DIMM_n must be populated with a matched set of DIMMs if more than 1 DIMM is present. The following memory DIMMs have been disabled: Alert! Redundant memory disabled!.
Table 1-13. Server Module Messages (continued) Message Causes DIMMs must be populated in sequential order beginning with slot 1. The following DIMM is electrically isolated: DIMM x. The specified DIMM is inaccessible to Populate two, four, or eight DIMMs the system due to its location. sequentially beginning with slot 1. DIMMs must be populated in sequential order, beginning with slot 1.
Table 1-13. Server Module Messages (continued) Message Causes Corrective Actions Error: Memory failure detected. Memory size reduced. Replace the faulty DIMM as soon as possible. Faulty or improperly seated memory modules. See "Troubleshooting Server Module Memory" on page 112. Error: Remote Access Controller initialization failure. Faulty or improperly installed DRAC/MC module. Reinstall the DRAC/MC module. See "DRAC/MC Module" on page 26.
Table 1-13. Server Module Messages (continued) Message Causes Memory address line failure at address, read value expecting value Faulty or improperly installed memory Ensure that all memory modules are modules, or faulty server module properly installed. See "Troubleshooting board. Server Module Memory" on page 112. If the problem persists, see "Getting Help" on page 127.
Table 1-13. Server Module Messages (continued) Message Causes Corrective Actions Plug & Play Configuration Error Error encountered in initializing PCI device; faulty server module board. Set the NVRAM_CLR switch to "on" and reboot the server module. See Figure 6-2 for switch location. Check for a BIOS update. If the problem persists, see "Getting Help" on page 127. Read fault Faulty diskette, diskette drive, optical Replace the diskette. Ensure that the drive, or hard drive.
Table 1-13. Server Module Messages (continued) Message Causes Corrective Actions Unsupported CPU combination Mismatched processors are installed. Replace a microprocessor so that both microprocessors match. See "Processors" on page 84. Processor is not supported by the server module. Check for a BIOS update using the Dell Support website at support.dell.com. Unsupported CPU stepping detected Processor is not supported by the server module.
Alert Messages Systems management software generates alert messages for your system. Alert messages include information, status, warning, and failure messages for drive, temperature, fan, and power conditions. For more information, see the systems management software documentation.
About Your System
Using the System Setup Program After you set up your system, run the System Setup program to familiarize yourself with your system configuration and optional settings. Record the information for future reference.
Using the System Setup Program Table 2-1 lists the keys that you use to view or change information on the System Setup program screens and to exit the program. Table 2-1. System Setup Program Navigation Keys Keys Action Up arrow or Moves to the previous field. Down arrow or Moves to the next field. Spacebar, <+>, <–>, left and right arrows Cycles through the settings in a field. In some fields, you can also type the appropriate value.
Figure 2-1. Main System Setup Program Screen Table 2-2 lists the options and descriptions for the information fields that appear on the main System Setup program screen. NOTE: The options for the System Setup program change based on the system configuration. NOTE: The System Setup program defaults are listed under their respective options, where applicable. Table 2-2.
Table 2-2. 46 System Setup Program Options (continued) Option Description Boot Sequence Determines the order in which the system searches for boot devices during system startup. Available options can include the USB diskette drive, USB CD drive, hard drives, and USB flash drive. NOTE: A USB device will be displayed in the boot order screen only if it is attached to the system before the system enters BIOS.
Memory Information Screen Table 2-3 lists the options and descriptions for the information fields that appear on the Memory Information screen. Table 2-3. Memory Information Screen Option Description System Memory Size Displays the amount of main memory. (If memory mirroring or spare memory is enabled, this value will be less than the amount of physical memory installed in the server module.) This field does not have user-selectable settings. System Memory Type Displays the type of system memory.
Table 2-4. CPU Information Screen (continued) Option Description Adjacent Cache Line Prefetch (Enabled default) Enables or disables optimal use of sequential memory access. Enabled optimizes the system for applications that require sequential memory access. Disabled is used for applications with random memory access. Hardware Prefetcher (Enabled default) Enables or disables the hardware prefetcher.
Table 2-5. Integrated Devices Screen Options (continued) Option Description MAC Address Displays the MAC address for NIC2. This field does not have userselectable settings. TOE Capability Displays status of the TCP/IP off-load engine (TOE) feature of NIC2. See "Activating the Integrated NIC TOE" on page 84. NOTE: To use the TOE feature in a NIC team, a dual-port TOE hardware key is required.
Table 2-7. System Security Screen Options (continued) Option Description Setup Password Restricts access to the System Setup program in the same way that you restrict access to your system using the System Password feature. NOTE: See "Using the System Password" on page 51 for instructions on assigning a setup password and using or changing an existing setup password. Password Status Setting the Setup Password option to Enabled prevents the system password from being changed or disabled at start-up.
System and Setup Password Features NOTICE: The password features provide a basic level of security for the data on your system. If your data requires more security, use additional forms of protection, such as data encryption programs. NOTICE: Anyone can access the data stored on your system if you leave the system running and unattended without having a system password assigned or if you leave your system unlocked so that someone can disable the password by changing a jumper setting.
The password assignment is not case-sensitive. However, certain key combinations are not valid. To erase a character when entering your password, press or the left-arrow key. NOTE: To escape from the field without assigning a system password, press to move to another field, or press at any time prior to completing step 5. 4 Press . 5 To confirm your password, type it a second time and press . The setting shown for the System Password changes to Enabled.
Deleting or Changing an Existing System Password 1 When prompted, press to disable the existing system password. If you are asked to enter your setup password, contact your network administrator. 2 Enter the System Setup program by pressing during POST. 3 Select the System Security screen field to verify that the Password Status option is set to Unlocked. 4 When prompted, type the system password. 5 Confirm that Not Enabled is displayed for the System Password option.
If you do not enter the correct password in three attempts, the system lets you view, but not modify, the System Setup screens—with the following exception: If System Password is not set to Enabled and is not locked through the Password Status option, you can assign a system password (however, you cannot disable or change an existing system password). NOTE: You can use the Password Status option in conjunction with the Setup Password option to protect the system password from unauthorized changes.
For additional information on using BMC, see the documentation for the BMC and systems management applications. Entering the BMC Setup Module 1 Turn on or restart your system. 2 Press when prompted after POST. If your operating system begins to load before you press , allow the system to finish booting, and then restart your system and try again.
Using the System Setup Program
Installing System Options The procedures in this section describe how to remove and install system components and server module components, including: • Power supply modules • Fan Modules • Dell Remote Access Controller/Modular Chassis (DRAC/MC) module • KVM modules • Network switch modules • Server modules • Server module components – Memory modules – Daughter cards – TOE NIC – Processors – Server module battery – Hard drives • Back-panel module cage assembly (service-only procedu
Power Supply Modules Your system contains up to four hot-pluggable power supply modules that are accessible from the system chassis back panel. NOTE: Only 2100-W power supply modules are supported on your system. The 2100-W power supply modules require 180–240 V input from a PDU capable of providing AC current up to 29.2 A at 180 V input. If the power supply modules are plugged into 110-V electrical outlets, the system will not power up.
Figure 3-1. Removing and Installing a Power Supply Module 1 2 3 1 handle 2 release tab 3 power supply module Installing a Power Supply Module 1 Ensure that the power-supply module handle is fully down and then slide the power supply module into the chassis until it is fully seated. See Figure 3-1. 2 Rotate the power-supply module handle upward until its release tab snaps securely into place. 3 Plug a power cable into the power supply module.
Removing a Fan NOTICE: After a fan module is removed from the system, replace it immediately to ensure proper cooling. 1 Identify the failed system fan using the back-panel fan module indicators. See Figure 1-7. Fan 1 is the fan closest to the chassis midplane; Fan 2 is the fan closest to the fan-module handle. 2 Remove the fan module: a Press down on the fan-module release tab. See Figure 3-2. b Rotate the fan-module handle down to eject the fan module. c Slide the fan module out of the chassis.
Figure 3-3. Removing and Installing a System Fan 1 3 2 4 5 1 fan module 2 fan 2 4 fan lever 5 fan-release tab 3 fan 1 Installing a Fan 1 Orient the replacement fan as shown in Figure 3-3. 2 Install the fan: a Slide the fan into the fan module. b Lower its fan lever. c Press the bottom of the lever until it snaps securely into place. 3 Slide the fan module into the chassis until it is fully seated. See Figure 3-2.
Installing a DRAC/MC Module 1 Ensure that the DRAC/MC module release lever is fully extended. See Figure 3-4. 2 Slide the module into the chassis until it is fully seated. 3 Close the release lever until it snaps securely into place. 4 Reconnect the cables that were attached to the module. Figure 3-4. Removing and Installing a DRAC/MC Module 1 2 1 release tab 2 release lever 3 3 DRAC/MC module Important I/O Configuration Considerations Ensure that you read the DRAC/MC’s readme.txt file.
• Reseat a DRAC/MC module • Cause a DRAC/MC failover event, such as removing the network cable from the primary DRAC/MC Performing any of these actions will power off and stop traffic on the bay 2 or bay 4 I/O module, resulting in data loss. When initiated, the DRAC/MC firmware algorithm must find a module in bay 1 before bay 2 and a module in bay 3 before bay 4.
4 Secure the release lever to the module with the Phillips screw. 5 Reconnect the custom cable to the KVM module and connect the keyboard, monitor, and mouse to the custom cable. Figure 3-5. Removing and Installing a KVM Module 1 2 3 1 release lever 2 securing screw 3 KVM module Figure 3-6 shows the basic cabling configuration for a KVM module. For information on configuring the KVM module, see the Configuration Guide provided with your system.
Figure 3-6. KVM Module Basic Configuration 1 6 5 2 3 4 1 monitor 2 custom KVM cable 3 KVM module 4 system 5 mouse 6 keyboard Tiering an Avocent Analog KVM Switch or Avocent Digital Access KVM Switch From a Analog KVM Switch Both Avocent KVM switches can be tiered from analog KVM switches such as the Dell180ES and 2160ES, as well as other products that support the On-Screen Configuration and Activity Reporting (OSCAR) interface.
Before connecting the KVM switch to a supported analog switch, you must set the KVM switch to display in slot order, and set the Screen Delay Time to 1 or more seconds: 1 Press to launch the KVM Switch OSCAR. 2 Click Setup > Menu. The Menu dialog box appears. 3 Select Slot to display servers numerically by slot number. 4 Enter a screen delay time of at least 1 second. 5 Click OK. Setting the Screen Delay time to 1 second allows you to soft switch to a server without launching OSCAR.
Figure 3-7. Avocent Analog or Digital KVM Switch Tiered from an Analog KVM Switch 2 1 5 3 4 1 analog switch 2 keyboard, video, and mouse interconnecting cable 4 KVM switch 5 system 3 custom KVM cable 4 Connect both the analog switch and the system to an appropriate power source. 5 Power up the system. 6 Power up the analog switch. NOTE: If the analog switch is powered up before the system, it may result in only one server module displaying in the analog switch OSCAR, instead of 10.
Tiering an Avocent Analog KVM Switch From a Dell Console Switch To tier an Avocent Analog KVM switch from a Dell 2161DS, 180AS, or 2160AS console switch, connect the ACI port on the rear of the Avocent Analog KVM switch to one of the 16 ARI ports on the back of the Dell console switch (see Figure 3-8). NOTE: Do not connect the KVM switch ACI port to a LAN device such as a network hub. Doing so may result in equipment damage. Figure 3-8.
Tiering an Avocent Digital Access KVM Switch From a Dell Console Switch To tier a Avocent Digital Access KVM switch module from a Dell 2161DS, 180AS, or 2160AS console switch: 1 Connect one end of a CAT5 cable to an ARI port on the console switch (see Figure 3-9). 2 Connect the other end of the CAT5 cable to a Server Interface Pod (SIP). 3 Connect the local KVM cable to the local KVM port of the KVM switch and then to the SIP. 4 Once the KVM switch is connected, the server modules appear in OSCAR.
Resynchronizing the Server List at the Remote Client Workstation Once the KVM switch is connected, the server modules appear in OSCAR. You now need to resynchronize the servers on any remote workstation to ensure that the server modules are now available to any remote users that are connected to the console switch through the Remote Console Switch software. NOTE: This procedure only resynchronizes one remote client workstation.
I/O Module Placements The back panel has four bays for I/O modules and are labeled IO/1, IO/2, IO/3, and IO/4 (see Figure 1-5). PowerConnect 5316M Ethernet switch modules or Ethernet pass-through modules must be installed in either bay IO/1 or IO/2. All other types of matching I/O modules can be installed in IO/3 and IO/4. See " Guidelines for Installing Connectivity Modules" in "Indicators, Messages, and Codes" for guidelines on installing I/O modules.
Figure 3-10. Removing and Installing an I/O Module 1 2 1 I/O module 2 release lever Installing an I/O Module 1 Unpack the I/O module and prepare it for installation. For instructions, see the documentation that accompanied the module. 2 Install the I/O module. NOTE: Bays IO/1 and IO/2 accept only PowerConnect 5316M Ethernet switch modules or Gb Ethernet passthrough modules. If only one module is used, it must be installed in bay IO/1.
4 Reconnect any cables that must be attached to the module. See the documentation that accompanied the I/O module for information about its cable connections. Server Modules Your system can include up to 10 hot-pluggable server modules. Each server module can contain up to two processors, two hard drives, six memory modules, and one daughter card. Removing a Server Module 1 Ensure that the server module's power is off. When a server module is powered off, its front-panel power indicator is amber.
Installing a Server Module NOTICE: Follow this procedure carefully—it is possible to insert the server module upside-down, which may damage the chassis midplane and the server module. 1 Orient the server module so that its top side is up. The server module is correctly oriented for installation when its components have the characteristics described below: a The server module’s upper handle is above (outside) the lower handle.
4 Continue to rotate the upper handle inward until it is flush against the lower handle. The upper-handle release latch locks both handles to the front panel of the server module when the handles are properly closed. 5 Turn on the server module by pressing the module's power button. Opening the Server Module CAUTION: Only trained service technicians are authorized to remove the system cover and access any of the components inside the system.
Figure 3-14. Inside a Server Module 1 2 6 5 3 4 1 optional daughter card 2 memory modules 3 heat sink and processor 2 4 hard drive 0 5 hard drive 1 6 heat sink and processor 1 Closing the Server Module CAUTION: Only trained service technicians are authorized to remove the system cover and access any of the components inside the system.
Figure 3-15.
The eight memory module sockets are divided into two equal branches (0 and 1). Each branch consists of two channels: • Branch 0: Channel 0 (DIMM 1, DIMM 5) and channel 1 (DIMM 2, DIMM 6) • Branch 1: Channel 2 (DIMM 3, DIMM 7) and channel 3 (DIMM 4, DIMM 8) The first socket of each channel has white release tabs. The memory sockets are located on the system board at the back of the server module. See Figure 6-3 in "Server Module Board Connectors.
Table 3-1.
Sample Memory Configurations Table 3-2 shows examples of supported memory configurations. NOTICE: For configurations requiring less than eight memory modules, memory module blanks must be installed in four of the unoccupied memory sockets to maintain proper cooling airflow. See Table 3-2. Table 3-2.
Figure 3-16. Installing and Removing a Memory Module or Memory Module Blank 2 1 3 4 6 5 1 memory module 2 memory module blank 3 memory module socket ejectors (2) 4 socket 5 alignment key 6 edge connector 5 Align the memory module's edge connector with the alignment key on the memory module socket, and insert the memory module in the socket. NOTE: The memory module socket has an alignment key that allows you to install the memory module in the socket in only one way.
Removing Memory Modules CAUTION: Only trained service technicians are authorized to remove the system cover and access any of the components inside the system. See your Product Information Guide for complete information about safety precautions, working inside the computer, and protecting against electrostatic discharge. CAUTION: The DIMMs are hot to the touch for some time after the system has been powered down. Allow time for the DIMMs to cool before handling them.
4 Align the connectors on the bottom of the daughter card with the connectors on the server module board, and then press down on the card edges until it is fully seated. 5 Secure the daughter card to the server module board with the three screws. 6 Close the server module. See "Closing the Server Module" on page 76. 7 Install the server module. See "Installing a Server Module" on page 74. Figure 3-17.
3 Remove the three screws that secure the daughter card to the server module board. See Figure 3-17. NOTICE: Hold the daughter card by its edges only. 4 Lift up the daughter card from its connector and remove it from the server module board. 5 Close the server module. See "Closing the Server Module" on page 76. 6 Install the server module. See "Installing a Server Module" on page 74.
Figure 3-18. Installing and Removing the Heat Sink 1 2 1 screws (4) 2 heat sink NOTE: When removing the heat sink, the possibility exists that the processor might adhere to the heat sink and be removed from the socket. It is recommended that you remove the heat sink while the processor is still warm. 4 Remove the heat sink: a Slightly rotate the heat sink to loosen it from the processor.
Figure 3-19. Installing and Removing the Processor 1 4 2 3 1 processor 4 pin-1 corner of processor 2 socket-release lever 3 pin-1 corner of socket 6 Lift the processor out of the socket and leave the release lever up so that the socket is ready for the new processor. NOTICE: Be careful not to bend any of the pins on the LGA socket when removing the processor. Bending the pins can permanently damage the socket and system board.
5 Install the processor in the socket. NOTE: If you are installing just one processor, it must be installed in socket CPU_1. See Figure 6-3. NOTICE: Positioning the processor incorrectly can permanently damage the processor and the system board when you turn it on. Be careful not to bend the pins on the LGA socket. a If the release lever on the processor socket is not positioned all the way up, move it to that position.
Server Module Battery The system battery is a 3.0-volt (V), coin-cell battery. Removing and Installing the Server Module Battery CAUTION: Only trained service technicians are authorized to remove the system cover and access any of the components inside the system. See your Product Information Guide for complete information about safety precautions, working inside the computer, and protecting against electrostatic discharge.
6 If you removed a daughter card from the server module board, reinstall it. See "Installing a Daughter Card" on page 82. 7 Close the server module. See "Closing the Server Module" on page 76. 8 Install the server module. See "Installing a Server Module" on page 74. 9 Enter the System Setup program to confirm that the battery is operating properly. See "Using the System Setup Program" in your User's Guide. 10 Enter the correct time and date in the System Setup program's Time and Date fields.
Installing a Hard Drive NOTICE: When a replacement hot-pluggable hard drive is installed and the server module is powered on, the hard drive automatically begins to rebuild. Make absolutely sure that the replacement hard drive is blank or contains data that you wish to have over-written. Any data on the replacement hard drive is immediately lost after the hard drive is installed. NOTICE: Not all operating systems support hot-plug drive installation.
2 Open the hard-drive carrier handle to release the drive. See Figure 3-21. 3 Slide the hard drive out until it is free of the drive bay. If you are permanently removing the hard drive, install a blank insert. Shutdown Procedure for Servicing a Hard Drive NOTE: This section applies only to situations where the server module must be powered down to service a hard drive. In many situations, the hard drive can be serviced while the server module powered on.
Figure 3-22. Installing a Hard Drive Into a Drive Carrier 2 1 3 1 screws (4) 2 drive carrier 3 hard drive Back-Panel Module Cage Assembly (Service-Only Procedure) Removing the Back-Panel Module Cage Assembly CAUTION: Only trained service technicians are authorized to remove the system cover and access any of the components inside the system.
6 Remove the KVM module. See "Removing a KVM Module" on page 63. 7 Remove the I/O modules. See "Removing an I/O Module" on page 71. 8 Remove the four screws securing the module cage assembly to the chassis back panel. See Figure 3-23. 9 Pull the assembly out of the chassis approximately half way until it stops, press the two side levers on the sides of the cage, and then pull the cage out from the chassis. See Figure 3-23. Figure 3-23.
6 Install the fan modules. See "Installing a Fan" on page 61. 7 Install the power supply modules. See "Installing a Power Supply Module" on page 59. 8 Install the server modules. See "Installing a Server Module" on page 74. 9 Press the system power switch to turn on the system. Chassis Control Panel Assembly (Service-Only Procedure) Removing the Chassis Control Panel CAUTION: Only trained service technicians are authorized to remove the system cover and access any of the components inside the system.
Figure 3-24. Removing and Installing the Chassis Control Panel Assembly 1 3 2 4 5 6 front 1 midplane receptacle 2 securing-arm release button 3 securing arm 4 control-panel cable 5 control-panel securing tab 6 control panel Installing the Chassis Control Panel CAUTION: Only trained service technicians are authorized to remove the system cover and access any of the components inside the system.
Server Module Control Panel Assembly (Service-Only Procedure) Removing the Server Module Control Panel CAUTION: Only trained service technicians are authorized to remove the system cover and access any of the components inside the system. See your Product Information Guide for complete information about safety precautions, working inside the computer, and protecting against electrostatic discharge. 1 Turn off the server module.
Figure 3-25. Removing and Installing the Server Module Control Panel Assembly 1 2 7 6 5 4 3 1 screws (2) 2 control panel cable retaining clip 3 retaining clip 4 server module-board connector 5 control panel cable 6 top bracket 7 control panel Installing the Server Module Control Panel 1 Place the new control panel under the server module top bracket and secure it with the two screws. See Figure 3-25. 2 Route the control-panel cable under its retaining clip.
System Board (Service-Only Procedure) Removing the System Board CAUTION: Only trained service technicians are authorized to remove the system cover and access any of the components inside the system. See your Product Information Guide for complete information about safety precautions, working inside the computer, and protecting against electrostatic discharge. 1 Remove the server module. See "Removing a Server Module" on page 73. 2 Open the server module. See "Opening the Server Module" on page 75.
Figure 3-26. Removing and Installing the System Board 2 1 1 screws (8) 2 system board Installing the System Board CAUTION: Only trained service technicians are authorized to remove the system cover and access any of the components inside the system. See your Product Information Guide for complete information about safety precautions, working inside the computer, and protecting against electrostatic discharge. 1 Carefully lower the new system board into the chassis.
Installing System Options
Troubleshooting Your System Safety First—For You and Your System To perform certain procedures in this document, you must remove the system cover and work inside the system. While working inside the system, do not attempt to service the system except as explained in this guide and elsewhere in your system documentation. CAUTION: Many repairs may only be done by a certified service technician.
Troubleshooting External Connections Loose or improperly connected cables are the most likely source of problems for the system, monitor, and other peripherals (such as a printer, keyboard, mouse, or other external device). Ensure that all external cables are securely attached to the external connectors on your system. See Figure 1-3 for the front-panel connectors on your system and Figure 1-5 for the back-panel connectors.
5 If two or more server modules are installed in the chassis, press the KVM selection button on a different server module. NOTE: After pressing the KVM selection button, allow approximately two seconds for the KVM functions to change to a different server module. If the monitor is connected to the back-panel KVM module and works with another server module, the first server module may need to be reseated. See "Server Modules" on page 73.
6 If two or more server modules are installed in the chassis, press the KVM selection button on a different server module. NOTE: After pressing the KVM selection button, allow approximately two seconds for the KVM functions to change to a different server module. If the keyboard is connected to the back-panel KVM module and works with another server module, the first server module may need to be reseated. See "Server Modules" on page 73.
6 If two or more server modules are installed in the chassis, press the KVM selection button on a different server module. NOTE: After pressing the KVM selection button, allow approximately two seconds for the KVM functions to change to a different server module. If the mouse is connected to the back-panel KVM module and works with another server module, the first server module may need to be reseated. See "Server Modules" on page 73.
Troubleshooting a Wet System Problem • Liquid spills • Splashes • Excessive humidity Action CAUTION: Many repairs may only be done by a certified service technician. You should only perform troubleshooting and simple repairs as authorized in your product documentation, or as directed by the online or telephone service and support team. Damage due to servicing that is not authorized by Dell is not covered by your warranty. Read and follow the safety instructions that came with the product.
15 Run the Server Administrator diagnostics to confirm that the system is working properly (see "Running System Diagnostics"). If the tests fail, see "Getting Help" on page 127. Troubleshooting a Damaged System Problem • System was dropped or damaged Action 1 Ensure that the following components are properly installed and connected: • DRAC/MC module • I/O modules • Power supply modules • Fan modules • Server modules 2 Ensure that all cables are properly connected.
Action NOTICE: The power-supply modules are hot-pluggable. Remove and replace only one power-supply module at a time in a system that is turned on. Leave a failed power-supply module installed in the chassis until you are ready to replace it. Operating the system with a power-supply module removed for extended periods of time can cause the system to overheat. NOTE: The 2100-W power supply modules require 170-264 V to operate.
Troubleshooting the DRAC/MC Module Problem • DRAC/MC module is not operating properly • System message indicates a problem with the DRAC/MC module • DRAC/MC module cable connections Action NOTE: To eliminate the possibility of a hardware problem with the module or its attaching devices, first ensure that the module is properly initialized and configured. See the Configuration Guide and the documentation that came with the module before performing the following procedure.
Troubleshooting a Network Switch Module Problem • System cannot communicate with the network • Network cable connections • Network switch module and hub configuration settings Action NOTE: To eliminate the possibility of a hardware problem with the module or its attaching devices, first ensure that the module is properly initialized and configured. See the Configuration Guide and the documentation that came with the module before performing the following procedure.
Inside the Server Module Figure 4-1 shows an interior view of the major components of the server module. Figure 4-1. Inside the Server Module 1 2 6 5 3 4 1 optional I/O daughter card 2 memory modules 3 microprocessor 2 4 hard drive 0 5 hard drive 1 6 microprocessor 1 The server module board contains up to two microprocessors, eight memory modules, interface connectors for the hard drives, interface connectors for an optional daughter card, and a dual-Gigabit NIC.
Troubleshooting Server Module Memory Problem • Faulty memory module • Faulty server module board Action CAUTION: Many repairs may only be done by a certified service technician. You should only perform troubleshooting and simple repairs as authorized in your product documentation, or as directed by the online or telephone service and support team. Damage due to servicing that is not authorized by Dell is not covered by your warranty. Read and follow the safety instructions that came with the product.
Troubleshooting Hard Drives Problem • Device driver error • Improperly seated hard drive carrier • Faulty hard drive or hard-drive carrier • Device drivers Action CAUTION: Many repairs may only be done by a certified service technician. You should only perform troubleshooting and simple repairs as authorized in your product documentation, or as directed by the online or telephone service and support team. Damage due to servicing that is not authorized by Dell is not covered by your warranty.
Troubleshooting Microprocessors Problem • System message indicates a problem with the microprocessor • Heat sink is not installed for the microprocessor Action CAUTION: Many repairs may only be done by a certified service technician. You should only perform troubleshooting and simple repairs as authorized in your product documentation, or as directed by the online or telephone service and support team. Damage due to servicing that is not authorized by Dell is not covered by your warranty.
Troubleshooting the Server Module Battery Problem • System message indicates a problem with the battery • System Setup program loses system configuration information • System date and time do not stay current Each server module contains a battery, which maintains the server module configuration, date, and time information in NVRAM when you turn off the server module. You may need to replace the battery if an incorrect time or date is displayed during the boot routine.
Troubleshooting Your System
Running System Diagnostics If you experience a problem with your server module, run the diagnostics before calling for technical assistance. The purpose of the diagnostics is to test your server module's hardware without requiring additional equipment or risking data loss. If you are unable to fix the problem yourself, service and support personnel can use diagnostics test results to help you solve the problem.
When to Use the System Diagnostics If a major component or device in the server module does not operate properly, component failure may be indicated. As long as the microprocessor and the server module's input/output devices (monitor, keyboard, and diskette drive) are functioning, you can use the system diagnostics to help identify the problem. Running the System Diagnostics The system diagnostics can be run from either the utility partition on your hard drive or a USB flash drive.
When you start the system diagnostics, a message is displayed stating that the diagnostics are initializing. Next, the Diagnostics menu appears. The menu allows you to run all or specific diagnostics tests or to exit the system diagnostics. NOTE: Before you read the rest of this section, start the system diagnostics so that you can see the utility on your screen.
• The right side of the screen under Devices for Highlighted Group lists the specific devices within a particular test group. • The menu area consists of two lines at the bottom of the screen. The first line lists the menu options that you can select; press the left- or right-arrow key to highlight an option. The second line provides information about the highlighted option. For more information about a device group or device, highlight the Help option and press .
DIP Switch Settings and Connectors This section provides detailed information about the sever-module board DIP switch settings. It also provides some basic information on switches and describes the connectors on the various boards in the system. DIP Switch Settings—A General Explanation DIP switches provide a convenient and reversible way of reconfiguring the circuitry on a printed circuit board. When reconfiguring the system, you may need to change DIP switch settings on circuit boards or drives.
Server Module Board DIP Switch CAUTION: Many repairs may only be done by a certified service technician. You should only perform troubleshooting and simple repairs as authorized in your product documentation, or as directed by the online or telephone service and support team. Damage due to servicing that is not authorized by Dell is not covered by your warranty. Read and follow the safety instructions that came with the product.
Table 6-1. Server-Module DIP Switch Settings DIP Switch Setting PWRD_EN (Switch 1) (default) Description The password feature is enabled when switch 1 is set to "on." The password feature is disabled when switch 1 is set to "off." NVRAM_CLR (Switch 2) (default) The configuration settings in NVRAM are retained at system boot when switch 2 is set to "off." The configuration settings in NVRAM are cleared at next system boot when switch 2 is set to "on.
Figure 6-3.
Table 6-2.
Disabling a Forgotten Password The server module's software security features include a system password and a setup password, which are discussed in detail in "Using the System Setup Program" on page 43. The password jumper enables these password features or disables them and clears any password(s) currently in use. CAUTION: Many repairs may only be done by a certified service technician.
Getting Help Technical Assistance If you need assistance with a technical problem, perform the following steps: 1 Complete the procedures in "Troubleshooting Your System" on page 101. 2 Run the system diagnostics and record any information provided. 3 Make a copy of the Diagnostics Checklist, and fill it out. 4 Use Dell's extensive suite of online services available at Dell Support at support.dell.com for help with installation and troubleshooting procedures.
www.euro.dell.com (Europe only) www.dell.com/la (Latin American countries) www.dell.ca (Canada only) • Anonymous file transfer protocol (FTP) ftp.dell.com/ Log in as user:anonymous, and use your e-mail address as your password. • Electronic Support Service support@us.dell.com apsupport@dell.com (Asian/Pacific countries only) support.jp.dell.com (Japan only) support.euro.dell.com (Europe only) • Electronic Quote Service apmarketing@dell.com (Asian/Pacific countries only) sales_canada@dell.
Dell Enterprise Training and Certification Dell Enterprise Training and Certification is available; see www.dell.com/training for more information. This service may not be offered in all locations. Problems With Your Order If you have a problem with your order, such as missing parts, wrong parts, or incorrect billing, contact Dell for customer assistance. Have your invoice or packing slip available when you call. See the contact information for your region.
Remember to fill out the Diagnostics Checklist. If possible, turn on your system before you call Dell for technical assistance and call from a telephone at or near the computer. You may be asked to type some commands at the keyboard, relay detailed information during operations, or try other troubleshooting steps possible only at the computer system itself. Ensure that the system documentation is available.
Diagnostics Checklist Name: Date: Address: Phone number: Service Tag (bar code on the back of the computer): Express Service Code: Return Material Authorization Number (if provided by Dell support technician): Operating system and version: Peripherals: Expansion cards: Are you connected to a network? Yes No Network, version, and network card: Programs and versions: See your operating system documentation to determine the contents of the system’s start-up files. If possible, print each file.
Contacting Dell To contact Dell electronically, you can access the following websites: • www.dell.com • support.dell.com (technical support) • premiersupport.dell.com (technical support for educational, government, healthcare, and medium/large business customers, including Premier, Platinum, and Gold customers) For specific web addresses for your country, find the appropriate country section in the table below. NOTE: Toll-free numbers are for use within the country for which they are listed.
Country (City) International Access Code Country Code City Code Australia (Sydney) Department Name or Service Area, Website and E-Mail Address Area Codes, Local Numbers, and Toll-Free Numbers Website: support.ap.dell.com International Access Code: 0011 E-mail: support.ap.dell.com/contactus Country Code: 61 General Support 13DELL-133355 City Code: 2 Austria (Vienna) Website: support.euro.dell.com International Access Code: 900 E-mail: tech_support_central_europe@dell.
Country (City) International Access Code Country Code City Code Department Name or Service Area, Website and E-Mail Address Brazil Website: www.dell.
Country (City) International Access Code Country Code City Code Department Name or Service Area, Website and E-Mail Address China (Xiamen) Technical Support website: support.dell.com.cn Country Code: 86 Technical Support E-mail: cn_support@dell.com City Code: 592 Customer Care E-mail: customer_cn@dell.
Country (City) International Access Code Country Code City Code Department Name or Service Area, Website and E-Mail Address Area Codes, Local Numbers, and Toll-Free Numbers Czech Republic (Prague) Website: support.euro.dell.com International Access Code: 00 E-mail: czech_dell@dell.com Country Code: 420 Technical Support 22537 2727 Customer Care 22537 2707 Fax 22537 2714 Technical Fax 22537 2728 Switchboard 22537 2711 Denmark (Copenhagen) Website: support.euro.dell.
Country (City) International Access Code Country Code City Code Department Name or Service Area, Website and E-Mail Address Area Codes, Local Numbers, and Toll-Free Numbers France (Paris) (Montpellier) Website: support.euro.dell.
Country (City) International Access Code Country Code City Code Department Name or Service Area, Website and E-Mail Address Area Codes, Local Numbers, and Toll-Free Numbers Greece Website: support.euro.dell.
Country (City) International Access Code Country Code City Code Department Name or Service Area, Website and E-Mail Address Area Codes, Local Numbers, and Toll-Free Numbers Ireland (Cherrywood) Website: support.euro.dell.com International Access Code: 00 E-mail: dell_direct_support@dell.com Country Code: 353 Technical Support for XPS portable computers only 1850 200 722 City Code: 1 Technical Support for all other Dell computers 1850 543 543 U.K. Technical Support (dial within U.K.
Country (City) International Access Code Country Code City Code Department Name or Service Area, Website and E-Mail Address Japan (Kawasaki) Website: support.jp.dell.
Country (City) International Access Code Country Code City Code Latin America Department Name or Service Area, Website and E-Mail Address Area Codes, Local Numbers, and Toll-Free Numbers Customer Technical Support (Austin, Texas, U.S.A.) 512 728-4093 Customer Service (Austin, Texas, U.S.A.) 512 728-3619 Fax (Technical Support and Customer Service) (Austin, Texas, U.S.A.) 512 728-3883 Sales (Austin, Texas, U.S.A.) 512 728-4397 SalesFax (Austin, Texas, U.S.A.
Country (City) International Access Code Country Code City Code Mexico Department Name or Service Area, Website and E-Mail Address Customer Technical Support International Access Code: 00 Country Code: 52 Area Codes, Local Numbers, and Toll-Free Numbers 001-877-384-8979 or 001-877-269-3383 Sales 50-81-8800 or 01-800-888-3355 Customer Service 001-877-384-8979 or 001-877-269-3383 Main 50-81-8800 or 01-800-888-3355 Montserrat General Support toll-free: 1-866-278-6822 Netherlands Antilles General
Country (City) International Access Code Country Code City Code Department Name or Service Area, Website and E-Mail Address Area Codes, Local Numbers, and Toll-Free Numbers Norway (Lysaker) Website: support.euro.dell.
Country (City) International Access Code Country Code City Code Department Name or Service Area, Website and E-Mail Address Area Codes, Local Numbers, and Toll-Free Numbers Singapore (Singapore) Website: support.ap.dell.
Country (City) International Access Code Country Code City Code Department Name or Service Area, Website and E-Mail Address Area Codes, Local Numbers, and Toll-Free Numbers Spain (Madrid) Website: support.euro.dell.
Country (City) International Access Code Country Code City Code Department Name or Service Area, Website and E-Mail Address Area Codes, Local Numbers, and Toll-Free Numbers Taiwan Website: support.ap.dell.com International Access Code: 002 E-mail: ap_support@dell.
Country (City) International Access Code Country Code City Code Department Name or Service Area, Website and E-Mail Address U.K. (Bracknell) Website: support.euro.dell.com International Access Code: 00 Country Code: 44 Customer Care website: support.euro.dell.com/uk/en/ECare/Form/Home.asp City Code: 1344 E-mail: dell_direct_support@dell.
Country (City) International Access Code Country Code City Code Department Name or Service Area, Website and E-Mail Address Area Codes, Local Numbers, and Toll-Free Numbers U.S.A.
Glossary This section defines or identifies technical terms, abbreviations, and acronyms used in your system documents. A — Ampere(s). AC — Alternating current. ACPI — Advanced Configuration and Power Interface. A standard interface for enabling the operating system to direct configuration and power management. ambient temperature — The temperature of the area or room where the system is located. ANSI — American National Standards Institute.
cm — Centimeter(s). DIN — Deutsche Industrie Norm. cmos — Complementary metal-oxide semiconductor. directory — Directories help keep related files organized on a disk in a hierarchical, “inverted tree” structure. Each disk has a “root” directory. Additional directories that branch off the root directory are called subdirectories. Subdirectories may contain additional directories branching off them.
expansion-card connector — A connector on the system board or riser board for plugging in an expansion card. F — Fahrenheit. FAT — File allocation table. The file system structure used by MS-DOS to organize and keep track of file storage. The Microsoft® Windows® operating systems can optionally use a FAT file system structure.
key combination — A command requiring you to press multiple keys at the same time (for example, ). MB — Megabyte(s); 1,048,576 bytes. However, when referring to hard-drive capacity, the term is often rounded to mean 1,000,000 bytes. kg — Kilogram(s); 1000 grams. Mbps — Megabits per second. kHz — Kilohertz. MBps — Megabytes per second. KMM — Keyboard/monitor/mouse. MBR — Master boot record. KVM — Keyboard/video/mouse.
NVRAM — Nonvolatile random-access memory. Memory that does not lose its contents when you turn off your system. NVRAM is used for maintaining the date, time, and system configuration information. parity — Redundant information that is associated with a block of data. partition — You can divide a hard drive into multiple physical sections called partitions with the fdisk command. Each partition can contain multiple logical drives. You must format each logical drive with the format command.
ROMB — RAID on motherboard. rpm — Revolutions per minute. RTC — Real-time clock. SAS — SCSI Attached Storage. SATA — Serial Advanced Technology Attachment. A standard interface between the system board and storage devices. SCSI — Small computer system interface. An I/O bus interface with faster data transmission rates than standard ports. SDRAM — Synchronous dynamic random-access memory. sec — Second(s). serial port — An I/O port used most often to connect a modem to your system.
UNIX — Universal Internet Exchange. UNIX, the precursor to Linux, is an operating system written in the C programming language. uplink port — A port on a network hub or switch used to connect to other hubs or switches without requiring a crossover cable. UPS — Uninterruptible power supply. A battery-powered unit that automatically supplies power to your system in the event of an electrical failure. USB — Universal Serial Bus.
Glossary
Index A AC power present indicator, 20 asset tag utility, 54 Avocent Analog KVM switch module, 22 Avocent Digital Access KVM switch module, 24 B baseboard management controller, 54 BMC, 54 connectors system board, 123 drive carrier SATA hard drive (SATA), 91 D E damaged systems troubleshooting, 107 error messages, 43 daughter card installing, 82 status indicator, 15 F Dell contacting, 132 fan present indicator, 21 BMC, 54 diagnostics advanced testing options, 119 error messages, 120 running fro
Index features (continued) PowerConnect 5316M Ethernet switch, 29 server module, 12 server module power button, 14 system, 10 system control panel, 11 system identification, 11 system status, 10 Fibre Channel pass-through module, 31 Fibre Channel switch module, 32 G Gb Ethernet pass-through module, 33 getting help, 127 guidelines memory installation, 78 H hard drive installing SATA in a SATA drive carrier, 91 removing from a drive carrier, 91 hard drives, 89 features, 16 installing, 90 integrated mi
M P memory installing, 80 troubleshooting, 112 upgrade kits, 77 upgrading, 77 password disabling, 126 memory modules removing, 82 passwords disabling, 54 setup, 53 system, 51 messages alert, 41 error messages, 43 server module, 34 system diagnostics, 40 systems management, 105 warning, 40 microprocessors server modules, 84 troubleshooting, 114 mouse troubleshooting, 104 password features setup, 51 system, 51 power supplies, 58 installing, 59 removing, 58 troubleshooting, 107 PowerConnect 5316M Ether
Index support contacting Dell, 132 system board connectors, 123 system components installing, 57 removing, 57 system control panel, 11 system fans, 59 system features, 10 system password assigning, 51 changing, 53 deleting, 53 using, 51 system password features, 51 system power button, 11 system power indicator, 11 system setup entering, 43 entering BMC, 55 options, 44 using, 44 system setup screens console redirection, 49 integrated devices, 48 main, 44 system security, 49 system status features, 10