
User's Manual


267
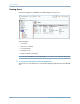
Viewing Users
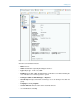
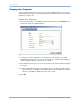
7 Click Continue. On the next screen, enter the user's email information. This information
is used to contact the user when alerts occur. These fields are optional.
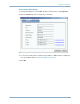
8 Click Continue. Enter the user’s department, title, location, and telephone numbers.
These fields are optional.
9 Click Continue.
10 Enter and re-enter a Password for the new user. A password is required.
11 Click Continue.
12 Select User Group. (This step is required only if you are creating a non-Administrator
User. Admin users do not belong to any User Group.) If a User Group exists on this
system, select a User Group. If a User Group has not been created, click Create User
Group.
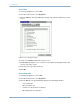
13 Click Continue. The system displays the attributes you entered.
14 Click Create Now.
Deleting a User
You must have Administrator privileges to delete a user.
Once a user is deleted, that user name cannot be reused for a new user. You can, however,
reuse a user name when restoring a user.
1 In the System Explorer, select a User.
2 From the shortcut menu, select Delete. The system asks you to confirm.
3 Click Yes. The user is deleted.
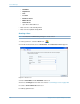
Restoring a User
You must have Administrator privileges to restore a user.
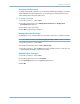
1 From the System Management menu, select User > Restore Deleted User. The
Restore Deleted User window appears.
2 From the list of deleted users, select the user you want to restore. You can only select
one user at a time to restore.
3 Click Continue.
4 Enter and confirm a new password for the user.
5 Click Restore Now. The user is restored and the user name is displayed in the System
Explorer.