
White Papers


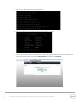
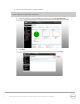
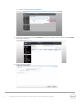

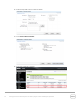
Table Of Contents
- 1 Installing and configuring the DR Series system
- 2 Configuring a backup job on ASG-Time Navigator for a CIFS target
- 3 Configuring a restore job on ASG-Time Navigator over a CIFS target
- 4 Running a duplication and restore job on a secondary CIFS target
- 5 Configuring a backup job on ASG-Time Navigator over an NFS target
- 6 Configuring a restore job on ASG-Time Navigator for an NFS target
- 7 Running a duplication and restore job on a secondary DR Series system NFS target
- 8 Setting up the DR Series system cleaner
- 9 Monitoring deduplication, compression, and performance
- A Best practices for setting up ASG-Time Navigator backup native Virtual Library System (VLS) on a DR Series system
- B Creating a storage device for CIFS
- C Creating a storage device for NFS
- D Launching a Time Navigator administration console on a Linux platform

5 Setting Up the Dell™ DR Series System as a Backup Target on ASG-TimeNavigator | April 2015
1 Installing and configuring the DR Series system
1. Rack and cable the DR Series system, and power it on. Initialize the DR Series system. Refer to the
DR Series System Administrator Guide
topics: “iDRAC Connection”, “Logging in and Initializing the
DR Series System,” and “Accessing IDRAC6/Idrac7 Using RACADM” for more information.
2. Log on to iDRAC using the default address 192.168.0.120, or the IP address that is assigned to the
iDRAC interface. Use the user name and password: “root/calvin”.
3. Launch the virtual console.
4. When the virtual console is open, log on to the system as user administrator with the password
St0r@ge! (The “0” in the password is the numeral zero).