
Setup Guide


115 Dell EMC PowerEdge MX SmartFabric Configuration and Troubleshooting Guide
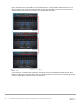
B OpenManage Enterprise Modular console
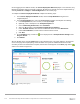
The PowerEdge MX9002m module hosts the OME-M console. OME-M is the latest addition to the Dell
OpenManage Enterprise suite of tools and provides a centralized management interface for the PowerEdge
MX platform. OME-M console features include:
• End-to-end lifecycle management for servers, storage, and networking
• A touch LCD for initial setup and error notification
• Leverages iDRAC9 intelligent automation and security features
• Manages one or multiple chassis from a single web or REST API leveraging multi-chassis
management (MCM) groups
• OpenManage Mobile for configuration and troubleshooting including wireless server vKVM
• Creation and deployment of SmartFabric topologies
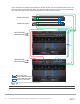
B.1 PowerEdge MX9002m module cabling
Multiple PowerEdge MX9002m modules are grouped to form domains called MCM groups. A single MCM
group can include up to 10 chassis, where one is the lead and the remaining chassis are members. The
OpenManage Enterprise Modular console supports a daisy chain topology using the redundant 1GbE ports
on the MX9002m module.
An MCM group includes the following features:
• Provides the rollup health status of the OME-M chassis group
• Automatically propagates lead chassis settings to member chassis
In addition to the two MX7000s each having a single connection to the S3048-ON management switch,
additional inter-chassis cabling is needed. These additional 1GbE cables provide redundancy to all available
MMs in both chassis. See section 2.2 PowerEdge MX7000 Multi-Chassis Management groups in the
Dell
EMC PowerEdge MX Networking Architecture Guide for more information on inter-chassis cabling of MMs.
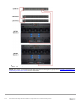
B.2 PowerEdge MX7000 initial deployment
Initial configuration may be done through the LCD touchscreen. If DHCP is not used, perform the following
steps to assign a static IP address and gateway to each chassis:
1. Activate the LCD touchscreen by tapping the screen lightly. The Select Language screen displays.
2. Select the desired language, such as English.
3. Select Main Menu, and then Save.
4. Select Settings > Network Settings > Edit > IPv4 > Static IP.
5. Select Yes to change the IP settings from DHCP to Static.
6. Enter the required information in the following fields:
a. IP address
b. Subnet mask
c. Default gateway
7. Select Save.
8. Repeat steps 1 through 7 for each chassis.