
Users Guide
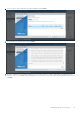


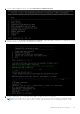
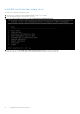
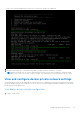

Table Of Contents
- OpenManage Network Integration for SmartFabric Services User Guide Release 2.0
- Change history
- Overview of OMNI, SFS, VxRail, and PowerEdge MX
- SmartFabric Services
- OpenManage Network Integration
- OMNI vCenter integration
- Access the OMNI stand-alone portal
- Access the OMNI Fabric Management Portal
- OMNI Appliance Management user interface
- OMNI automation support for PowerEdge MX SmartFabric
- OMNI automation support for NSX-T
- OMNI support for SmartFabric instances
- Lifecycle management
- Troubleshooting
- Logs and support data for troubleshooting
- Verify OMNI VM connectivity
- Unable to add SmartFabric instance in OMNI
- Missing networks on server interfaces
- Unable to launch OMNI UI
- OMNI plug-in does not show service instance
- Unable to register the vCenter in OMNI
- OMNI is unable to communicate with other devices
- Timestamp not synchronized in OMNI
- Reset OMNI VM password

You can select Power on automatically checkbox to power on the VM after the installation.
9. Ready to complete page displays the summary of the settings that are configured
so far. Review and verify the settings and click Finish to complete the installation.
Set up OMNI
To log in to the VM console and set up OMNI configurations:
1. Follow the steps provided in the section Set up OMNI to log in to the VM.
2. Configure Wired connection 1 (ens160) interface with the ESXi management IP address. Set the IPv4 configuration from
Automatic to Manual from the drop-down and enter the required IP address details along with the subnet ask and gateway
information. Set the IPv6 configuration for the interface to Ignore. See ens160 interface configuration steps from Set up
OMNI.
NOTE: Wired connection 2 (ens192) interface setup is not required for non-VxRail deployment.
3. By default, ens160 interface is activated. If you change while editing a connection, you must deactivate then activate the
connection for the ens160 interface, see Set up OMNI.
42
OpenManage Network Integration