
Administrator Guide

Removing volumes from a volume group
You can remove volumes from a volume group. You cannot remove all volumes from a group. At least one volume must remain. Removing
a volume from a volume group will ungroup the volumes but will not delete them. To remove all volumes from a volume group, see
Removing volume groups.
To see more information about a volume, hover the cursor over the volume in the table. Viewing volumes contains more details about the
Volume Information panel that appears.
Remove volumes from a volume group
1. In the Volumes topic, select the volumes to remove from a volume group.
2. Select Action > Remove from Volume Group. The Remove from Volume Group panel opens and lists the volumes to be removed.
3. Click OK. For the selected volumes, the Group value changes to --.
Renaming a volume group
You can rename a volume group unless it is part of a replication set. To see more information about a volume, hover the cursor over the
volume in the table. Viewing volumes contains more details about the Volume Information panel that appears, including how to view
volumes and volume groups that are part of a replications set.
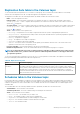
Rename a volume group
1. In the Volumes topic, select a volume that belongs to the volume group that you want to rename.
2. Select Action > Rename Volume Group. The Rename Volume Group panel opens.
3. In the New Group Name field, enter a new name for the volume group. A volume group name is case sensitive and can have a
maximum of 32 bytes. It cannot include the following: " , < \
If the name is used by another volume group, you are prompted to enter a different name.
4. Click OK. The volumes table is updated.
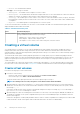
Remove volume groups
You can remove volume groups. When you remove a volume group, you can optionally delete its volumes. Otherwise, removing a volume
group will ungroup its volumes but will not delete them.
CAUTION: Deleting a volume removes its mappings and schedules and deletes its data.
To see more information about a volume, hover the cursor over the volume in the table. Viewing volumes contains more details about the
Volume Information panel that appears.
Remove volume groups only
1. In the Volumes topic, select a volume that belongs to each volume group that you want to remove. You can remove 1 through 100
volume groups at a time.
2. Select Action > Remove Volume Group. The Remove Volume Group panel opens and lists the volume groups to be removed.
3. Click OK. For volumes that were in the selected volume groups, the Volume Groups value changes to --.
Remove volume groups and their volumes
1. Verify that hosts are not accessing the volumes that you want to delete.
2. In the Volumes topic, select a volume that belongs to each volume group that you want to remove. You can remove 1 through 100
volume groups at a time.
3. Select Action > Remove Volume Group. The Remove Volume Group panel opens and lists the volume groups to be removed.
4. Select the Delete Volumes check box.
5. Click OK. A confirmation panel appears.
98
Working in the Volumes topic