Dell EMC XC640 Series Hyper-Converged Appliance Solutions Guide
Notes, cautions, and warnings NOTE: A NOTE indicates important information that helps you make better use of your product. CAUTION: A CAUTION indicates either potential damage to hardware or loss of data and tells you how to avoid the problem. WARNING: A WARNING indicates a potential for property damage, personal injury, or death. © 2017 - 2018 Dell Inc. or its subsidiaries. All rights reserved. Dell, EMC, and other trademarks are trademarks of Dell Inc. or its subsidiaries.
Contents 1 About Dell EMC XC640 Hyper-Converged Appliances solution...................................................................... 4 2 Documentation references.............................................................................................................................5 3 License management..................................................................................................................................... 6 Setting up Nutanix Customer Portal.............................
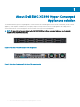
1 About Dell EMC XC640 Hyper-Converged Appliances solution The Dell EMC XC640 Hyper-Converged Appliances solution includes the Dell EMC appliance and software from Nutanix (used as a virtual appliance), which simplifies virtualization by converging computer, storage, and network into a single appliance that is deployed in a clustered environment.
2 Documentation references Table 1 provides the reference document link on the Dell support site for Nutanix solution software documentation, Dell EMC documentation, and supported hardware, firmware, and software. Table 1. Documentation references Information Link Nutanix solution software documentation Dell EMC documentation See the Dell EMC XC640 Series Hyper-Converged Appliances Support Matrix available at Dell.
3 License management NOTE: This chapter does not apply to XC Core appliances. The Nutanix virtual computing platform consists of various features that enable you to administer your environment according to your current and future requirements. You can use the default feature set of the Nutanix solution software, upgrade to an enhanced feature set, update your license for a longer term, or reassign existing licenses to nodes or clusters as required. There are two types of licenses.
Managing the license Perform the following steps to manage your licenses: 1 In Nutanix Documentation portal, open the Web Console Guide, and then see the License Management section. For more information about accessing Web Console Guide, see the Documentation Matrix section in the Dell EMC XC640 Series Hyper-Converged Appliances Support Matrix available at Dell.com/XCSeriesmanuals. 2 Perform the relevant licensing tasks for your appliance.
4 Deploying an appliance Before you begin Before you deploy an appliance, ensure that you read through this document and familiarize yourself with the process and required materials. WARNING: Before you set up and operate your appliance, review the safety instructions that shipped with your storage enclosure. WARNING: The weight of your appliance with all the physical disk drives installed (full weight) is 35-70 lbs. WARNING: Your appliance must be installed by Dell EMC certified service technicians.
Setting up your appliance for first use Make sure that your appliance components are properly installed. Your appliance is shipped with physical disk drives, power supply units (PSUs), and fan components. Ensure that all components are properly seated and are not dislodged or damaged during shipping. 1 Install the appliance in a rail. The appliance requires a compatible rack and a rack installation kit.
First time boot scripts Use the first time boot script information that applies to your appliance and associated hypervisor. First time boot scripts for Nutanix AOS Nutanix AOS is installed on each appliance. As Nutanix AOS is preconfigured, it does not require more first time configuration. The XC Series appliances boot to the hypervisor and are ready to be clustered after the CVM has all the services up and running.
During this process, you can set the following parameters: • Cluster maximum Redundancy Factory (RF) • Cluster name • Cluster virtual IP (optional for AHV and vSphere) • Subnet mask and default gateway (iDRAC, hypervisor, and CVM) • Domain Name Servers (DNS) • Network Time Protocol (NTP) servers (hypervisor NTP N/A for Hyper-V) • Hypervisor hostnames • Appliance IPs (iDRAC, hypervisor, and CVM) • Reinstallation of new hypervisor and CVM (optional with Nutanix Foundation CVM) Configuring a
Table 2.
5 Downloading and installing software applications OpenManage Essentials is a hardware management application that provides a comprehensive view of the appliance and its components.
Dell Nautilus Dell Nautilus is a general maintenance release utility for updating firmware for SAS and SATA drives (or disks). NOTE: For information about the supported Dell Nautilus version number, see Dell EMC XC640 Series Hyper-Converged Appliances Support Matrix available at Dell.com/XCSeriesmanuals. Perform the following steps to download the Dell Nautilus Firmware Update Utility for SAS and SATA disk Solid State Drives (SSDs): 1 Go to Dell.com/support/drivers.
6 Monitoring XC Series appliances You can monitor an appliance by using any of the following: • iDRAC • OpenManage Essentials • Nutanix Prism • Nutanix web console The following table lists the components and monitor utility: Table 3.
Monitoring an appliance by using Nutanix Web Console To monitor the health of a cluster, VMs, performance, and alerts and events, the Nutanix Web Console provides a range of status-check features. To monitor the appliance by using Nutanix Web Console, see the Prism Web Console Guide at Nutanix documentation portal.
7 Updating firmware You can update the firmware of an appliance by using any of the following: • iDRAC • Dell Update Packages (DUPs) • LCM • Nutanix web console • Dell EMC Nautilus NOTE: You can use Dell EMC Nautilus as an alternative to the Nutanix web console for updating firmware on the front hard drives and SSDs. The following table lists the components and utility: Table 4.
• 4 Connect to the iDRAC GUI. NOTE: For more information about configuring and accessing the iDRAC GUI, see the iDRAC Quick Start Guide at Dell.com/idracmanuals. Press F11 to restart the appliance and open BIOS boot manager. 5 To mount Dell Nautilus ISO or the USB key to the appliance, select EFI Boot Manager. 6 From the EFI boot list, select Virtual CD or USB drive. 7 Click Update Firmware.
8 Replacing hardware This section describes high-level tasks to replace the components within the appliance. To perform the hardware replacement tasks, you have to download the below documents from Dell.com/XCSeriesmanuals: • Nutanix Hardware Replacement Documentation NOTE: For more information about downloading the Nutanix Hardware Replacement Documentation, see the Documentation matrix section in the Dell EMC XC640 Series Hyper-Converged Appliance Support Matrix available at Dell.com/ XCSeriesmanuals.
Replacing failed front hard drive and SSD components that contain cluster data Perform the following steps to replace the failed front hard drive and SSDs that contain cluster data: 1 Identify the failed hard drive or SSD. For more information, see the Data Drive Failure section in the Nutanix Hardware Replacement Guide on the Nutanix documentation portal.
9 Recovering an appliance Dell EMC provides an option to recover the appliance in the event of an appliance failure or a cluster node failure. For more information about recovering an appliance, contact Dell EMC support.
10 Getting help Topics: • Contacting Dell EMC • Dell EMC SupportAssist • Locating Service Tag • Quick Resource Locator Contacting Dell EMC NOTE: If you do not have an active internet connection, you can find contact information on your purchase invoice, packing slip, bill, or Dell EMC product catalog. Dell EMC provides several online and telephone-based support and service options. Availability varies by country and product, and some services may not be available in your area.
Figure 5. Locating Service Tag of your appliance 1 information tag (top view) 2 information tag (back view) 3 OpenManage Mobile (OMM) label 4 iDRAC MAC address and iDRAC secure password label 5 Service Tag Quick Resource Locator Use the Quick Resource Locator (QRL) to get immediate access to appliance information and how-to videos. This can be done by visiting Dell.com/QRL or by using your smartphone or tablet and a model specific Quick Resource (QR) code located on your Dell appliance.
A Bare metal recovery To maintain a fast and efficient bare metal recovery option, Dell EMC recommends using the Rapid Appliance Self-Recovery (RASR) tool. WARNING: When you create a RASR USB disk, all the data saved on the USB disk is deleted. WARNING: When you perform a Factory Restore on your appliance with the RASR USB backup disk, all the data saved on the appliance is deleted.