emphasis™ Lighting Control System Quick Guide Version 1.4.0 C o p y r i g h t © E le c tr o n i c T h e a t r e C o n t r o l s , I n c . All Rights reserved. P r o d u c t in f o r m a t i on a n d s p e c i f i c a t i o n s s u bj e c t t o c h a n g e . P a r t N u m b e r : 4200M1300-1.4.
ET C ®, E m p h a s i s ™ , E x p r e s s io n ®, In s i g h t ™ , I m a g i n e ™ , F o c u s ™ , E x p r e s s ™ , U n i s o n ®, O b s e s s i o n ® II , E T C N e t 2 ™ , E D M X ™ , S e n s o r ®, a n d W Y S IL i n k ™ a r e e i th e r r eg i s t e r e d t r a d e m a r k s o r t r a d e m a r k s o f E l e c t r o n i c T h e a t r e C o n t r o l s , I n c . i n th e U n i t e d S ta t e s a n d o t h er c o u n t r i e s .
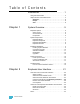
Table of Contents Introduction . . . . . . . . . . . . . . . . . . . . . .1 Using this Quick Guide . . . . . . . . . . . . . . . . . . . . . . . . . . . . .2 Help from ETC Technical Services . . . . . . . . . . . . . . . . . . . .3 Americas . . . . . . . . . . . . . . . . . . . . . . . . . . . . . . . . . . . .3 Europe . . . . . . . . . . . . . . . . . . . . . . . . . . . . . . . . . . . . .3 Asia . . . . . . . . . . . . . . . . . . . . . . . . . . . . . . . . . . . . . . . .3 Chapter 1 System Overview .
EDMX . . . . . . . . . . . . . . . . . . . . . . . . . . . . . . . . . . . . .33 Where do I patch my channels? . . . . . . . . . . . . . . . . .33 Patch Conventional Lights in Emphasis Console . . . .34 Patch in DATA mode . . . . . . . . . . . . . . . . . . . . . . . . . .35 Insert Fixtures . . . . . . . . . . . . . . . . . . . . . . . . . . . . . . .36 Enter and Edit Data . . . . . . . . . . . . . . . . . . . . . . . . . . .37 Saving Your Work . . . . . . . . . . . . . . . . . . . . . . . . . . . . . . . .
Introduction This quick guide covers the basic installation and operation of the Emphasis Control System. Specifically, this guide contains basic information about creating a show in Emphasis, including a step-by-step tutorial covering all the basic functions of Emphasis. The introduction contains the following sections: Introduction • Using this Quick Guide . . . . . . . . . . . . . . . . . . . . . . . . . . . . . . 2 • Help from ETC Technical Services . . . . . . . . . . . . . . . . . . . . .
Using this Quick Guide This quick guide is intended for use in conjunction with the Emphasis Visualization and Emphasis Console User Manuals. This guide assumes that you have a basic familiarity with the Microsoft Windows® operating system, opening and closing files, closing and resizing windows, using Windows Explorer, and performing basic disk operations.
Help from ETC Technical Services If you are having difficulties, your most convenient resources are the references given in the manual and the Help system. To search more widely, try the ETC website at www.etcconnect.com. If none of these resources is sufficient, contact ETC Technical Services directly at one of the offices identified below. Emergency service is available from all ETC offices outside of normal business hours.
This page intentionally blank.
Chapter 1 System Overview Emphasis integrates the functionality of WYSIWYG with the Expression-style control consoles to give you a powerful, but user-friendly, control system offering both a graphical, point-and-click environment and a tactile button-and-wheel interface. Emphasis ensures consistency and accuracy with total integration of data across all modes. Data input in any mode is applied through the paperwork, on the light plot, in the console patch, on reports, and on screen, in every view.
Emphasi s Opti ons Emphasis systems are created by choosing the server type, maximum channel count and Facepanel type. Emphasis is offered as an upgrade to an existing Express or Expressionstyle console (see below for compatible Facepanel types), or as a complete package. Server Types • 3D - Includes full console feature set and full visualization functionality: paperwork and presentation tools, data tasks, 3D CAD drafting, complete visualization and rendering.
System Components Emphasis Server The Emphasis Server is a Dell® computer optimized by ETC for the best performance of the Emphasis Visualization and Emphasis Console applications. The Server is provided pre-configured and should not require any software installations for its initial use. This section contains information on specific differences between your Server and a regular PC.
procedure for exporting your show to v3.1 format is described in the Emphasis Visualization User Manual. The procedure for returning your Facepanel to v3.1 operation is described in the Emphasis Console User Manual. Emphasis Visualization Emphasis Visualization is the software application that provides the graphic interface to the Emphasis Control System. It is based on the powerful WYSIWYG suite of software applications. This is where you patch your show, create your plot and prepare your paperwork.
Installation Guidel ines Hooking Up the Hardware Emphasis systems can range from a simple Server and Facepanel combination to fully integrated network systems. Regardless of the size of your system, there are some basic connections that are common to all systems. Note: See the Emphasis Console User Manual for the correct network settings. Incorrect settings will not allow your Facepanel and Server to communicate.
Step 9: CAUTION: Connect power cables to Server, Facepanel, and hubs or switches. When you plug in the server it may boot - it may not wait for you to press the power button. If the keyboard and/or mouse are not plugged in when you power up, they will not be recognized by the Server. You will have to force the Server to power down, plug them in, and restart. Connecting a Printer Connecting a printer to your Emphasis Server follows the same setup rules as any Windows computer.
Software Installation Your Emphasis Server will arrive with all software fully installed. If you have purchased a complete Emphasis Control System, including an Emphasis Server and a Facepanel, the Facepanel Software should also be loaded and ready to use. If you have purchased Emphasis as an upgrade to an existing Express or Expression-style console, you will need to upgrade the software in your console.
Step 16: Press [Enter]. The Facepanel will boot and the Stage displays will open on the attached monitor(s). I n s ta l l i n g S o f t w a r e o n t h e E m p h a s i s S e r v e r If you are installing a new version of software, you will be provided specific instructions for installation with the release notes for that version.
Registration When you first start your Emphasis Control System, you will be prompted to register the system. Registration will enable ETC to track your system for support purposes, and will enroll your system in the software subscription included with your Emphasis Control System, providing you with software upgrades for the duration of the subscription. You have 15 days to use the system prior to registering; however, it is recommended that you register your system as soon as possible.
To register by fax: Step 1: Fill out the registration form included with your Emphasis Server. Fax it to the appropriate fax number based on your location. You will be sent a Registration Validation Code within a full business day. Step 2: If you cannot find the form, you can print a new copy from the Emphasis Server. Ensure you have a printer connected to your Emphasis Server. See Connecting a Printer, page 10, for more information. a: Power up the Emphasis Server.
Upgrades To upgrade your Emphasis Control System, contact the ETC dealer who provided your Emphasis Control System to purchase the upgrade. When purchased, you will receive an Upgrade Code that will unlock the new features you have purchased. You can upgrade from a lower channel count to a higher channel count, and/or from 2D to 3D operation. You can also purchase an activation code for the Wireless Remote Focus Unit (WRFU) and/or WYSILink™.
System Procedures Power-up Procedure For best performance, power-up your system in the following order: Note: Note: 16 Step 1: Turn on the hub(s) and/or switch(es). Step 2: Turn on the Server and monitor(s). Wait for the Emphasis application to start up completely before proceeding to the next step. In a network with multiple Emphasis Control Systems online, allow one Emphasis Server to fully startup before starting the other Emphasis Servers. This will ensure that your network configures correctly.
Login as a Different User There are a number of different user accounts contained in the Emphasis system. When the system is turned on, it will open using the Emphasis User settings. To gain access to the other user accounts, exit Emphasis. Note: When you load new system software onto your Emphasis Server, you will see an advisory indicating that the library indices are being rebuilt the first time each user type logs in. This is normal behavior.
Troubleshooting The Emphasis Facepanel type defaults to the Expression 3. This affects the video output of your Facepanel and the virtual facepanel in Emphasis Visualization. If you have an Insight or Express console as your Emphasis Facepanel, or if you swap Facepanels from an Expression-style to an Insight or Express, you will need to change the settings to reflect this in the Emphasis Visualization, Emphasis mode Setup menu.
performance speed of your system. The wallpaper is set to “None” as a default. • Additional software applications (games, internet browsers, word processors, etc.). It is not advisable to load additional applications onto your Emphasis Server. Conflicts may occur between applications that could severely impact your system’s performance. The Emphasis Server should not be connected to the Internet.
Step 3: Note: Click the General tab. You will find the Windows version information as well as the Emphasis system version. The Support Info button also displays the version number, as well as the phone numbers for ETC Americas, ETC Europe and ETC Asia. You can also use the shortcut á+PAUSE/BREAK to view the System Properties. If you are asked to provide specific component version numbers, it is recommended that you use the first method below to find all the version numbers at the same time.
Chapter 2 Emphasis User Interface The Emphasis user interface includes the displays, toolbars, menus and commands available on the Emphasis Server, and the displays and commands available from the Emphasis Facepanel. These are used together to create and playback your show file. This chapter contains the following sections: 2 • Overview of the Console User Interface. . . . . . . . . . . . . . . . 22 • Overview of the Emphasis Visualization User Interface . . . 30 • Patch . . . . . . . . . . . . . .
Overview of the Console User Interface Emphasis Console drives the Facepanel and the console displays within EMPHASIS mode in Emphasis Visualization. Stage vs. Blind The Stage display shows you the current levels of all active channels.The Blind display looks almost exactly the same as Stage, but is used to view and edit cues, groups, submasters, subroutines and effects without affecting the look on stage. Expression/ Insight facepanels Display Name Indicates the current display and time.
Changing display pages If you are using more channels than can be displayed on a single display, you can use softkeys [S4-Previous Page] and [S5-Next Page] to view more channels. You can also use the arrow keys to change pages: left-arrow [s] jumps to the first page of channels, uparrow [u] displays the previous page, down-arrow [v] displays the next page and rightarrow [t] jumps to the last page of channels.
• In Emphasis Visualization, you can click on a fixture symbol to select its channel. See the Emphasis Visualization User Manual for more information on selecting fixtures using the mouse. Select dimmers: • Press [x] to select a single dimmer for dimmer check, or in Patch or Park displays. • Press [x] [And] [z] to select non-consecutive dimmers in Patch or Park. • Press [x] [Thru] [z] to select a range of dimmers in Patch or Park displays.
Set levels using [Full]: Step 1: Select channels using the procedure described in Select Channels, Dimmers and Fixtures, page 23. Step 2: Press [Full] to set the channel(s) to 100%. Set levels using the level wheel (Expression/Insight only): Step 1: Select channels using the procedure described in Select Channels, Dimmers and Fixtures, page 23. Step 2: Roll the level wheel away from you to raise the level, or toward you to lower the level.
Captured channels and the [Release] command When you set channels to levels and then move on to select other channels, the channels you have just set are displayed in red and become captured. Captured channels have been set to levels using manual control, and they may have been recorded into a cue, group, focus point or submaster. Captured channels remain at their set level until you release them.
Fixture channels Fixture Box Encoder assignment Fixture attribute 16 Bit data Current page Control fixtures using the encoders (Expression/Insight 3 or 2x with MLM): Step 1: Press [S8 - Fixture] [x], where [x] is the fixture number you want to select. Use [And], [Thru] and [Except] to select multiple fixtures. The fixture box will be displayed. Step 2: Press [Focus Point] [Enter] to prepare the fixture for control. Step 3: Press the page keys to move from one encoder page to the next.
Record Cues and Submasters Emphasis provides two basic recording functions – [Record] and [Track]. The [Record] function saves all channels at their Stage levels in the cue, group or submaster you specify. When you use [Record] for cues, only the cue you specify is affected. [Track], on the other hand, can make changes across a series of cues (see the Emphasis Console User Manual for more information on [Track]).
Cue Playback Playing back cues is as simple as pressing the [Go] key on a fader pair. With each [Go] press, the selected cue (or next cue) will play back in that fader pair. If you have cues recorded and you have just turned on your system or loaded a new show, the cue with the lowest cue number automatically becomes the next cue, and you are ready to play back your show. If, however, you need to start with a different cue number, you can easily select the cue to play back next at any time.
Overview of the Emphasis Visualization User Interface Emphasis Visualization provides a graphic user-interface designed to facilitate smooth transitions from mode to mode, and to keep the data organized and easy to find. Mode and Layout Tabs The mode buttons are used to access the different modes available within Emphasis Visualization. EMPHASIS is where you select and control fixtures.
Access menu commands using the keyboard: Step 1: Press ALT+n, where n is the underlined letter in the menu name. The menu will drop down. Step 2: Press the key corresponding to the underlined letter in the command you want to execute. Some commands have shortcuts that do not require menu selection. In those cases, the shortcut keys are listed to the right of the command in the menu. Example: To undo the last command, press CTRL+Z.
Note: You can also right-click on a toolbar to see the toolbar list. A check mark to the left of a toolbar name indicates it is currently visible. Click the toolbar’s name to change its visibility. Shortcuts Shortcuts are available on the left-hand side of the screen. Each mode has different types of shortcuts. To change the visible shortcuts, click on the tab that corresponds to the shortcut type you wish to use. There are some built-in shortcuts, mainly for different views.
Patch To control dimmers and other DMX controlled devices using your Emphasis Control System, you will need to create a patch. Emphasis uses control channels to record data in cues and submasters. Control channels must have dimmers assigned to them, so that the dimmers (or other DMX controlled devices) know which channel to listen to for level information. This assignment is called the patch.
Moving Lights Conventional Lights ONLY Show Requirements My show only contains conventional lights. I do not want to draw anything or create any paperwork. My show contains only conventional lights, but I want to create my channel schedule and instrument schedule in Emphasis. My show contains only conventional lights, but I want to create my plot and paperwork in Emphasis. My show contains conventional and moving lights. I do not want to draw anything or create any paperwork.
Unpatch dimmers in Emphasis Console: Note: Step 1: On your Emphasis Facepanel or from the virtual facepanel in Emphasis Visualization, press [Patch] to access the Patch display. Step 2: Press [x] [Enter], where [x] is the dimmer number, to select the dimmer. You can use [And], [Thru] and [Except] to select ranges of dimmers. Step 3: Press [S6 - Unpatch]. You cannot unpatch dimmers assigned to moving light fixtures using [S6 - Unpatch]. You must unpatch the fixture in Emphasis Visualization.
Insert Fixtures You can insert fixtures directly into the Spreadsheet using the Library. Insert fixtures one at a time: Step 1: In the Library menu, click Browse Library. Step 2: Navigate to the fixture you want to insert. Step 3: Double-click on the fixture name you want to insert. The fixture will be inserted at the bottom of the list of fixtures in the Spreadsheet. Change the properties of the fixture before inserting: Step 1: In the Library menu, click Browse Library.
E n t e r a n d E di t D a t a Entering data into the Spreadsheet is as simple as selecting the cell or cells you want to edit and typing in a new value. For data that is generated by the fixture library, you may be asked to select a value from a list. The list contains valid choices for the type of fixture you have selected. In some cases, the data shown in the Spreadsheet is generated by Emphasis, and may not be edited. Enter data in the spreadsheet: Note: Step 1: Click in the cell you want to modify.
Saving Your Work It is important to save your work often during your work session. Emphasis has an Auto Save function that will help to keep your data safe, however it is always a good idea to get in the habit of saving your show document to the hard drive and to an external disk periodically during your work session. Set the Auto Save options: Note: Step 1: In the Options menu, click Application Options. Step 2: Click on the File Options tab.
Save destination Show file name Step 2: Insert a 3.5” floppy disk into the drive on the Server. Step 3: Set the floppy drive as the save destination. Step 4: Type the file name into the File name box. Step 5: Click Save. Save a show file to CD: 2 Step 1: In the File menu, click Save Show to save as the current show name, or Save Show As to save to another name. Save your show to the hard drive (Drive D: recommended). Step 2: Minimize the Emphasis application.
Step 5: Insert new CD-R and click Format CD. Step 6: Type a label for your CD and click Start Format. When the format is complete, you can access the CD just like any other disk on your Server. Step 7: Click Emphasis on the Windows Task Bar to maximize Emphasis Visualization. Step 8: In the File menu, click Save Show As. The Save dialog will open. Save destination Show file name Step 9: Set the CD-RW drive as the save destination. Step 10: Type the file name into the File name box.
Eject a CD-R: Step 1: Minimize the Emphasis application and right-click on Start menu on task bar and click Explore. Alternatively, you can press á+E to launch Windows Explorer at any time. Step 2: Right-click on the CD-R’s volume name and click Eject. The Eject CD dialog opens. Step 3: Choose how you want to close the CD: Step 4: • Leave As Is - this setting leaves the DirectCD session open, so you can continue to save shows to the CD.
42 Emphasis Control System Quick Guide
Chapter 3 Quick Start This chapter provides a guide for new Emphasis users with WYSIWYG experience, and a tutorial for new Emphasis users with little or no WYSIWYG experience. Note: This chapter takes you quickly through many of the basic functions of your Emphasis Control System. All the features in the tutorial are explained in greater detail later in the Emphasis Visualization and Emphasis Console User Manuals.
Emphasi s for Experi enced WYSIWYG/Expression Users Emphasis Visualization is based upon the levels of WYSIWYG software. If you have used these applications, you will find the user interface very familiar. Emphasis Visualization replaces the DESIGN and LIVE modes of WYSIWYG Design and WYSIWYG Perform with the new EMPHASIS mode. CAD, DATA and PRES (Presentation) modes all operate as in the WYSIWYG applications.
Basic Show Creation for New Emphasi s Users This tutorial will take you through many of the basic steps in creating a show file: • Create a CAD drawing for a small show • View and modify your data in DATA mode • Create show paperwork • Control fixtures and store basic cues • [Emphasis 3D] Create a rendering This tutorial assumes that you have already turned on your system, following the Power-up Procedure, page 16. It also assumes you have read Chapter 2: Emphasis User Interface, page 21.
Step 2: Click the CAD mode button at the top of the Emphasis Visualization screen. Step 3: Click Wireframe layout tab at bottom of work area. Step 4: Open toolbars. Toolbars give you quick access to commands at the click of a mouse. You can move toolbars around the screen, or you can dock them at the top, bottom or sides of the work area. We will use the toolbars listed below for some commands in this exercise, and menu commands for other functions. Most menu functions do have a toolbar equivalent. a.
Step 5: Insert a Venue. The Venue is a representation of your theatre space. Emphasis provides you with three basic venue shapes: Black Box, Arena and Proscenium Arch. All of these venues can be customized. a. In the Draw menu, click Venue, then Black Box. b. In the dialog that opens, enter 50’-0” for the width and 30’-0” for the Depth and click OK. Step 6: Create Layers. Layers are very useful in CAD drawings.
i. Step 7: In the File menu, click Save Show. Draw a Cyc by extruding a line. a. In the Draw menu, click Line, then click Solid. b. Place the first end of the line at -20’-0”, 14’-0” by moving the mouse to that point (watch the coordinates display in the status bar). You can also type “-20’,14’” ENTER in the ComEdit toolbar. Note: You don’t have to click on the ComEdit toolbar, just start typing. c.
b. Press TAB and change missing coordinate to -6’-0”. c. Click the XZ Ortho button on the CAD Options toolbar to constrain the surface to vertical and horizontal sides. d. In the Draw menu, click Surface. e. Place the mouse at -21’-0”, -6’-0”, 18’-0” and click to place the first corner of the surface. f. Place the mouse at 21’-0”, -6’-0”, 18’-0” and click to place the next corner of the surface. g. Place the mouse at 21’-0”, -6’-0”, 26’-0” and click to place the next corner of the surface. h.
d. Right-click the 8’ Ladder and click Property. This allows you to view the object before you place it in your drawing. e. Click Insert. f. Drag the ladder to the upstage-right corner and click to place it. g. Click the “+” next to Outdoors. h. Double-click “BBQ w/Hotplate”. Doubleclicking the BBQ executes the Insert command without having to open the Properties window for the object. The BBQ will attach to the cursor. i. Drag the BBQ to down-center and click to place it. Step 11: Rotate objects.
e. f. Step 13: Drag the dimmer pack to the riser and click to place it. Change to a side or front view to see how everything is placed. Place a human figure in the drawing. Emphasis contains a library of hundreds of human figures in various poses. a. In the Layers toolbar, click the down-arrow and click Talent. This sets Talent as the current layer. b. Press TAB and set the missing coordinate to “0”. c. In the Library Browser, click the “+” next to “People”. d. Click the “+” next to “Standing”. e.
j. k. Step 16: Click on the colour box and select the colour for that element. Repeat for as many elements as you would like to change. The colours you set will be visible in the shaded view and in renderings. Place focus positions in your drawing. Focus positions are useful for focusing fixtures at a specific place in your plot. A focus position defines a point in space at which fixtures are pointed. You can place focus positions anywhere in your drawing, and assign those focus positions to fixtures.
c. d. e. f. g. h. i. j. k. l. m. n. o. p. q. r. s. Step 18: Set the pipe length to 50’-0”. The height for the pipe is set in the Draw Pipe dialog. We’ll use the default height of 20’-0”. Click the Position Manager button [...] to the right of the position name list. Click New. Type in “#1 Electric” and click OK. Repeat steps e-f for “#2 Electric” and “#3 Electric”. Click on #1 Electric and click UP twice. Click on #2 Electric and click UP once.
c. In the Library Browser, click the Truss icon. Unlike pipe, truss is built from library objects. d. Find the following type of truss in the library: Thomas>GP 12inch>Section Imperial> Thomas GP12in 8ft. e. Double-click on the truss name. A piece of truss will attach to the cursor. f. Place your truss starting on the left side of the screen. Build a 40’-0” long truss (five sticks) above the ladder and riser. Make sure to place the pieces of truss on the snap points.
g. Right-click each shortcut and click Properties. Rename each shortcut to be more descriptive of their lens settings. Step 20: Set an interval for placing fixtures on pipes. There is a feature that constrains placement of fixtures on pipes to a specific hang interval. This feature is called Pipe Snap. You can set a default interval for all pipes and trusses, or by individual hang structures. a. In the Options menu, click Show Options. b. Click the Object Settings tab.
d. Drag your cursor over pipes in your drawing. Note that you must place fixtures on hang structures. Emphasis will not allow you to place fixtures in your drawing unless they are placed on hang structures. e. Click on the pipes and truss to place fixtures of that type. Place a total of four fixtures for each focus position. They don’t all have to be the same type of fixture. f. When done with that fixture type, right-click and click Finish Placing Fixtures. g.
Step 24: Patch your fixtures using Quick Tools. Quick Tools is a feature that lets you quickly set fixture properties like patch, colour and gobos. All of the data you set with Quick Tools can also be set or edited in DATA mode. a. In the Tools menu, click Quick Tools. The Quick Tools dialog will open. b. Uncheck the Focus box and check the Channel and Patch boxes. The Dimmer box will automatically become checked when you check Patch.
c. [Emphasis 3D] Click the Shutter tab. The Shutter tab displays the point of view of the selected fixture and gives you sliders to move the shutters. Shutter cuts are visible in the beam of the fixture in wireframe and shaded views, and renderings. d. In the File menu, click Save Show. Step 26: Edit fixture data in DATA mode.
screen. b. Click on the Reports layout tab at the bottom of the work area. Many typical types of show paperwork are already provided in the Reports shortcuts. c. Scroll to find the report shortcuts for “Channel Schedule” and “Instrument Schedule”. Click on each one to view the report layout. You will notice that the report headings are blank. d. In the Options menu, click Show Options. e. Click the Show Info tab. f. Type in the names of your venue, show, designer and assistant. g. Click OK. h.
b. Click on the Quad layout tab. c. Click on the top left window in the Quad view and set it to the plan view. d. Click on the top right window in the Quad view and set it to a side view. e. Click on the bottom left window in the Quad view and set it to the front view. f. In a wireframe view, click on a Source 4 750. It will turn green to indicate it is selected. g. Right-click and click Intensity. You can choose one of the default levels, or use the Specify command to open a slider window.
f. Play back your cues to verify they look all right. g. In the File menu, click Save Show. Step 31: Emphasis 3D: Create a Rendering. In Emphasis 3D, you can create photo-realistic renderings of your lighting cues. There are many different settings you can play with to find the best look for your own renderings. Be aware that the size of your rendering, and the more realistic you want it to look, will affect the amount of time it takes to generate the image.
62 Emphasis Visualization v1.4.
This page intentionally blank.
Americas 3030 Laura Lane, P.O. Box 620979, Middleton, Wisconsin 53562-0979 USA Tel: +608 831 4116 +800 688 4116 Fax: +608 836 1736 +800 555 8912 Europe Unit 5, Victoria Industrial Estate, Victoria Road, London W3 6UU, UK Tel: +44 (0)20 8896 1000 Fax: +44 (0)20 8896 2000 Asia Room 605-606, Tower III Enterprise Square, 9 Sheung Yuet Road, Kowloon Bay, Kowloon, Hong Kong Tel: +852 2799 1220 Fax: +852 2799 9325 Web: www.etcconnect.com Email: (US) mail@etcconnect.