Dell Endpoint Security Suite Enterprise Advanced Installation Guide v3.0 May 2021 Rev.
Notes, cautions, and warnings NOTE: A NOTE indicates important information that helps you make better use of your product. CAUTION: A CAUTION indicates either potential damage to hardware or loss of data and tells you how to avoid the problem. WARNING: A WARNING indicates a potential for property damage, personal injury, or death. © 2012-2021 Dell Inc. All rights reserved.
Contents Chapter 1: Introduction................................................................................................................. 6 Before You Begin................................................................................................................................................................. 6 Using This Guide..................................................................................................................................................................
Uninstall Uninstall Uninstall Uninstall Uninstall Uninstall Web Protection and Firewall......................................................................................................................... 63 Advanced Threat Prevention........................................................................................................................ 63 Full Disk Encryption.................................................................................................................................
Chapter 19: Troubleshooting...................................................................................................... 103 All Clients - Troubleshooting.........................................................................................................................................103 All Clients - Protection Status......................................................................................................................................
1 Introduction This guide details how to install and configure Advanced Threat Prevention, Encryption, SED management, Full Disk Encryption, Web Protection and Client Firewall, and BitLocker Manager. All policy information and their descriptions are found in the AdminHelp. Before You Begin 1. Install the Dell Server before deploying clients. Locate the correct guide as shown below, follow the instructions, and then return to this guide.
Using This Guide Use this guide in the following order. ● See Requirements for client prerequisites, computer hardware and software information, limitations, and special registry modifications needed for features. ● If needed, see Pre-Installation Configuration for SED UEFI, and BitLocker. ● If your clients will be entitled using Dell Digital Delivery, see Set GPO on Domain Controller to Enable Entitlements.
2 Requirements All Clients These requirements apply to all clients. Requirements listed in other sections apply to specific clients. ● IT best practices should be followed during deployment. This includes, but is not limited to, controlled test environments for initial tests, and staggered deployments to users. ● The user account performing the installation/upgrade/uninstallation must be a local or domain administrator user, which can be temporarily assigned by a deployment tool such as Microsoft SCCM.
Language Support FR - French JA - Japanese PT-PT - Portuguese, Portugal (Iberian) Encryption ● The client computer must have network connectivity to activate. ● To reduce initial encryption time, run the Windows Disk Cleanup Wizard to remove temporary files and any other unnecessary data. ● Windows Hello for Business support requires Endpoint Security Suite Enterprise v3.0 or later running on Windows 10. ● Windows Hello for Business support requires activation against a Dell Server running v11.
Hardware ● The following table details supported hardware. Optional Embedded Hardware ○ TPM 1.2 or 2.0 Operating Systems ● The following table details supported operating systems. Windows Operating Systems (32- and 64-bit) ○ ○ ○ ○ ○ Windows Windows Windows Windows Windows 7 SP1: Enterprise, Professional, Ultimate Embedded Standard 7 with Application Compatibility template 8.1: Enterprise, Pro Embedded 8.
Windows Operating Systems Supported to Access Encrypted Media (32- and 64-bit) ■ ■ Windows 10 2016 LTSB Windows 10 2019 LTSC Mac Operating Systems Supported to Access Encrypted Media (64-bit kernels) ○ macOS High Sierra 10.13.5 - 10.13.6 ○ macOS Mojave 10.14.0 - 10.14.4 ○ macOS Catalina 10.15.5 - 10.15.6 Full Disk Encryption ● ● ● ● ● ● ● ● ● ● ● ● Full Disk Encryption requires activation against a Dell Server running v9.8.2 or later.
Prerequisite ○ In January 2020, SHA1 signing certificates are no longer valid and cannot be renewed. Devices running Windows 7 or Windows Server 2008 R2 must install Microsoft KBs https://support.microsoft.com/help/4474419 and https://support.microsoft.com/help/4490628 to validate SHA256 signing certificates on applications and installation packages.
UEFI PBA - on supported Dell Computers Password Fingerprint Contacted Smart card SIPR Card 1. Available with supported UEFI computers. Dell Computer Models Supported with UEFI Boot Mode ● For the most up-to-date list of platforms supported with the Full Disk Encryption, see KB article 126855. ● For a list of docking stations and adapters supported with Full Disk Encryption, see KB article 124241. Operating Systems ● The following table details supported operating systems.
Prerequisite ○ In January 2020, SHA1 signing certificates are no longer valid and cannot be renewed. Devices running Windows 7 or Windows Server 2008 R2 must install Microsoft KBs https://support.microsoft.com/help/4474419 and https://support.microsoft.com/help/4490628 to validate SHA256 signing certificates on applications and installation packages.
Operating Systems (32- and 64-bit) ● Windows 7 SP1: Enterprise, Professional, Ultimate ● Windows 8.1: Enterprise, Pro ● Windows 10: Education, Enterprise, Pro v1803-v21H1 (April 2018 Update/Redstone 4 - May 2021 Update/21H1) Note: Windows 10 v2004 (May 2020 Update/20H1) does not support 32-bit architecture. For more information, see https://docs.microsoft.
Mac Operating Systems Supported to Access Encrypted Media (64-bit kernels) ● macOS High Sierra 10.13.5 - 10.13.6 ● macOS Mojave 10.14.0 - 10.14.4 ● macOS Catalina 10.15.1 - 10.15.4 Advanced Threat Prevention ● To complete Advanced Threat Prevention installation when the Dell Server managing the client is running in Connected mode (default), the computer must have network connectivity.
Use Application Protocol Transport Protocol Port Number Destination Direction All Communication HTTPS TCP 443 Allow all https traffic to *.cylance.com Outbound For detailed information regarding the URLs in use, see KB article 127053.
Features Policies Windows macOS Linux Stack Pivot x x x Stack Protect x x x Overwrite Code x n/a RAM Scraping x n/a Malicious Payload x Remote Allocation of Memory x x n/a Remote Mapping of Memory x x n/a Remote Write to Memory x x n/a Remote Write PE to Memory x n/a n/a Remote Overwrite Code x n/a Remote Unmap of Memory x n/a Remote Thread Creation x x Remote APC Scheduled x n/a n/a x x n/a Process Injection DYLD Injection Escalation LSASS Read x n/a
Features Policies Windows macOS Linux Block Powershell console usage x Approve scripts in these folders (and subfolders) x Logging Level x Self Protection Level x Auto Update x Run a Detection (from Agent UI) x Delete Quarantined (Agent UI and Console UI) x Disconnected Mode x Detailed Threat Data x Certificate Safe List x x n/a Copy malware samples x x x Proxy Settings x x x Manual Policy Check (Agent UI) x x x Client Firewall and Web Protection ● To successfully inst
Ports ● To ensure that Client Firewall and Web Protection receives the most current Client Firewall and Web Protection updates, ports 443 and 80 must be available for the client to communicate with the various destination servers. If the ports are blocked for any reason, anti-virus signature updates (DAT files) cannot be downloaded, so computers may not have the most current protection. Ensure that client computers can access the URLs, as follows.
● Be prepared to shut down and restart the computer after you apply policies and are ready to begin enforcing them. ● Computers equipped with self-encrypting drives cannot be used with HCA cards. Incompatibilities exist that prevent the provisioning of the HCA. Dell does not sell computers with self-encrypting drives that support the HCA module. This unsupported configuration would be an after-market configuration.
● NOTE: When PBA is used, the Sync All Users policy should be enabled if a computer has multiple users. Additionally, all users must have passwords. Zero-length password users will be locked out of the computer following activation. ● NOTE: Computers protected by SED Manager must be updated to Windows 10 v1703 (Creators Update/Redstone 2) or later before updating to Windows 10 v1903 (May 2019 Update/19H1) or later. If this upgrade path is attempted, an error message displays.
International Keyboards The following table lists international keyboards supported with Pre-boot Authentication on UEFI and non-UEFI computers.
BitLocker Manager ● Consider reviewing Microsoft BitLocker requirements if BitLocker is not yet deployed in your environment, ● Ensure that the PBA partition is already set up. If BitLocker Manager is installed before the PBA partition is set up, BitLocker cannot be enabled and BitLocker Manager will not be operational. See Pre-Installation Configuration to Set Up a BitLocker PBA Partition. ● A Dell Server is required to use BitLocker Manager. ● Ensure a signing certificate is available within the database.
Windows Operating Systems ○ Windows 7 SP0-SP1: Enterprise, Ultimate (32- and 64-bit) NOTE: BitLocker Manager does not support TPM 2.0 on Windows 7 devices. Devices with BitLocker Manager on Windows 7 may not have KB article KB3133977 or KB3125574 installed. To resolve issues with BitLocker Manager on Windows 7, ensure these KBs are not installed. ○ Windows 8.
3 Registry Settings ● This section details all Dell ProSupport approved registry settings for local client computers, regardless of the reason for the registry setting. If a registry setting overlaps two products, it is listed in each category. ● These registry changes should be done by administrators only and may not be appropriate or function in all scenarios. Encryption ● If a self-signed certificate is used on the Dell Server.
[HKLM\SOFTWARE\CREDANT\CMGShield] "DeleteTempFiles"=REG_DWORD:0 Not deleting temporary files increases initial encryption time. ● Encryption displays the length of each policy update delay prompt for five minutes each time. If the user does not respond to the prompt, the next delay begins. The final delay prompt includes a countdown and progress bar, and it displays until the user responds, or the final delay expires and the required logoff/reboot occurs.
To enable or disable this feature, create a DWORD with the name SlottedActivation under the parent key: [HKLM\Software\Microsoft\Windows NT\CurrentVersion\Winlogon\CMGShield\] ○ Activation Slot To enable or disable this feature, create a subkey with the name ActivationSlot under the parent key: [HKLM\Software\Microsoft\Windows NT\CurrentVersion\Winlogon\CMGShield\] Activation Slot - a string that defines the period within which Encryption attempts to activate with the Dell Server.
Rules" in AdminHelp. When Encryption is processing a policy update that includes an active SDE policy, the current user profile directory is encrypted by default with the SDUser key (a User key) rather than the SDE key (a Device key). The SDUser key is also used to encrypt files or folders that are copied (not moved) into a user directory that is not a encrypted with SDE.
[HKLM\System\CurrentControlSet\Services\DellMgmtAgent\Parameters] "DisableSSLCertTrust"=DWORD:0 0 = Enabled 1 = Disabled ● To determine if the PBA is activated, ensure that the following value is set: [HKLM\SYSTEM\CurrentControlSet\services\DellMgmtAgent\Parameters] "PBAIsActivated"=DWORD (32-bit):1 A value of 1 means that the PBA is activated. A value of 0 means the PBA is not activated.
HKLM\SOFTWARE\Dell\Dell Data Protection\ "AllowOtherCredProviders" = DWORD:1 0=Disabled (default) 1=Enabled NOTE: This value may prevent the Dell credential provider from properly syncing credentials initially due to third-party credential providers being disabled. Ensure the devices using this registry key can properly communicate with the Dell Server. ● To suppress all Toaster notifications from the Encryption Management Agent, the following registry value must be set on the client computer.
d. For the name, type CompatibilityMode. e. Open the registry setting and change the value to 01. f. Click OK, then close Registry Editor. To add the registry value with a command, you can use one of the following command line options to run on the client computer: ○ (For one computer) Psexec: psexec -s reg add HKEY_LOCAL_MACHINE\SOFTWARE\Cylance\Desktop /v CompatibilityMode /t REG_BINARY /d 01 ○ (For multiple computers) Invoke-Command cmdlet: $servers = "testComp1","testComp2","textComp3" $credential = Get
HKEY_LOCAL_MACHINE\Software\Microsoft\Windows NT\CurrentVersion\Winlogon\Notify "SmartCardLogonNotify"=DWORD:1 0 = Disabled 1 = Enabled ● To prevent SED Manager from disabling third-party credential providers, create the following registry key: HKLM\SOFTWARE\Dell\Dell Data Protection\ "AllowOtherCredProviders" = DWORD:1 0=Disabled (default) 1=Enabled NOTE: This value may prevent the Dell credential provider from properly syncing credentials initially due to third-party credential providers being disabled.
[HKLM\SOFTWARE\DigitalPersona\Policies\Default\SmartCards] "MSSmartcardSupport"=DWORD:1 Set the Authentication Method policy to Smart Card in the Management Console, and commit the change. ● To suppress all Toaster notifications from the Encryption Management Agent, the following registry value must be set on the client computer. [HKEY_LOCAL_MACHINE\SOFTWARE\Dell\Dell Data Protection] "PbaToastersAllowClose" =DWORD:1 0=Enabled (default) 1=Disabled BitLocker Manager ● If a self-signed certificate is used on
4 Install Using the Master Installer ● Command line switches and parameters are case-sensitive. ● To install using non-default ports, use the child installers instead of the master installer. ● Endpoint Security Suite Enterprise master installer log files are located at C:\ProgramData\Dell\Dell Data Protection\Installer. NOTE: If Policy-Based Encryption is installed before the Encryption Management Agent, computer crash may occur.
6. Click Next to install the product in the default location of C:\Program Files\Dell\Dell Data Protection\. Dell recommends installing in the default location only, as problems may arise when installing in other locations. 7. Select the components to be installed. Security Framework installs the underlying security framework.
8. Click Install to begin the installation. Installation takes several minutes. 9. Select Yes, I want to restart my computer now and click Finish.
Installation is complete. Install by Command Line Using the Master Installer ● The switches must be specified first in a command line installation. Other parameters go inside an argument that is passed to the /v switch. Switches ● The following table describes the switches that can be used with the Endpoint Security Suite Enterprise master installer.
Parameter Description ATP = Advanced Threat Prevention only DE-ATP = Advanced Threat Prevention and Encryption.
● (On a server operating system) This example installs Encryption only using the Endpoint Security Suite Enterprise master installer on standard ports, silently, in the default location of C:\Program Files\Dell\Dell Data Protection\, and configures it to use the specified Dell Server. "DDSSuite.exe" /s /z"\"SERVER=server.organization.com, FEATURES=DE\"" 40 Install Using the Master Installer
5 Uninstall the Master Installer ● Dell recommends using the Data Security Uninstaller to remove the Data Security suite. ● Each component must be uninstalled separately, followed by uninstallation of the Endpoint Security Suite Enterprise master installer. The clients must be uninstalled in a specific order to prevent uninstallation failures. ● Follow the instructions in Extract the Child Installers from the Master Installer to obtain child installers.
6 Install Using the Child Installers ● To install or upgrade each client individually, the child executable files must first be extracted from the Endpoint Security Suite Enterprise master installer, as shown in Extract the Child Installers from the Master Installer. ● Command examples included in this section assume the commands are run from C:\extracted. ● Command line switches and parameters are case-sensitive.
○ See the Dell Encrypt Help to learn how to use the features of Encryption. Access the help from \Program Files\Dell\Dell Data Protection\Encryption\Help. ○ See the Encryption External Media Help to learn how the features of Encryption External Media. Access the help from \Program Files\Dell\Dell Data Protection\Encryption\EMS. ○ See the Endpoint Security Suite Enterprise Help to learn how to use the features of Advanced Threat Prevention. Access the help from \Program
Parameters HIDEOVERLAYICONS=1 (0 enables overlay icons, 1 disables overlay icons) HIDESYSTRAYICON=1 (0 enables the icon in the notification area, 1 disables the icon in the notification area) ENABLE_FDE_LM=1 (Allows installation of Dell Encryption on a computer with active Full Disk Encryption) EME=1 (Install Encryption External Media mode) OPTIN=1 (Install in Deferred Activation mode) For a list of basic .
DDPE_XXbit_setup.exe /s /v"SERVERHOSTNAME=server.organization.com POLICYPROXYHOSTNAME=rgk.organization.com MANAGEDDOMAIN=ORGANIZATION DEVICESERVERURL=https://server.organization.com:8443/xapi/ EME=1 /qn" MSI Command: msiexec.exe /i "Dell Data Protection Encryption.msi" /qn REBOOT="ReallySuppress" SERVERHOSTNAME="server.organization.com" POLICYPROXYHOSTNAME="rgk.organization.com" MANAGEDDOMAIN="ORGANIZATION" DEVICESERVERURL="https://server.organization.
MSI Command: msiexec.exe /i "Dell Data Protection Encryption.msi" /qn REBOOT="ReallySuppress" OPTIN="1" SERVERHOSTNAME="server.organization.com" POLICYPROXYHOSTNAME="rgk.organization.com" MANAGEDDOMAIN="ORGANIZATION" DEVICESERVERURL="https://server.organization.com:8443/xapi/" HIDEOVERLAYICONS="1" ● Example Command Line to Install Dell Encryption with Full Disk Encryption \Encryption ● The following example installs Dell Encryption with default parameters (Encryption, Encrypt for Sharing, no dialogue, no pr
DDPE_XXbit_setup.exe /s /v"SERVERHOSTNAME=server.organization.com POLICYPROXYHOSTNAME=rgk.organization.com MANAGEDDOMAIN=ORGANIZATION DEVICESERVERURL=https://server.organization.com:8443/xapi/ ENABLE_FDE_LM=1 / norestart /qn /l*v C:\Dell\DellEncryptionInstall.log" NOTE: Some older versions may require escape characters of \" around the values of parameters. For example: DDPE_XXbit_setup.exe /v"CMG_DECRYPT=\"1\" CMGSILENTMODE=\"1\" DA_SERVER=\"server.organization.com\" DA_PORT=\"8050\" SVCPN=\"administrator@
Encryption The following example installs Encryption External Media with Silent installation, no progress bar, automatic restart, installed in the default location of C:\Program Files\Dell\Dell Data Protection\Encryption. DDPE_XXbit_setup.exe /s /v"SERVERHOSTNAME=server.organization.com POLICYPROXYHOSTNAME=rgk.organization.com MANAGEDDOMAIN=ORGANIZATION DEVICESERVERURL=https://server.organization.
● To install Encryption on server operating system, you must first extract the child installer, DDPE_xxbit_setup.exe, from the master installer. See Extract the Child Installers from the Master Installer. Install Interactively ● Use these instructions to install Encryption on server operating system interactively. This installer includes the components needed for software encryption. 1. Locate DDPE_XXbit_setup.exe in the C:\extracted\Encryption folder. Copy it to the local computer. 2.
9. In Policy Proxy hostname and port, enter/validate the information and click Next. 10. In Device Server URL, enter/validate the information and click Next.
11. Click Install to begin the installation. Installation may take several minutes. 12. Once the configuration is complete, click Finish.
Installation is complete. 13. Restart the computer. Dell recommends snoozing the reboot only if time is needed to save your work and close applications. Encryption cannot begin until the computer has rebooted. Install Using the Command Line Locate the installer in C:\extracted\Encryption ● Use DDPE_xxbit_setup.exe to install or upgrade using a scripted installation, using batch files, or any other push technology available to your organization.
Component Log File Command Line Parameters MANAGEDDOMAIN= DEVICESERVERURL= GKPORT= MACHINEID= RECOVERYID= REBOOT=ReallySuppress HIDEOVERLAYICONS=1 HIDESYSTRAYICON=1 EME=1 NOTE: Although the reboot can be suppressed, an eventual reboot is required. Encryption cannot begin until the computer has rebooted. Options The following table details the display options that can be specified at the end of the argument passed to the /v switch.
msiexec.exe /i "Dell Data Protection Encryption.msi" /qn REBOOT="ReallySuppress" SERVERMODE="1" SERVERHOSTNAME="server.organization.com" POLICYPROXYHOSTNAME="rgk.organization.com" MANAGEDDOMAIN="ORGANIZATION" DEVICESERVERURL="https://server.organization.
The Dell Server issues an encryption key for the Machine ID, creates the virtual server user account, creates an encryption key for the user account, bundles the encryption keys, and creates the relationship between the encryption bundle and the virtual server user account. 3. Click Close. After activation, encryption begins. 4. After the encryption sweep has finished, restart the computer to process any files that were previously in use. This is an important step for security purposes.
Virtual Server User ● In the Management Console, a protected server can be found under its machine name. In addition, each protected server has its own virtual server user account. Each account has a unique static user name and unique machine name. ● The virtual server user account is only used by Encryption on server operating systems and is otherwise transparent to the operation of the protected server. The virtual server user is associated with the encryption key bundle and the Policy Proxy.
○ From Your Dell FTP Account - Locate the installation bundle at Endpoint-Security-Suite-Ent-2.x.x.xxx.zip and then Extract the Child Installers from the Master Installer. After extraction, locate the file in C:\extracted\Advanced Threat Prevention\WinXXR\ and C:\extracted\Advanced Threat Prevention\WinNtAll\. ● The Encryption Management Agent installer can be located at: ○ From Your Dell FTP Account - Locate the installation bundle at Endpoint-Security-Suite-Ent-2.x.x.xxx.
The following example installs Advanced Threat Prevention, without SED management or BitLocker Manager (silent installation, no reboot, no entry in the Control Panel Programs list, no desktop icon, installed in the default location of C:\Program Files\Dell\Dell Data Protection). :: Installing Encryption Management Agent ".\Encryption Management Agent\EMAgent_64bit_setup.
Parameters Description nocontentupdate Tells the installer not to update content files automatically as part of the installation process. Dell recommends scheduling an update as soon as installation has completed. nopreservesettings Do not save settings. ● The following table details the parameters available for the DellThreatProtection.msi file. Parameters Description Reboot=ReallySuppress Suppresses the reboot.
○ From Your Dell FTP Account - Locate the installation bundle at Endpoint-Security-Suite-Ent-2.x.x.xxx.zip and then Extract the Child Installers from the Master Installer. After extraction, locate the file at C:\extracted\Encryption Management Agent. Command Line Installation ● The following table details the parameters available for the installation. Parameters CM_EDITION=1 INSTALLDIR= SERVERHOST=
Parameters CM_EDITION=1 INSTALLDIR= SERVERHOST= SERVERPORT=8888 SECURITYSERVERHOST= SECURITYSERVERPORT=8443 FEATURE=BLM FEATURE=BLM,SED ARPSYSTEMCOMPONENT=1 For a list of basic .
7 Uninstall Using the Child Installers ● Dell recommends using the Data Security Uninstaller to remove the Data Security suite. ● To uninstall each client individually, the child executable files must first be extracted from the Endpoint Security Suite Enterprise master installer, as shown in Extract the Child Installers from the Master Installer Alternatively, run an administrative installation to extract the .msi. ● Ensure that the same versions of client are used for uninstallation as installation.
Uninstall Web Protection and Firewall If Web Protection and Firewall are not installed, proceed to Uninstall Encryption Client. Command Line Uninstallation ● Once extracted from the Endpoint Security Suite Enterprise master installer, the Web Protection and Firewall client installer can be located at C:\extracted\Threat Protection\ThreatProtection\WinXXR\DellThreatProtection.msi. ● Go to Add/Remove Programs in the Control Panel and uninstall the following components in this order.
If you do not know the Hostname, scroll through the list to locate the computer. A computer or list of computers displays based on your search filter. 6. 7. 8. 9. 10. 11. 12. Select the hostname of the desired computer. Click Security Policies on the top menu. Select Full Disk Encryption from the Windows Encryption group. Change the Full Disk Encryption and policy from On to Off. Click Save. In the left pane, click the Commit Policies banner. Click Commit Policies.
Uninstall SED Manager and PBA Advanced Authentication after the PBA is deactivated. Uninstall SED Client Command Line Uninstallation ● Once extracted from the master installer, the SED Manager installer can be located at C:\extracted\Encryption Management Agent\EMAgent_XXbit_setup.exe. ○ The following example silently uninstalls SED Manager. EMAgent_XXbit_setup.exe /x /s /v" /qn" Shut down and restart the computer when finished.
Parameter Selection CMG_DECRYPT Property for selecting the type of Encryption Removal Agent installation: 3 - Use LSARecovery bundle 2 - Use previously downloaded forensics key material 1 - Download keys from the Dell Server 0 - Do not install Encryption Removal Agent CMGSILENTMODE Property for silent uninstallation: 1 - Silent - required when running with msiexec variables containing /q or /qn 0 - Not Silent - only possible when msiexec variables containing /q are not present in the command line synta
DDPE_XXbit_setup.exe /s /x /v"CMG_DECRYPT=1 CMGSILENTMODE=1 FORENSIC_ADMIN=forensicadmin@organization.com FORENSIC_ADMIN_PWD=tempchangeit /qn" MSI Command: msiexec.exe /s /x "Dell Data Protection Encryption.msi" /qn CMG_DECRYPT=1 CMGSILENTMODE=1 FORENSIC_ADMIN=forensicadmin@organization.com FORENSIC_ADMIN_PWD=tempchangeit REBOOT=REALLYSUPPRESS Reboot the computer when finished. NOTE: Dell recommends the following actions when using a forensic administrator password on the command line: 1.
8 Data Security Uninstaller Uninstall Endpoint Security Suite Enterprise Dell provides the Data Security Uninstaller as a master uninstaller. This utility gathers the currently installed products and removes them in the appropriate order. NOTE: When uninstalling FDE, Dell recommends restarting the computer after FDE deactivation is complete to prevent computer hibernation issues. This Data Security Uninstaller is available in: C:\Program Files (x86)\Dell\Dell Data Protection For more information or to use c
Optionally clear any application from removal and click Next. Required dependencies are automatically selected or cleared.
To remove applications without installing the Encryption Removal Agent, choose Do not install Encryption Removal Agent and select Next. Select Encryption Removal Agent - Download Keys from Server. Enter the fully qualified credentials of a forensic administrator and select Next.
Select Remove to begin the uninstall. Click Finish to complete removal and reboot the computer. Reboot machine after clicking finished is selected by default.
Uninstallation and removal is complete.
9 Commonly Used Scenarios ● To install each client individually, the child executable files must first be extracted from the Endpoint Security Suite Enterprise master installer, as shown in Extract the Child Installers from the Master Installer. ● The Advanced Threat Prevention child installer component should be installed by command line only. Double-clicking to install this component installs a non-Dell, non-managed version of the product, which is not supported.
○ See the Endpoint Security Suite Enterprise Help to learn how to use the features of Advanced Threat Prevention. Access the help from :\Program Files\Dell\Dell Data Protection\Advanced Threat Prevention\Help. Encryption Client and Advanced Threat Prevention ● The following example installs SED management and the Encryption Management Agent (silent installation, no reboot, no entry in the Control Panel Programs list, installed in the default location of C:\Program Files\Dell\Dell Data Protecti
EnsMgmtSdkInstaller.exe "C:\Program Files\Dell\Dell Data Protection\Threat Protection\DellAVAgent.exe" -InstallSDK -RemoveRightClick -RemoveMcTray >"C:\ProgramData\Dell\Dell Data Protection\Installer Logs\McAfeeSDKInstallerAfterEndPoint.
MSIEXEC.EXE /I "ATP_CSF_Plugins_x64.msi" /qn REBOOT="ReallySuppress" ARPSYSTEMCOMPONENT="1" /l*v "C:\ProgramData\Dell\Dell Data Protection\Installer Logs\ATP.log" APPFOLDER="C:\Program Files\Dell\Dell Data Protection\Advanced Threat Prevention" and "\Advanced Threat Prevention\WinNtAll\ATP_AgentSetup.
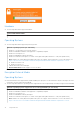
10 Provision a Tenant A tenant must be provisioned in the Dell Server before Advanced Threat Prevention enforcement of policies becomes active. Prerequisites ● Must be performed by an administrator with the system administrator role. ● Must have connectivity to the Internet to provision on the Dell Server. ● Must have connectivity to the Internet on the client to display the Advanced Threat Prevention online service integration in the Management Console.
4. The guided set up begins once the licenses are imported. Click Next to begin. 5. Read and agree to the EULA and click Next.
6. Provide identifying credentials to the Dell Server for provisioning of the Tenant. Click Next. Provisioning an existing Tenant that is Cylance-branded is not supported. 7. Download the Certificate. This is required to recover if there is a disaster scenarios with the Dell Server. This Certificate is not automatically backed up. Back up the Certificate to a safe location on a different computer. Select the check box to confirm that you backed up the Certificate and click Next.
8. Set up is complete. Click OK.
11 Configure Advanced Threat Prevention Agent Auto Update In the Management Console, you can enroll to receive Advanced Threat Prevention agent auto updates. Enrolling to receive agent auto updates allows clients to automatically download and apply updates from the Advanced Threat Prevention service. Updates are released monthly. NOTE: Agent auto updates are supported with Dell Server v9.4.1 or later. Receive agent auto updates To enroll to receive agent auto updates: 1.
12 Pre-Installation Configuration for SED UEFI, and BitLocker Manager Initialize the TPM ● You must be a member of the local administrators group, or equivalent. ● The computer must be equipped with a compatible BIOS and a TPM. ● Follow the instructions located at http://technet.microsoft.com/en-us/library/cc753140.aspx.
Disable Legacy Option ROMs Ensure that the Enable Legacy Option ROMs setting is disabled in the BIOS. 1. 2. 3. 4. 5. Restart the computer. As it is restarting, press F12 repeatedly to bring up the UEFI computer's boot settings. Press the down arrow, highlight the BIOS Settings option, and press Enter. Select Settings > General > Advanced Boot Options. Clear the Enable Legacy Option ROMs check box and click Apply.
13 Designate the Dell Server through Registry ● If your clients are entitled through Dell Digital Delivery, follow these instructions to set a registry through Group Policy Objects to preset the Dell Server to use after installation. ● The workstation must be a member of the OU where the Group Policy Objects is applied or the registry settings must be manually set on the endpoint. ● Ensure that outbound port 443 is available to communicate from the Dell Server to cloud.dell.com.
5. The Group Policy Management Editor loads. Access Computer Configuration > Preferences > Windows Settings > Registry. 6. Right-click the Registry and select New > Registry Item. Complete the following. Action: Create Hive: HKEY_LOCAL_MACHINE Key Path: SOFTWARE\Dell\Dell Data Protection Value name: Server Value type: REG_SZ Value data: 7. Click OK.
8. Log out and then back into the workstation, or run gpupdate /force to apply the group policy.
14 Extract Child Installers ● To install each client individually, extract the child executable files from the installer. ● The master installer is not a master uninstaller. Each client must be uninstalled individually, followed by uninstallation of the master installer. Use this process to extract the clients from the master installer so that they can be used for uninstallation. 1. From the Dell installation media, copy the DDSSuite.exe file to the local computer. 2.
15 Configure Key Server ● This section explains how to configure components for use with Kerberos Authentication/Authorization when using an Security Management Server. The Security Management Server Virtual does not use the Key Server. The Key Server is a service that listens for clients to connect on a socket. Once a client connects, a secure connection is negotiated, authenticated, and encrypted using Kerberos APIs (if a secure connection cannot be negotiated, the client is disconnected).
4. Restart the Key Server service (leave the services panel open for further operation). 5. Navigate to log.txt to verify that the service started properly. Key Server Config File - Add User for Security Management Server Communication 1. Navigate to . 2. Open Credant.KeyServer.exe.config with a text editor. 3.
Sample Configuration File [TCP port the Key Server will listen to. Default is 8050.] [number of active socket connections the Key Server will allow] [Security Server (formerly Device Server) URL (the format is 8081/xapi for a pre-v7.
6. Click Users in the left menu. In the search box, search for the user name added in Step 5. Click Search. 7. Once the correct user is located, click the Admin tab. 8. Select Forensic Administrator and click Update. The components are now configured for Kerberos Authentication/Authorization.
16 Use the Administrative Download Utility (CMGAd) ● This utility allows the download of a key material bundle for use on a computer that is not connected to a Dell Server. ● This utility uses one of the following methods to download a key material bundle, depending on the command line parameter passed to the application: ○ Forensic Mode - Used if -f is passed on the command line or if no command line parameter is used. ○ Admin Mode - Used if -a is passed on the command line. Log files can be located at C:\
3. In Passphrase:, enter a passphrase to protect the download file. The passphrase must be at least eight characters long, and contain at least one alphabetic and one numeric character. Confirm the passphrase. Either accept the default name and location of where the file will be saved or click ... to select another location. Click Next. A message displays, indicating that the key material was successfully unlocked. Files are now accessible. 4. Click Finish when complete.
1. Open a command prompt where CMGAd is located and type cmgad.exe -a. 2. Enter the following information (some fields may be pre-populated). Server: Fully qualified hostname of the Key Server, such as keyserver.domain.com Port Number: The default port is 8050 Server Account: The domain user the Key Server is running as. The format is DOMAIN\Username. The domain user running the utility must be authorized to perform the download from the Key Server MCID: Machine ID, such as machineID.domain.
A message displays, indicating that the key material was successfully unlocked. Files are now accessible. 4. Click Finish when complete.
17 Configure Encryption on a Server Operating System Enable Encryption on a Server Operating System NOTE: Encryption of server operating systems converts User encryption to Common encryption. 1. As a Dell administrator, log in to the Management Console. 2. Select Endpoint Group (or Endpoint), search for the endpoint or endpoint group to enable, select Security Policies, and then select the Server Encryption policy category. 3.
● Encryption External Media policies control removable media access to the server, authentication, encryption, and more. ● Port Control policies affect removable media on protected servers, for example, by controlling access and usage of the server's USB ports by USB devices. The policies for removable media encryption can be found in the Management Console in the Server Encryption technology group.
NOTE: Click Reinstate to allow Encryption of server operating systems to access encrypted data on the server after it restarts.
18 Configure Deferred Activation The Encryption client with Deferred Activation differs from the Encryption client activation in two ways: Device-based Encryption policies The Encryption client policies are user-based; the Encryption client with Deferred Activation's encryption policies are devicebased. User encryption is converted to Common encryption.
Dell highly recommends that a Windows password be created (if one does not already exist) to protect access to the encrypted data. Creating a password for the computer prevents others from logging on to your user account without your password. Uninstall Previous Versions of the Encryption Client Before uninstalling a previous version of the Encryption client, stop or pause an encryption sweep, if necessary. If the computer is running a version of Dell Encryption earlier than v8.
The Dell Server combines the encryption key bundle with the user's credentials and with the computer's unique ID (machine ID), creating an unbreakable relationship between the key bundle, the specific computer, and the user. 4. Restart the computer to begin the encryption sweep. NOTE: The local Management Console, accessible from the notification area icon, shows the policies sent by the server, not the effective policy.
The URL and other data that the user entered into the installer are stored in the registry. Check the accuracy of the data under [HKLM\SOFTWARE\Microsoft\Windows NT\CurrentVersion\Winlogon\CMGShield] and [HKLM\SOFTWARE\Microsoft\Windows NT\CurrentVersion\Winlogon\CMGShield\Servlet] ● Disconnect and reconnect: Disconnect the computer from the network. Reconnect to the network. Restart the computer. Try to connect to the network again.
19 Troubleshooting All Clients - Troubleshooting ● Endpoint Security Suite Enterprise master Suite installer log files are located at C:\ProgramData\Dell\Dell Data Protection\Installer. ● Windows creates unique child installer installation log files for the logged in user at %temp%, located at C: \Users\\AppData\Local\Temp. ● Windows creates log files for client prerequisites, such as Visual C++, for the logged in user at %temp%, located at C:\Users\\AppData\Local\Temp. For example, C: \
The user name or password does not match. Possible Solution: Try to log in again, ensuring that you type the user name and password exactly. Error Message: Activation failed because the user account does not have domain administrator rights. The credentials used to activate do not have domain administrator rights, or the administrator's user name was not in UPN format. Possible Solution: In the Activation dialog, enter credentials in UPN format for a domain administrator.
NOTE: The requirement for domain administrator credentials is a safety measure that prevents Encryption of server operating systems from being rolled out to unsupported server environments. To disable the requirement for domain administrator credentials, see Before You Begin. 6. Dell Server checks for the credentials in the enterprise vault (Active Directory or equivalent) to verify that the credentials are domain administrator credentials. 7. A UPN is constructed using the credentials. 8.
1. When restarted after a successful initial activation, a computer with Server Encryption automatically authenticates using the virtual server user account and runs the Encryption client in Server mode. 2. The computer checks its device activation status with the Dell Server: ● If the computer has not previously device-activated, the Dell Server assigns the computer an MCID, a DCID, and a trust certificate, and stores all of the information in the Dell Server's vault.
Encryption External Media and PCS Interactions To Ensure Media is Not Read-Only and the Port is Not Blocked The EMS Access to unShielded Media policy interacts with the Port Control System - Class: Storage > Subclass Storage: External Drive Control policy. If you intend to set the EMS Access to unShielded Media policy to Full Access, ensure that the Subclass Storage: External Drive Control policy is also set to Full Access to ensure that the media is not set to read-only and the port is not blocked.
OR 1. Click Advanced to toggle the view to Simple to scan a particular folder. 2. Go to Scan Settings and enter the folder path in the Search Path field. If this field is used, the selection in the menu is ignored. 3. If you do not want to write WSScan output to a file, clear the Output to File check box. 4. Change the default path and file name in Path, if desired. 5. Select Add to Existing File if you do not want to overwrite any existing WSScan output files. 6.
WSScan Command Line Usage WSScan [-ta] [-tf] [-tr] [-tc] [drive] [-s] [-o] [-a] [-f] [-r] [-u[a][-|v]] [-d] [-q] [-e] [-x] [-y] Switch Meaning Drive Drive to scan. If not specified, the default is all local fixed hard drives. Can be a mapped network drive.
Switch Meaning -s Silent operation -o Output file path -a Append to output file. The default behavior truncates the output file. -f Report format specifier (Report, Fixed, Delimited) -r Run WSScan without administrator privileges. Some files may not be visible in this mode. -u Include unencrypted files in output file. This switch is sensitive to order: "u" must be first, "a" must be second (or omitted), "-" or "v" must be last.
Output Meaning If you are scanning a mapped network drive, the scanning report does not return a KCID. UCID The User ID. As shown in the example above, "_SDENCR_" The UCID is shared by all the users of that computer. File The path of the encrypted file. As shown in the example above, "c:\temp\Dell - test.log" Algorithm The encryption algorithm being used to encrypt the file.
wsprobe [-h] wsprobe [-f path] wsprobe [-u n] [-x process_names] [-i process_names] Parameters Parameter To path Optionally specify a particular path on the device to scan for possible encryption/ decryption. If you do not specify a path, this utility scans all folders related to your encryption policies. -h View command line Help. -f Troubleshoot as instructed by Dell ProSupport -u Temporarily disable or re-enable the user Application Data Encryption List.
Advanced Threat Prevention Troubleshooting Find the Product Code with Windows PowerShell ● You can easily identify the product code, if the product code changes in the future, using this method. Get-WmiObject Win32_Product | Where-Object {$_.Name -like '*Cylance*'} | FT IdentifyingNumber, Name, LocalPackage The output results with the full path and .msi file name (the converted hex name of the file).
Troubleshooting
The following diagram illustrates the Advanced Threat Prevention agent communication process. BIOS Image Integrity Verification Process The following diagram illustrates the BIOS image integrity verification process. For a list of Dell computer models supported with BIOS image integrity verification, see Requirements - BIOS Image Integrity Verification.
SED Troubleshooting Use the Initial Access Code ● This policy is used to log on to a computer when network access is unavailable. Meaning, access to the Dell Server and AD are both unavailable. Only use the Initial Access Code policy if absolutely necessary. Dell does not recommend this method to log in. Using the Initial Access Code policy does not provide the same level of security as the usual method of logging in using user name, domain, and password.
● The Initial Access Code can only be used one time, immediately after activation. After an end user has logged in, the Initial Access Code will not be available again. The first domain login that occurs after the Initial Access Code is entered will be cached, and the Initial Access Code entry field will not display again. ● The Initial Access Code only displays under the following conditions: ○ A user has never activated inside the PBA. ○ The client has no connectivity to the network or Dell Server.
The PBAErr.log file is updated and written in real-time. Dell ControlVault Drivers Update Dell ControlVault Drivers and Firmware ● Dell ControlVault drivers and firmware that are installed on Dell computers at the factory are outdated and should be updated by following this procedure, in this order.
4. Select the Operating System of the target computer. 5. Select the Security category.
6. Download and save the Dell ControlVault Drivers. 7. Download and save the Dell ControlVault Firmware. 8. Copy the drivers and firmware to the target computers, if needed. Install Dell ControlVault Driver 1. Navigate to the folder which you downloaded the driver installation file.
2. Double-click the Dell ControlVault driver to launch the self-extracting executable file. NOTE: Be sure to install the driver first. The file name of the driver at the time of this document creation is ControlVault_Setup_2MYJC_A37_ZPE.exe. 3. Click Continue to begin. 4. Click Ok to unzip the driver files in the default location of C:\Dell\Drivers\. 5. Click Yes to allow the creation of a new folder.
6. Click Ok when the successfully unzipped message displays. 7. The folder which contains the files should display after extraction. If not, navigate to the folder to which you extracted the files. In this case, the folder is JW22F. 8. Double-click CVHCI64.MSI to launch the driver installer. [this example is CVHCI64.MSI in this example (CVHCI for a 32-bit computer)]. 9. Click Next at the Welcome screen.
10. Click Next to install the drivers in the default location of C:\Program Files\Broadcom Corporation\Broadcom USH Host Components\. 11. Select the Complete option and click Next.
12. Click Install to begin the installation of the drivers. 13. Optionally check the box to display the installer log file. Click Finish to exit the wizard.
Verify Driver Installation ● The Device Manager will have a Dell ControlVault device (and other devices) depending on the operating system and hardware configuration. Install Dell ControlVault Firmware 1. Navigate to the folder which you downloaded the firmware installation file. 2. Double-click the Dell ControlVault firmware to launch the self-extracting executable file. 3. Click Continue to begin.
4. Click Ok to unzip the driver files in the default location of C:\Dell\Drivers\. 5. Click Yes to allow the creation of a new folder. 6. Click Ok when the successfully unzipped message displays. 7. The folder which contains the files should display after extraction. If not, navigate to the folder to which you extracted the files. Select the firmware folder.
8. Double-click ushupgrade.exe to launch the firmware installer. 9. Click Start to begin the firmware upgrade.
NOTE: You may be asked to enter the administrator password if upgrading from an older version of firmware. Enter Broadcom as the password and click Enter if presented with this dialog. Several status messages display.
Troubleshooting 129
10. Click Restart to complete the firmware upgrade. The update of the Dell ControlVault drivers and firmware is complete.
UEFI Computers Troubleshoot Network Connection ● For pre-boot authentication to succeed on a computer with UEFI firmware, the PBA mode must have network connectivity. By default, computers with UEFI firmware do not have network connectivity until the operating system is loaded, which occurs after PBA mode.
Constant/Value Description TPM_E_BAD_ORDINAL The ordinal was unknown or inconsistent. 0x8028000A TPM_E_INSTALL_DISABLED The ability to install an owner is disabled. 0x8028000B TPM_E_INVALID_KEYHANDLE The key handle cannot be interpreted. 0x8028000C TPM_E_KEYNOTFOUND The key handle points to an invalid key. 0x8028000D TPM_E_INAPPROPRIATE_ENC Unacceptable encryption scheme. 0x8028000E TPM_E_MIGRATEFAIL Migration authorization failed.
Constant/Value Description TPM_E_SHA_ERROR The calculation is unable to proceed because the existing SHA-1 thread has already encountered an error. 0x8028001B TPM_E_FAILEDSELFTEST 0x8028001C TPM_E_AUTH2FAIL 0x8028001D TPM_E_BADTAG The TPM hardware device reported a failure during its internal self test. Try restarting the computer to resolve the problem. If the problem continues, you might need to replace your TPM hardware or motherboard.
Constant/Value Description TPM_E_BAD_MODE A mode parameter is bad, such as capArea or subCapArea for TPM_GetCapability, phsicalPresence parameter for TPM_PhysicalPresence, or migrationType for TPM_CreateMigrationBlob. 0x8028002C TPM_E_BAD_PRESENCE 0x8028002D TPM_E_BAD_VERSION Either the physicalPresence or physicalPresenceLock bits have the wrong value. The TPM cannot perform this version of the capability. 0x8028002E TPM_E_NO_WRAP_TRANSPORT The TPM does not allow for wrapped transport sessions.
Constant/Value Description TPM_E_BAD_LOCALITY The locality is incorrect for the attempted operation. 0x8028003D TPM_E_READ_ONLY The NV area is read only and cannot be written to. 0x8028003E TPM_E_PER_NOWRITE There is no protection on the write to the NV area. 0x8028003F TPM_E_FAMILYCOUNT The family count value does not match. 0x80280040 TPM_E_WRITE_LOCKED The NV area has already been written to. 0x80280041 TPM_E_BAD_ATTRIBUTES The NV area attributes conflict.
Constant/Value Description TPM_E_TRANSPORT_NOTEXCLUSIVE There was a command executed outside of an exclusive transport session. 0x8028004E TPM_E_OWNER_CONTROL Attempt to context save a owner evict controlled key. 0x8028004F TPM_E_DAA_RESOURCES 0x80280050 TPM_E_DAA_INPUT_DATA0 0x80280051 TPM_E_DAA_INPUT_DATA1 0x80280052 TPM_E_DAA_ISSUER_SETTINGS The DAA command has no resources available to execute the command. The consistency check on DAA parameter inputData0 has failed.
Constant/Value Description TPM_E_MA_AUTHORITY Incorrect migration authority. 0x8028005F TPM_E_PERMANENTEK Attempt to revoke the EK and the EK is not revocable. 0x80280061 TPM_E_BAD_SIGNATURE Bad signature of CMK ticket. 0x80280062 TPM_E_NOCONTEXTSPACE There is no room in the context list for additional contexts. 0x80280063 TPM_E_COMMAND_BLOCKED The command was blocked. 0x80280400 TPM_E_INVALID_HANDLE The specified handle was not found.
Constant/Value Description TBS_E_INSUFFICIENT_BUFFER A specified output buffer is too small. 0x80284005 TBS_E_IOERROR An error occurred while communicating with the TPM. 0x80284006 TBS_E_INVALID_CONTEXT_PARAM One or more context parameters is invalid. 0x80284007 TBS_E_SERVICE_NOT_RUNNING The TBS service is not running and could not be started.
Constant/Value Description value returned in the Additional Information), or enabling the TPM in the system BIOS.) TBS_E_PPI_FUNCTION_UNSUPPORTED 0x80284014 TBS_E_OWNERAUTH_NOT_FOUND The Physical Presence Interface of this firmware does not support the requested method. The requested TPM OwnerAuth value was not found. 0x80284015 TBS_E_PROVISIONING_INCOMPLETE 0x80284016 The TPM provisioning did not complete.
Constant/Value Description TPMAPI_E_MESSAGE_TOO_LARGE The message was too large for the encoding scheme. 0x8029010D TPMAPI_E_INVALID_ENCODING The encoding in the blob was not recognized. 0x8029010E TPMAPI_E_INVALID_KEY_SIZE The key size is not valid. 0x8029010F TPMAPI_E_ENCRYPTION_FAILED The encryption operation failed.
Constant/Value Description TPMAPI_E_POLICY_DENIES_OPERATION The requested operation was blocked by current TPM policy. Please contact your system administrator for assistance. 0x8029011E TBSIMP_E_BUFFER_TOO_SMALL The specified buffer was too small. 0x80290200 TBSIMP_E_CLEANUP_FAILED The context could not be cleaned up. 0x80290201 TBSIMP_E_INVALID_CONTEXT_HANDLE The specified context handle is invalid. 0x80290202 TBSIMP_E_INVALID_CONTEXT_PARAM An invalid context parameter was specified.
Constant/Value Description TBSIMP_E_NOT_ENOUGH_TPM_CONTEXTS There are too many TPM contexts in use. 0x80290210 TBSIMP_E_COMMAND_FAILED The TPM command failed. 0x80290211 TBSIMP_E_UNKNOWN_ORDINAL The TBS does not recognize the specified ordinal. 0x80290212 TBSIMP_E_RESOURCE_EXPIRED The requested resource is no longer available. 0x80290213 TBSIMP_E_INVALID_RESOURCE The resource type did not match. 0x80290214 TBSIMP_E_NOTHING_TO_UNLOAD No resources can be unloaded.
Constant/Value Description TPM_E_PCP_ERROR_MASK This is an error mask to convert Platform Crypto Provider errors to win errors. 0x80290400 TPM_E_PCP_DEVICE_NOT_READY 0x80290401 TPM_E_PCP_INVALID_HANDLE 0x80290402 TPM_E_PCP_INVALID_PARAMETER 0x80290403 TPM_E_PCP_FLAG_NOT_SUPPORTED 0x80290404 TPM_E_PCP_NOT_SUPPORTED 0x80290405 TPM_E_PCP_BUFFER_TOO_SMALL 0x80290406 TPM_E_PCP_INTERNAL_ERROR 0x80290407 TPM_E_PCP_AUTHENTICATION_FAILED The Platform Crypto Device is currently not ready.
Constant/Value Description PLA_E_DCS_ALREADY_EXISTS Data Collector Set already exists. 0x803000B7 PLA_S_PROPERTY_IGNORED Property value will be ignored. 0x00300100 PLA_E_PROPERTY_CONFLICT Property value conflict. 0x80300101 PLA_E_DCS_SINGLETON_REQUIRED 0x80300102 PLA_E_CREDENTIALS_REQUIRED 0x80300103 PLA_E_DCS_NOT_RUNNING The current configuration for this Data Collector Set requires that it contain exactly one Data Collector.
Constant/Value Description PLA_E_PLA_CHANNEL_NOT_ENABLED The Event Log channel Microsoft-Windows-Diagnosis-PLA/ Operational must be enabled to perform this operation. 0x80300110 PLA_E_TASKSCHED_CHANNEL_NOT_ENABLED 0x80300111 PLA_E_RULES_MANAGER_FAILED The Event Log channel Microsoft-Windows-TaskScheduler must be enabled to perform this operation. The execution of the Rules Manager failed.
Constant/Value Description administrator to verify that any required BitLocker Active Directory schema extensions have been installed.
Constant/Value Description FVE_E_NOT_DATA_VOLUME The operation attempted cannot be performed on an operating system drive.
Constant/Value Description 0x80310028 FVE_E_AUTOUNLOCK_ENABLED 0x80310029 FVE_E_WRONG_BOOTSECTOR 0x8031002A FVE_E_WRONG_SYSTEM_FS 0x8031002B FVE_E_POLICY_PASSWORD_REQUIRED 0x8031002C FVE_E_CANNOT_SET_FVEK_ENCRYPTED 0x8031002D FVE_E_CANNOT_ENCRYPT_NO_KEY 0x8031002E FVE_E_BOOTABLE_CDDVD 0x80310030 FVE_E_PROTECTOR_EXISTS 0x80310031 FVE_E_RELATIVE_PATH 0x80310032 FVE_E_PROTECTOR_NOT_FOUND 0x80310033 FVE_E_INVALID_KEY_FORMAT 0x80310034 FVE_E_INVALID_PASSWORD_FORMAT BitLocker Drive Encryption cannot be tu
Constant/Value Description FVE_E_FIPS_PREVENTS_RECOVERY_PASSWORD The Group Policy setting requiring FIPS compliance prevents a local recovery password from being generated or used by BitLocker Drive Encryption. When operating in FIPS-compliant mode, BitLocker recovery options can be either a recovery key stored on a USB drive or recovery through a data recovery agent.
Constant/Value Description FVE_E_PIN_INVALID The BitLocker encryption key cannot be obtained from the TPM and PIN. 0x80310043 FVE_E_AUTH_INVALID_APPLICATION 0x80310044 FVE_E_AUTH_INVALID_CONFIG 0x80310045 FVE_E_FIPS_DISABLE_PROTECTION_NOT_ALLOWED 0x80310046 FVE_E_FS_NOT_EXTENDED 0x80310047 FVE_E_FIRMWARE_TYPE_NOT_SUPPORTED 0x80310048 FVE_E_NO_LICENSE 0x80310049 FVE_E_NOT_ON_STACK A boot application has changed since BitLocker Drive Encryption was enabled.
Constant/Value Description FVE_E_BCD_APPLICATIONS_PATH_INCORRECT The path specified in the Boot Configuration Data (BCD) for a BitLocker Drive Encryption integrity-protected application is incorrect. Please verify and correct your BCD settings and try again.
Constant/Value Description FVE_E_POLICY_STARTUP_KEY_NOT_ALLOWED Group policy settings do not permit the use of a startup key. Please choose a different BitLocker startup option. 0x80310062 FVE_E_POLICY_STARTUP_KEY_REQUIRED 0x80310063 Group policy settings require the use of a startup key. Please choose this BitLocker startup option. FVE_E_POLICY_STARTUP_PIN_KEY_NOT_ALLOWED0x8 0310064 Group policy settings do not permit the use of a startup key and PIN.
Constant/Value Description FVE_E_POLICY_USER_CERTIFICATE_NOT_ALLOWED Group Policy settings do not permit user certificates such as smart cards to be used with BitLocker Drive Encryption. 0x80310072 FVE_E_POLICY_USER_CERTIFICATE_REQUIRED 0x80310073 FVE_E_POLICY_USER_CERT_MUST_BE_HW 0x80310074 FVE_E_POLICY_USER_CONFIGURE_FDV_AUTOUNLOCK _NOT_ALLOWED Group Policy settings require that you have a valid user certificate, such as a smart card, to be used with BitLocker Drive Encryption.
Constant/Value Description please ask your system administrator to resolve the settings conflict before enabling BitLocker. FVE_E_NON_BITLOCKER_OID 0x80310085 FVE_E_POLICY_PROHIBITS_SELFSIGNED 0x80310086 FVE_E_POLICY_CONFLICT_RO_AND_STARTUP_KEY_RE QUIRED 0x80310087 FVE_E_CONV_RECOVERY_FAILED 0x80310088 FVE_E_VIRTUALIZED_SPACE_TOO_BIG The Enhanced Key Usage (EKU) attribute of the specified certificate does not permit it to be used for BitLocker Drive Encryption.
Constant/Value Description permitted. Please have your system administrator resolve these policy conflicts before attempting to enable BitLocker.
Constant/Value Description FVE_E_NO_EXISTING_PIN This drive is not protected with a PIN. 0x803100A0 FVE_E_PROTECTOR_CHANGE_PIN_MISMATCH Please enter the correct current PIN. 0x803100A1 FVE_E_PROTECTOR_CHANGE_BY_STD_USER_DISALLO WED 0x803100A2 FVE_E_PROTECTOR_CHANGE_MAX_PIN_CHANGE_ATT EMPTS_REACHED 0x803100A3 FVE_E_POLICY_PASSPHRASE_REQUIRES_ASCII 0x803100A4 FVE_E_FULL_ENCRYPTION_NOT_ALLOWED_ON_TP_ST ORAGE You must be logged on with an administrator account to change the PIN or password.
Constant/Value Description FVE_E_EDRIVE_NO_FAILOVER_TO_SW BitLocker did not revert to using BitLocker software encryption due to group policy configuration. 0x803100AF FVE_E_EDRIVE_BAND_IN_USE 0x803100B0 FVE_E_EDRIVE_DISALLOWED_BY_GP 0x803100B1 FVE_E_EDRIVE_INCOMPATIBLE_VOLUME 0x803100B2 FVE_E_NOT_ALLOWED_TO_UPGRADE_WHILE_CONVER TING The drive cannot be managed by BitLocker because the drive's hardware encryption feature is already in use.
Constant/Value Description FVE_E_POLICY_INVALID_ENHANCED_BCD_SETTINGS BitLocker Drive Encryption cannot be applied to this drive because the Group Policy setting for Enhanced Boot Configuration Data contains invalid data. Please have your system administrator resolve this invalid configuration before attempting to enable BitLocker. 0x803100BE FVE_E_EDRIVE_INCOMPATIBLE_FIRMWARE 0x803100BF This PC's firmware is not capable of supporting hardware encryption.
Constant/Value Description FVE_E_DEVICE_LOCKOUT_COUNTER_UNAVAILABLE BitLocker cannot use hardware replay protection because no counter is available on your PC. 0x803100CD FVE_E_DEVICELOCKOUT_COUNTER_MISMATCH 0x803100CE FVE_E_BUFFER_TOO_LARGE Device Lockout state validation failed due to counter mismatch. The input buffer is too large.
20 Glossary Activate - Activation occurs when the computer has been registered with the Dell Server and has received at least an initial set of policies. Active Directory (AD) - A directory service created by Microsoft for Windows domain networks.
Pre-boot Authentication (PBA) - Pre-boot Authentication serves as an extension of the BIOS or boot firmware and guarantees a secure, tamper-proof environment external to the operating system as a trusted authentication layer. The PBA prevents anything being read from the hard disk, such as the operating system, until the user has confirmed they have the correct credentials. Script Control - Script Control protects devices by blocking malicious scripts from running.