
Deployment Guide
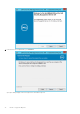
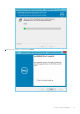


Table Of Contents
- Dell Security Management Server Installation and Migration Guide v10.2.13
- Introduction
- Requirements and Architecture
- Pre-Installation Configuration
- Install or Upgrade/Migrate
- Post-Installation Configuration
- Administrative Tasks
- Ports
- SQL Server Best Practices
- Certificates
Click Finish when complete.
○ Generate Self-Signed Certificate - The information from the self-signed certificate that was created when installing
the Security Management Server is used, if available.
Click Next.
Click Finish when complete.
Certificate setup is complete.
When changes are complete:
1. From the top menu, select Configuration > Save. If prompted, confirm the save.
2. Close the Dell Serverr Configuration Tool.
3. Click Start > Run. Type services.msc and click OK. When Services opens, go to each Dell Service and click Start the
service.
Import Dell Manager Certificate
If your deployment includes Security Management Server remotely-managed clients with Encryption Management Agents, you
must import your newly created (or existing) certificate. The Dell Manager certificate is used as a vehicle to protect the private
key which is used to sign the policy bundles being sent to Security Management Server remotely-managed clients and
Encryption Management Agent. This certificate can be independent of any of the other certificates. Additionally, if this key is
compromised it can be replaced with a new key, and Dell Manager will request a new public key if it cannot decrypt the policy
bundles.
1. Open the Microsoft Management Console.
2. Click File > Add/Remove Snap-in.
3. Click Add.
4. At the Add Standalone Snap-in window, select Certificates and click Add.
5. Select Computer Account and click Next.
6. At the Select Computer window, select Local computer (the computer this console is running on) and click Finish.
7. Click Close.
8. Click OK.
9. In the Console Root folder, expand Certificates (Local Computer).
10. Go to the Personal folder and locate the desired certificate.
11. Highlight the desired certificate, right-click All Tasks > Export.
12. When the Certificate Export wizard opens, click Next.
13. Select Yes, export the private key and click Next.
14. Select Personal Information Exchange - PKCS #12 (.PFX) and then select the sub-options Include all certificates in
the certification path if possible and Export all extended properties. Click Next.
15. Enter and confirm a password. This can be any password of your choosing. Choose a password that is easy for you to
remember, but no one else. Click Next.
16. Click Browse to browse to the location of where you would like to save the file.
17. In File Name, enter a name to save the file as. Click Save.
18. Click Next.
19. Click Finish.
20. A message stating that the export was successful displays. Close the MMC.
21. Go back to the Dell Server Configuration Tool.
Post-Installation Configuration
77