.הודפס בפולין www.dell.com | support.dell.
PS4110מערכי אחסון מדריך התקנה תיאור 10 מודולי בקרה 6 ממשקי רשת GUI H ,Host Integration Toolsתיאור 20 Remote Setup Wizard CLI הגדרת מדיניות RAID 21 יצירת אמצעי אחסון 28 44 S פ ,SNMPקביעת תצורה 34 ק ,Thin Provisioningאפשור באמצעי אחסון 27 ר קביעת תצורה של ממשקים מרובים 34 תאריך ,הגדרה 34 תכולת אריזת המשלוח 27 R קביעת תצורה של התוכנה 20 קבוצה גישה ממחשב אל אמצעי אחסון 31 הרחבה 17 התאמה א
אינדקס PS4110מערכי אחסון מדריך התקנה אינדקס א אופטי 10 ,6 אחריות 37 אלקטרוסטטית ,הימנעות הארקה לפרק כף היד ,שימוש 4 אמצעי אחסון 27 בקרות גישה 27 גודל מדווח 31 התחברות אל 27 יצירה 28 מתן שמות 27 ב בחירת מיקום הרכבה במעמד הרכבה במעמד 7 בקרות גישה הגדרה באמצעות CLI 28 הגדרה באמצעות GUI 30 הגנה על אמצעי אחסון 27 דרישות רשת 9 דרישות חשמל 4 דרישות רשת PS Series המלצות רשת 9 ד ה הודעות על אירועים ,קביעת תצורה
PS4110מערכי אחסון מדריך התקנה 42 תוחוקל תורישו תינכט הכימת
PS4110מערכי אחסון מדריך התקנה הבנה של הליך התקנת המערך 8 8תמיכה טכנית ושירות לקוחות שירות התמיכה של Dellזמין לענות על שאלותיך בנוגע למערכי PS Series SAN .אם ברשותך קוד שירות מהיר ,הכן אותו לפני הפנייה .הקוד יסייע למערכת המענה האוטומטי של Dellלנתב את שיחתך ביתר יעילות. פנייה אל Dell חברת Dellמציעה כמה אפשרויות לתמיכה ולשירות באינטרנט ובטלפון .הזמינות משתנה בהתאם לארץ ולמוצר; ייתכן ששירותים מסוימים לא יהיו זמינים באזורך. לקוחות בארצות הברית ,התקשרו .
PS4110מערכי אחסון מדריך התקנה 40 ול קקדזהל יושע התאש ףסונ עדימ
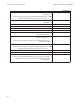
PS4110מערכי אחסון מדריך התקנה תנאי סביבה טמפרטורת הפעלה טמפרטורת אחסון לחות יחסית בהפעלה לחות יחסית לאחסון רטט בהפעלה רטט באחסון זעזוע בהפעלה זעזוע באחסון גובה הפעלה גובה אחסון רמת זיהום אווירי אקוסטיקה ול קקדזהל יושע התאש ףסונ עדימ 5°עד 40°C ( 41°עד )104°Fעם שינוי הדרגתי מרבי בטמפרטורה של 10°Cבשעה :הרעהבגבהים שמעל 900מטר ( 2950רגל) ,טמפרטורת הפעולה המרבית יורדת ב0.5°C-( )1°Fבקירוב לכל 165מטר ( 550רגל).
ול קקדזהל יושע התאש ףסונ עדימ PS4110מערכי אחסון מדריך התקנה מפרט טכני ספקי זרם הספק מתח פיזור חום ( Pכל הסיומות): S4110X • 700ואט (מרבי ,כולל) • +5וולט עד 155ואט; +12וולט עד 624ואט; +5וולט עד 10ואט 240–100וולט ז"ח ( 4.3–8.6אמפר) X,PS4110 ( XVכונני 2.5אינץ’) 133-114 :ואט E,PS4110 ( XVכונני 3.
הבנה של הליך התקנת המערך PS4110מערכי אחסון מדריך התקנה 7 7מידע נוסף שאתה עשוי להזדקק לו עיין במידע בנושא בטיחות ותקנות שסופק עם המערכת .ייתכן שמידע על האחריות כלול במסמך זה או במסמך נפרד. •התיעוד לארון תקשורת הנלווה לפתרון ארון התקשורת שלך מתאר כיצד להתקין את המערכת בארון תקשורת. •הרמוחל שמתשמ ךירדמ מספק מידע אודות תכונות מערכת ומתאר כיצד לפתור בעיות במערכת וכן כיצד להתקין או להחליף רכיבי מערכת .מסמך זה זמין באינטרנט ,בכתובת .support.dell.
PS4110מערכי אחסון מדריך התקנה 36 הצובק לש הרדגה רחאל רובעל ןאל
PS4110מערכי אחסון מדריך התקנה משימה הצובק לש הרדגה רחאל רובעל ןאל תיאור יצירת לוחות זמנים לתצלומים לשכפולים לוחות זמנים מאפשרים ליצור באופן קבוע תצלומים או שכפולים של אמצעי אחסון. יצירת אוספים אוספים מאפשרים לקבץ מספר אמצעי אחסון קשורים ,על מנת ליצור תצלומים או שכפולים .לאחר מכן ,באפשרותו של מנהל המערכת ליצור תצלום או שכפול של אמצעי אחסון מרובים בפעולה אחת או באמצעות לוח זמנים אחד.
הצובק לש הרדגה רחאל רובעל ןאל PS4110מערכי אחסון מדריך התקנה טבלה :9משימות נפוצות להתאמה אישית של קבוצות משימה תיאור הוספת חיבורי רשת לחבר קבוצה חיבורי רשת מרובים משפרים את הביצועים והזמינות ונדרשים עבור קלט/פלט מרובה נתיבים Dell .ממליצה לחבר את כל ממשקי הרשת שבשני מודולי הבקרה למתגי רשת מרובים ולאחר מכן להשתמש ב GUI-או ב CLI-כדי להקצות כתובת IPומסיכת רשת לממשקים. החשבון grpadminהוא חשבון ברירת המחדל לניהול Dell .ממליצה להגדיר יצירת חשבונות ניהול.
PS4110מערכי אחסון מדריך התקנה הבנה של הליך התקנת המערך 6 6לאן לעבור לאחר הגדרה של קבוצה לאחר הגדרת קבוצה ,באפשרותך להתאים אישית את הקבוצה על מנת לנהל בצורה יעילה יותר את סביבת האחסון שלך .תוכל גם להתחיל להשתמש בכל תכונות המוצר .התיעוד הבא והמוצרים הנוספים כלולים ברכישה של המערך וזמינים בכל עת. •המדריך למשתמש -חומרה מספק מידע בסיסי אודות מערכי אחסון ,תחזוקה ופתרון בעיות ,עבור חומרת מערכי האחסון שלך מסוג .
PS4110מערכי אחסון מדריך התקנה 32 ןוסחא תאצקה
PS4110מערכי אחסון מדריך התקנה ןוסחא תאצקה חיבור מחשב לאמצעי אחסון בעת יצירת אמצעי אחסון ,קבוצת ה PS Series-מפיקה אוטומטית שם יעד של ,iSCSIכאשר שם אמצעי האחסון מצורף לסוף שם היעד .כל אמצעי אחסון מופיע ברשת כיעד iSCSI. להלן דוגמה לשם יעד iSCSIשל אמצעי אחסון בשם dbvol: iqn.2001-05.com.equallogic.5-4a0900-2f00000-007eca92d654f160-dbvol כדי לחבר מחשב לאמצעי אחסון: 1 1.11התקן והגדר מאתחל iSCSIבמחשב .מאתחלי חומרה ותוכנה זמינים מספקים שונים .
ןוסחא תאצקה PS4110מערכי אחסון מדריך התקנה 5 5.55ציין את שם מאתחל ה iSCSI-או את כתובת ה IP-עבור רשומת בקרת הגישה (איור :17יצירת אמצעי אחסון – גישה ל )iSCSI-ולאחר מכן לחץ על ( Nextהבא). איור :17יצירת אמצעי אחסון – גישה לiSCSI- 6 6.66בדוק את מידע הסיכום (איור :18יצירת אמצעי אחסון– סיכום) ולחץ על ( Finishסיום) אם תצורת אמצעי האחסון נכונה. לחץ על ( Backהקודם) כדי לבצע שינויים.
ןוסחא תאצקה PS4110מערכי אחסון מדריך התקנה איור :15יצירת אמצעי אחסון -מאפיינים כלליים 4 4.44הזן גודל אמצעי אחסון (איור :16יצירת אמצעי אחסון -שטח רזרבי) ולאחר מכן לחץ על ( Nextהבא) .ערכי הטבלה ישקפו את הגודל שציינת.
PS4110מערכי אחסון מדריך התקנה ןוסחא תאצקה שימוש בממשק שורת הפקודה ( )CLIליצירת אמצעי אחסון 1 1.11היכנס לקבוצה. השתמש באחת משיטות אלה כדי להתחבר לקבוצה: •חיבור טורי לפריט חבר .ראה התקן חיבור טורי למערך בעמוד .14 •חיבור Telnetאו SSHלכתובת ה IP-של הקבוצה. במסך הכניסה ,הזן את שם החשבון והסיסמה של ה grpadmin-שציינת בעת יצירת הקבוצה. 2 2.
הבנה של הליך התקנת המערך PS4110מערכי אחסון מדריך התקנה 5 5הקצאת אחסון הקצאת שטח אחסון קבוצתי למשתמשים כרוכה בשלבים הבאים: 1 1.11יצירת אמצעי אחסון. 2 2.22חיבור מחשב לאמצעי אחסון בעמוד .31 לאחר הקצאת שטח אחסון ,באפשרותך להתאים אישית את הקבוצה ולהשתמש בתכונות המתקדמות יותר שלה .ראה פרק לאן 6לעבור לאחר הגדרה של קבוצה בעמוד .
PS4110מערכי אחסון מדריך התקנה 26 הנכותה לש הרוצת תעיבק
הנכותה לש הרוצת תעיבק PS4110מערכי אחסון מדריך התקנה איור :13קביעת תצורת חבר -תצורת RAID 7 7.77בתיבת הדו-שיח Configure Member – Summary (איור :14קביעת תצורת חבר -סיכום) ,לחץ על ( Finishסיום) אם תצורת הפריט החבר משביעת רצון .לחץ על ( Backהקודם) כדי לבצע שינויים. איור :14קביעת תצורת חבר -סיכום אחסון המערך מוכן לשימוש.
PS4110מערכי אחסון מדריך התקנה הנכותה לש הרוצת תעיבק איור :12קביעת תצורת חבר -הגדרות כלליות 6 6.66בתיבת הדו-שיח ( Configure Member – RAID Configurationקביעת תצורה של חבר -קביעת תצורה של )RAID (איור :13קביעת תצורת חבר -תצורת ,)RAIDבצע את הפעולות הבאות ולאחר מכן לחץ על ( Nextהבא). a .aבחר את מדיניות הRAID-. b .
PS4110מערכי אחסון מדריך התקנה הנכותה לש הרוצת תעיבק איור :11סיכום קבוצה – מדיניות RAIDלא מוגדרת לפריט חבר 4 4.44בתיבת הדו-שיח של הודעת האזהרה שמופיעה ,לחץ על ( Yesכן) כדי לקבוע את תצורת ה RAID-בפריט החבר. 5 5.55בתיבת הדו-שיח ( Configure Member – General Settingsקביעת תצורה של חבר -הגדרות כלליות) (איור :12קביעת תצורת חבר -הגדרות כלליות) ,לחץ על ( Nextהבא).
הנכותה לש הרוצת תעיבק PS4110מערכי אחסון מדריך התקנה שימוש בממשק המשתמש הגרפי ( )GUIלקביעת מדיניות הRAID- לקבלת המידע העדכני ביותר אודות תמיכת דפדפנים עבור ה GUI-של ה ,Group Manager-עיין בהערות המוצר של PS Series. כדי להשתמש בממשק המשתמש הגרפי לקביעת מדיניות ה RAID-עבור פריט חבר: 1 1.11היכנס לקבוצה על-ידי הזנת כתובת ה IP-של הקבוצה בדפדפן האינטרנט .
PS4110מערכי אחסון מדריך התקנה הנכותה לש הרוצת תעיבק 6 6.66בחר את המערך שברצונך לאתחל ולחץ על ( Nextהבא). 7 7.77בתיבת הדו-שיח ( Initialize Arrayאתחול מערך) ,הזן את תצורת המערך מ טבלה :6פרטי תצורה של מערך בעמוד 18 ולאחר מכן בחר ליצור קבוצה או להצטרף לקבוצה .לאחר מכן ,לחץ על ( Nextהבא). 8 8.88בתיבת הדו-שיח ( Create a New Groupיצירת קבוצה חדשה) או ( Join an Existing Groupהצטרפות לקבוצה קיימת) ,הזן את תצורת הקבוצה ולאחר מכן לחץ על ( Nextהבא). 9 9.
הנכותה לש הרוצת תעיבק מערכי אחסון מדריך התקנהPS4110 Enter the network configuration for the array: Member name []: member1 Network interface [eth0]: eth0 IP address for network interface []: 192.17.2.41 Netmask [255.255.255.0]: Default gateway [192.17.2.1]: Enter the name and IP address of the group that the array will join. Group name []: group1 Group IP address []: 192.17.2.20 Searching to see if the group exists. This may take a few minutes. The group does not exist or currently cannot be reached.
הנכותה לש הרוצת תעיבק PS4110מערכי אחסון מדריך התקנה התחל בקביעת התצורה של התוכנה השתמש בכלי השירות ( setupהגדרה) או ב Remote Setup Wizard-כדי לאתחל את המערך ,ולאחר מכן ליצור קבוצה עם המערך כחבר הקבוצה הראשון או להוסיף את המערך לקבוצה קיימת. לאחר השלמת קביעת התצורה של התוכנה ,המערך הופך לחבר בקבוצה ,ושטח אחסון הדיסק שלו זמין לשימוש. שימוש בכלי השירות להגדרה כדי לקבוע את התצורה של התוכנה כדי להשתמש בכלי השירות להגדרה על מנת לאתחל מערך וליצור או להרחיב קבוצה: 1 1.
הנכותה לש הרוצת תעיבק PS4110מערכי אחסון מדריך התקנה טבלה :6פרטי תצורה של מערך הנחיה שם חבר ממשק רשת כתובת IP מסיכת רשת שער ברירת מחדל (אופציונלי) מדיניות RAID תיאור שם ייחודי למערך בקבוצה (עד 63אותיות ,מספרים או מקפים) .התו הראשון חייב להיות אות או מספר. שם ממשק הרשת במערך (לדוגמה )eth0המחובר ליציאה פעילה במתג רשת. כתובת רשת עבור ממשק רשת המערך. :הרעהלכל חבר חייב להיות ממשק רשת אחד לפחות באותה רשת משנה שבה נמצאת כתובת ה IP-של הקבוצה.
PS4110מערכי אחסון מדריך התקנה הבנה של הליך התקנת המערך 4 4קביעת תצורה של התוכנה לאחר השלמת ההתקנה של חומרת המערך ,באפשרותך לאתחל את המערך וליצור קבוצת PS Seriesעם המערך כחבר הקבוצה הראשון .לחלופין ,באפשרותך להוסיף את המערך לקבוצה קיימת .בעת הרחבת קבוצה ,הקיבולת והביצועים משתפרים אוטומטית, ללא הפרעה למשתמשים. לאחר השלמת קביעת התצורה של התוכנה ,באפשרותך להקצות מקום אחסון ולהתחיל להשתמש בSAN- .ראה פרק 5הקצאת אחסון בעמוד .
PS4110מערכי אחסון מדריך התקנה 16 ךרעמה ילבכ רוביח
ךרעמה ילבכ רוביח PS4110מערכי אחסון מדריך התקנה איור :8חיבור כבל טורי למערך מידע על פינים בכבל טורי איור :9מחבר DB9של כבל טורי -מיקומי פינים מציג את מיקומי הפינים במחברי DB9בכבל הטורי המצורף למערך ,ואילו ב מוצגים פרטי הפינים של הכבל.
ךרעמה ילבכ רוביח PS4110מערכי אחסון מדריך התקנה איור :7מתג ספק זרם חילופין ונוריות טבלה :4תיאור של נוריות ספק זרם הסבר 1 2 3 תיאור מצב ספק זרם .נורית זו מאירה (בירוק) כאשר המתג מופעל וספק הזרם מספק חשמל למערך. שגיאה .נורית זו מאירה (בכתום) אם יש בעיה בספק הזרם. מתח ACנורית זו מאירה (בירוק) כל עוד ספק הזרם מקבל אספקת חשמל.
ךרעמה ילבכ רוביח PS4110מערכי אחסון מדריך התקנה איור :6חיבור כבלי חבר את המערך לרשת דגם המערך PS4110כולל שני מודולי בקרה .Type 17מודול הבקרה Type 17מכיל שתי יציאות ,10GB Ethernet המסומנות שתיהן .Ethernet 0יציאה אחת היא יציאת ,10GBASE-Tהיציאה השנייה היא יציאת .SFP+ניתן להשתמש רק באחת מיציאות 10Gb Ethernetאלה בכל בכל פעם. מודולי הבקרה כוללים גם יציאת 10Mb/100Mbהמסומנת ( Managementניהול) .יציאת הניהול אינה יכולה להעביר תעבורת iSCSI .
PS4110מערכי אחסון מדריך התקנה מתג 1 ךרעמה ילבכ רוביח מתג 0 חבר ואבטח את כבלי החשמל קח את כבלי החשמל המצורפים למערך .אם המערך נשלח ללא כבלי חשמל ,פנה אל ספק התמיכה או מוכר מערך הPS Series- לקבלת מידע אודות כבלי חשמל. 1 1.11ודא שמתג ההפעלה נמצא במצב כבוי ,(O) - OFFלפני שתחבר את כבלי החשמל. 2 2.22חבר את כבלי החשמל למערכת ( ,)PSUכפי שמוצג ב איור :6חיבור כבלי בעמוד .13 3 3.33חבר את כבלי החשמל למערכת: a .
ךרעמה ילבכ רוביח PS4110מערכי אחסון מדריך התקנה תצורות כבלים מינימליות ומומלצות עבור מערך עם מודול בקרה אחד ,התצורה המינימלית היא חיבור רשת אחד אל Ethernet 0. עבור מערך של מודול בקרה כפול ,התצורה המומלצת היא חיבור של כבלי רשת ל Ethernet 0-בשני מודולי הבקרה וחיבור כל מודול בקרה למתג רשת. לקבלת ביצועים וזמינות גבוהים ,פזר את החיבורים בין מתגי רשת מרובים. יש לחבר את המתגים באמצעות קישורי Interswitchעם רוחב פס מתאים כדי לטפל בתעבורת ה iSCSI-או לפי יכולת הערמה.
ךרעמה ילבכ רוביח PS4110מערכי אחסון מדריך התקנה טבלה :3המלצות רשת המלצות רשת 10GEממותגת חיבורי רשת מרובים למתגי רשת שונים רשת ניהול (אופציונלי) גישה לכתובת ה IP-של הקבוצה נתיבי רשת יתירים בין מחשבים ומערכים לשם שכפול ,קישור רשת אמין בגודל מתאים אין פונקציונליות STPביציאות המתג המחברת צומתי קצה בקרת זרימה מאופשרת במתגים ובכרטיסי NIC נטרול בקרה של סערת שידור לקבוצה ()Unicast Storm במתגים Jumbo Framesמאופשר רשתות VLAN DCB 10 ת
PS4110מערכי אחסון מדריך התקנה הבנה של הליך התקנת המערך 3 3חיבור כבלי המערך לאחר התקנת המערך במעמד ,עליך לחבר את כבלי הרשת והחשמל ,ואופציונלית גם את הכבל הטורי. תחילה ,עיין בהמלצות לרשת בסעיף דרישות והמלצות לרשת בעמוד .9 הרשימה הבאה מתארת את השלבים הכלליים לחיבור המערך לחשמל ולרשת. 1 1.11חבר את כבלי החשמל .אל תחבר את זרם החשמל למערך עדיין .ראה חבר ואבטח את כבלי החשמל בעמוד .12 2 2.22חבר את המערך לרשת .ראה חבר את המערך לרשת בעמוד .13 3 3.
דמעמב ךרעמה תבכרה PS4110מערכי אחסון מדריך התקנה 1 1.11חבר את הקצה הימני של הלוח הקדמי לצד הימני של התושבת. 2 2.22סובב את הקצה השמאלי של הלוח הקדמי לכיוון הצד השמאלי של התושבת. 3 3.33לחץ על הלוח הקדמי למקומו ,עד לסגירת תפס השחרור. 4 4.44באמצעות המפתח המצורף ,נעל את הלוח הקדמי ואחסן את המפתח במקום בטוח.
PS4110מערכי אחסון מדריך התקנה דמעמב ךרעמה תבכרה התקנת המסילות והמערכת במעמד התקן את המסילות במעמד ,תוך ביצוע הוראות הבטיחות והוראות התקנת המעמד המצורפות לערכת המסילות. אם ההתקנה מתבצעת במכלול מעמד סגור או מרובה יחידות ,הטמפרטורה של סביבת ההפעלה של המעמד עשויה להיות גבוהה מסביבת החדר .לכן ,יש להקפיד להתקין את הציוד בסביבה התואמת לטמפרטורת הסביבה המרבית ( )Tmaשציין היצרן .לקבלת מידע נוסף ,ראה מפרט טכני בעמוד .
PS4110מערכי אחסון מדריך התקנה רכיב תיעוד דמעמב ךרעמה תבכרה תיאור התיעוד הבא כלול באריזת המשלוח: •כרזת התקנה •הנקתה ךירדמ (מסמך זה) •מידע אודות הרישיון ,תקינה ואחריות טבלה :2חומרה נוספת (לא כלולה) רכיב מעמד ארבעה מוטות סטנדרטי של 19אינץ’ כבלי 10/100Mbps Ethernet כבלי רשת 10GE תיאור מספק גישה נוחה למערכים ולחומרה אחרת בסביבת המחשוב. לשימוש עם רשת ניהול ייעודית .מחבר את יציאת הניהול במערך למתג רשת 10/100Mbps.
דמעמב ךרעמה תבכרה PS4110מערכי אחסון מדריך התקנה 1 1.11חבר את לחצן המתכת שעל הסליל לכפתור שעל הסרט הגמיש .ראה איור :1שימוש ברצועת הארקה לפרק כף היד. איור :1שימוש ברצועת הארקה לפרק כף היד 2 2.22הדק את הסרט על פרק כף היד. 3 3.33חבר את הסרט להארקה .תוכל לחבר את המחבר לשקע מוארק תואם או לחבר אותו לאטב תנין תואם ולחבר את האטב להתקן מוארק .דוגמאות להארקה מתאימה :שטיחון ESDאו מסגרת המתכת של ציוד מוארק.
PS4110מערכי אחסון מדריך התקנה דמעמב ךרעמה תבכרה דרישות מעמד ודא שהתקנות המעמד והמערך עומדות בדרישות הבאות: •השתמש במעמד 19אינץ’ סטנדרטי ,תואם ,EIA-310-Dעם ארבעה מוטות ,בעל חור מרובע אוניברסלי או עם חור עגול ללא הברגה. •המעמד חייב להיות מדורג עבור עומס סטטי של 540ק"ג או יותר. •עומק המעמד המינימלי הוא 100ס"מ ( 40אינץ’) מחזית המעמד לחלק האחורי של המעמד.
PS4110מערכי אחסון מדריך התקנה הבנה של הליך התקנת המערך 2 2הרכבת המערך במעמד להפעלה תקינה ,יש להתקין מערך אחסון PS Seriesבמעמד .סעיף זה מכיל מידע כללי על בטיחות אלקטרוסטטית ורשת ,כמו גם מידע התקנה עבור מערכי PS Series. לאחר התקנת המערך במעמד ,חבר את כבלי החשמל והרשת ,כמתואר בסעיף פרק 3חיבור כבלי המערך פרק .9 לפני שתתחיל לפני התקנת המערך: •קרא את הוראות הבטיחות להתקנה .ראה הוראות בטיחות להתקנה בעמוד .3 •ודא שהמעמד עונה על דרישות המעמד .
PS4110מערכי אחסון מדריך התקנה 2 הבנה של הליך התקנת המערך
PS4110מערכי אחסון מדריך התקנה הבנה של הליך התקנת המערך 1הבנה של הליך התקנת המערך כדי להתקין את המערך ולהתחיל להשתמש ב ,SAN-בצע את השלבים הבאים: 1 1.11התקן את המערך במעמד .ראה הרכבת המערך במעמד בעמוד .3 2 2.22חבר את המערך לחשמל ולרשת .ראה חבר ואבטח את כבלי החשמל בעמוד 12וכן חבר את המערך לרשת בעמוד .13 3 3.33קבע את התצורה של תוכנת PS Series .תחילה ,אתחל מערך כדי שיהיה נגיש ברשת .
PS4110מערכי אחסון מדריך התקנה vi הקדמה
PS4110מערכי אחסון מדריך התקנה הקדמה הקדמה מדריך זה מתאר את אופן ההתקנה PS4110של חומרת מערך ,קביעת התצורה של התוכנה ותחילת העבודה בSAN-. באמצעות מערך אחסון PS Seriesאחד או יותר ,באפשרותך ליצור קבוצת — PS Seriesרשת אזור אחסון ( )SANמסוג iSCSIעם ניהול עצמי ,במחיר נוח ובשימוש קל ,ללא תלות בגודלה. קהל יעד המידע במדריך זה מיועד למנהלי מערכת האחראים להתקנה של חומרת מערך .מנהלי מערכת אינם נדרשים לניסיון מקיף ברשתות או במערכות אחסון .
PS4110מערכי אחסון מדריך התקנה iv תוכן
PS4110מערכי אחסון מדריך התקנה תוכן תוכן הקדמה v. . . . . . . . . . . . . . . . . . . . . . . . . . . . . . . . . . . . . . . . . . . . . . . . . . . . . . . . . . . . . . . . . . . . . . . . . . . . . . . . . .
זכויות יוצרים .Dell Inc.2013כל הזכויות שמורות. Dellו EqualLogic-הם סימנים מסחריים של.Dell Inc. כל הסימנים המסחריים והסימנים המסחריים הרשומים המוזכרים בזאת מהווים קניין של בעליהם בהתאמה. המידע במסמך זה עשוי להשתנות ללא הודעה. חל איסור מוחלט על העתקה מכל סוג ללא הרשאה בכתב מDell -.
PS4110מערכי אחסון מדריך התקנה גרסה 1.
PS SERIESןוסחאיכרעמ הנקתה ךירדמ PS4110