Dell EMC 主机总线适配器用户指南 HBA330 和外部 12 Gbps SAS HBA 管制型号: UCSE 900, UCSF-1000, UCSN-1000
注、小心和警告 注: “注”表示帮助您更好地使用该产品的重要信息。 小心: “小心”表示可能会损坏硬件或导致数据丢失,并说明如何避免此类问题。 警告: “警告”表示可能会造成财产损失、人身伤害甚至死亡。 © 2017 - 2018 Dell Inc. 或其子公司。保留所有权利 Dell、EMC 和其他商标为 Dell Inc. 或其子公司的商标。其他商标均为其各自所有者的商标。 2018 - 09 Rev.
目录 1 概览............................................................................................................................................................... 5 Dell HBA 卡规格.................................................................................................................................................................8 支持的操作系统.................................................................................................................................................................
6 BIOS 配置公用程序..................................................................................................................................... 30 进入 BIOS 配置公用程序............................................................................................................................................... 30 退出配置公用程序.......................................................................................................................................................... 30 设置引导卷..............................
1 概览 Dell EMC 主机总线适配器 (HBA) 卡系列包含 Dell HBA330 MMZ、Dell HBA330 MX、Dell 12 Gbps SAS HBA 控制器、Dell HBA330 适配 器卡和 Dell HBA330 mini 单片卡。 • Dell 12 Gbps SAS HBA 控制器:Dell 12 Gbps SAS HBA 控制器是一个提供无 RAID 功能的物理磁盘驱动器接口的 HBA,为外部存储 提供半高和全高外形规格。这是 Dell 串行连接 SCSI (SAS) 控制器解决方案系列的一部分。 图 1: 12 Gbps SAS HBA 控制器的功能 1 SAS 外部电缆连接器 3 散热器 • 2 12 Gbps SAS HBA 控制器 Dell HBA330:该卡有适配器(半高和全高)和微型单片机这两种外形规格。 概览 5
图 2: Dell HBA330 适配器卡的功能 1 Dell HBA330 适配器 3 SAS 电缆连接器 6 概览 2 散热器
图 3: Dell HBA330 微型单片机卡的功能 1 • 散热器 2 Dell HBA330 微型单片机卡 Dell HBA330 MX:Dell HBA330 是 MX7000 系列控制器的成员,并且用于与内部驱动器连接。 图 4: Dell HBA330 MX 适配器卡的功能 1 散热器 3 SAS 电缆连接器 • 2 释放拉杆 Dell HBA330 MMZ:Dell HBA330 MMZ 是 MX7000 系列控制器的成员,并且用于与 MX5016 存储机柜中的驱动器连接。 概览 7
图 5: PERC HBA330 MMZ 适配器卡的功能 1 夹层卡连接器 3 散热器 2 释放拉杆 主题: • Dell HBA 卡规格 • 支持的操作系统 • 相关说明文件 Dell HBA 卡规格 下表列出并说明了 Dell HBA 卡的规格。 表.
• • Microsoft – Windows Server 2012 R2 – Windows Server 2016 VMware – ESXi 6.5 更新 1 – ESXi 6.7 注: 用于 VMware ESXi 的 12 GBPS SAS HBA 驱动程序与 VMware ISO 映像绑定(戴尔提供)。有关更多信息,请参阅 Dell.com/virtualizationsolutions。 • • Linux – Red Hat Enterprise Linux 6.9 – Red Hat Enterprise Linux 7.5 – SUSE Linux Enterprise Server 版本 12.3 Ubuntu – Ubuntu 16.04.4 – Ubuntu 18.04 相关说明文件 注: • 有关所有存储控制器和 PCIe SSD 说明文件,请访问 Dell.com/storagecontrollermanuals。 • 有关所有 Dell OpenManage 说明文件,请访问 Dell.
2 功能 Dell HBA 卡支持以下功能。 LED 端口活动 12 GBPS SAS HBA 控制器配有端口活动 LED 或状态 LED。这些 LED 可使您快速确定外部 SAS 端口的状态。每个 x4 连接器均各有一 组 LED。 注: HBA 330 卡没有 LED 端口指示灯。 下表将介绍 LED 的颜色且与 SAS 端口状态对应。 表.
3 Dell EMC HBA 机柜支持 设置多路径系统时,HBA330 MMZ 和 12 Gbps SAS 控制器可以通过多个路径访问物理驱动器,以提供驱动器冗余和负载平衡。但 是,控制器不会管理这些路径;此功能由主机操作系统中的多路径层控制。因此,在多路径配置中,到驱动器的每个单独路径将视为 独立驱动器,并且单个驱动器可能在操作系统中显示为多个驱动器。为了避免来自驱动器多个路径的相关问题,必须使用路径管理软 件来将多个路径映射到同一个驱动器。本节将介绍用于不同操作系统和管理界面的多路径管理选项。 主题: • 使用 HII 的 Dell EMC HBA 多路径 • 使用 iDRAC 的 Dell EMC HBA 多路径 • 使用 Windows 的 Dell EMC HBA 多路径 • 使用 Linux 的 Dell EMC HBA 多路径 • 使用 VMware 的 Dell EMC HBA 多路径 • 用于 Dell EMC HBA330 MMZ 的多路径 • Dell EMC HBA330 MMZ 群集 使用 HII 的 Dell EMC HBA 多路径 12 GBps SA
8 右键单击多路径磁盘并选择 Properties(属性)。 9 单击 MPIO。您可以设置 MPIO 策略,并检查到驱动器的两个路径都处于活动状态。如果配置正确,两个路径将在 This device has the following paths(此设备具有以下路径)部分下显示 Active/Optimised(活动/优化)。如果仅列出一条路径,请检查系 统存储分配和硬件配置。 使用 Linux 的 Dell EMC HBA 多路径 有关使用 Linux 配置 Dell EMC HBA 多路径的信息,请参阅 Linux 管理文档。要检查多路径状态,使用 Multipath-l 命令以显示路径信 息。 使用 VMware 的 Dell EMC HBA 多路径 默认情况下,ESXi 提供 VMWare 本地多路径插件,可自动映射路径并在多路径配置中管理驱动器。有关更多信息,请参阅 NMP 上 的 VMWare 文档。 用于 Dell EMC HBA330 MMZ 的多路径 HBA330 MMZ 是适用于 PowerEdge MX740c 和 MX840c 计算底座的 HBA 控制器。它在多路径拓扑中
图 6: MX7000 模块化系统的多路径拓扑 在此图表中,HBA330 MMZ 驻留在计算底座中,用于连接到 MX7000 的 SAS 拓扑。HBA330 MMZ 可连接到一对 MX5000 SAS I/O 模块 (IOM),管理 MX7000 中计算和存储底座之间的连接。有关配置驱动器分配的更多信息,请参阅 Dell EMC OpenManage Enterprise Modular User's Guide(Dell EMC OpenManage Enterprise Modular 用户指南)。 注: I/O 模块无法独立配置。 HBA330 MMZ 连接至 SAS IOM,然后再连接至存储底座中的一个 SAS 扩充器。然后,存储底座中的扩充器连接到存储底座中的所有 驱动器,在 HBA330 MMZ 之间提供一个路径,以及存储底座中的一个驱动器。通过连接 SAS IOM,HBA330 MMZ 将通过两条路径 连接到存储底座中的每个驱动器,以允许多路径配置。如果存储底座中的 SAS IOM 或 SAS 扩充器已卸下,则到驱动器的路径也会从 SAS 拓扑中移除。 Dell EMC HBA330 MMZ
息,请参阅 OpenManage Enterprise Modular User's Guide(OpenManage Enterprise Modular 用户指南)。但是,分配存储底座后,将 需要计算群集软件来管理磁盘的共享和保留。请参阅适用于受支持操作系统或群集解决方案的文档以了解管理的详情。 注: Windows 2016 是用于共享存储的唯一戴尔验证群集解决方案(相同的磁盘分配给多个计算底座)。 14 Dell EMC HBA 机柜支持
4 部署 Dell HBA 卡 小心: 多数维修只能由经认证的维修技术人员进行。您只能根据产品说明文件中的授权,或者在联机或电话服务和支持团队的指 导下进行故障排除和简单维修。任何未经 Dell 授权的服务所导致的损坏均不在保修范围之列。请阅读并遵循系统附带的安全说 明。 此文档提供一组用于以下 Dell HBA 卡控制器的高级别安装和拆卸说明: 1 12 Gbps SAS HBA 控制器 2 HBA330 适配器卡 3 HBA330 MMZ 适配器卡 4 HBA330 MX 适配器卡 5 HBA330 微型单片机 主题: • 卸下 12 Gbps SAS HBA 控制器 • 安装 12 Gbps SAS HBA 控制器 • 通过缆线将安装在主机服务器上的 12 Gbps SAS HBA 控制器连接到存储模块 • 卸下 HBA330 适配器卡 • 安装 HBA330 适配器卡 • 卸下 HBA330 MMZ 适配器卡 • 安装 HBA330 MMZ 适配器卡 • 卸下 HBA330 MX 适配器卡 • 安装 HBA330 MX 适配器卡 • 拆卸 HB
7 装回存储控制器卡并连接电缆(如果适用)。有关安装卡的更多信息,请参阅安装 12 Gbps SAS HBA 控制器。 8 安装系统护盖。 9 重新连接电源电缆和网络电缆。 图 7: 卸下 12 Gbps SAS HBA 控制器 1 SAS 电缆(2 根) 2 SAS 电缆连接器(2 个) 3 12 Gbps SAS HBA PCIe 连接器 4 系统板上的 PCIe 连接器 5 12 Gbps SAS HBA 控制器 安装 12 Gbps SAS HBA 控制器 小心: 多数维修只能由经认证的维修技术人员进行。您只能根据产品说明文件中的授权,或者在联机或电话服务和支持团队的指 导下进行故障排除和简单维修。任何未经 Dell 授权的服务所导致的损坏均不在保修范围之列。请阅读并遵循产品附带的安全说 明。 小心: 为确保对内部电子组件的保护,请遵循静电释放 (ESD) 指南。 1 打开 12 Gbps SAS HBA 控制器。 2 关闭系统,包括所有连接的外围设备,并断开系统与电源插座的连接。 注: 有关电源装置 (PSU) 的更多信息,请参阅系统硬件用户手册,网址为 Del
9 使用 SAS 电缆将外部磁带设备或机柜连接到适配器。 10 安装系统护盖。 11 重新连接电源线或网络线,然后打开系统。 通过缆线将安装在主机服务器上的 12 Gbps SAS HBA 控制器连接到存储模块 请按照以下步骤将 12 Gbps SAS HBA 控制器连接到存储盘柜的物理磁盘驱动器: 1 设置最高 12 Gbps SAS HBA 控制器。请参阅安装 12 Gbps SAS HBA 控制器。 2 连接 SAS 缆线,以便前四个存储模块进行菊花链式连接,并且其中一个存储模块连接到控制器上的单端口。将第二组的四个存 储模块进行菊花链式连接,并且其中一个存储模块连接到控制器上的第二个端口。请参阅图 5。 注: 该控制器最多仅支持八个机柜。 注: 有关单个端口和多链配置的更多信息,请参阅 PowerVault 系统特定手册,网址是 Dell.
卸下 HBA330 适配器卡 小心: 多数维修只能由经认证的维修技术人员进行。您只能根据产品说明文件中的授权,或者在联机或电话服务和支持团队的指 导下进行故障排除和简单维修。任何未经 Dell 授权的服务所导致的损坏均不在保修范围之列。请阅读并遵循产品附带的安全说 明。 1 关闭系统,包括所有已连接的外围设备,并断开系统与电源插座和外围设备的连接。 注: 拆装系统内部组件时,建议始终使用防静电垫和防静电腕带。 2 打开系统。 3 在系统板上找到 HBA 卡。 小心: 为防止损坏卡,您必须仅握住该卡的边缘。 4 拧下支架上的螺钉(如果有),或使用系统的固定夹卸下系统上的控制器。 5 提起插卡,将其从系统板上的连接器中卸下。 6 断开连接至插卡的 SAS 电缆: a 按住 SAS 电缆连接器上的金属卡舌。 b 从连接器中拉出 SAS 电缆。 7 如果适用,装回存储控制器卡并连接电缆。有关安装插卡的更多信息,请参阅安装 HBA330 适配器卡。 8 合上系统.
安装 HBA330 适配器卡 小心: 多数维修只能由经认证的维修技术人员进行。您只能根据产品说明文件中的授权,或者在联机或电话服务和支持团队的指 导下进行故障排除和简单维修。任何未经 Dell 授权的服务所导致的损坏均不在保修范围之列。请阅读并遵循产品附带的安全说 明。 1 关闭系统和所有连接的外围设备,并断开系统与电源插座的连接。 注: 拆装系统内部组件时,建议始终使用防静电垫和防静电腕带。 2 打开系统护盖。 3 将 HBA 卡连接器与系统板上的卡连接器对齐,然后将 HBA 卡推向连接器以确保其稳固就位。 4 拧紧支架上的螺钉(如果有),或使用系统的固定夹将控制器固定在系统上。 5 将 SAS 数据电缆连接器连接至卡。 注: 务必按照电缆上的连接器标签连接电缆。如果方向逆置,电缆将无法正常工作。 6 通过卡上的固定夹和机箱内部的通道进行布线 SAS 数据电缆。 7 将标有“SAS A”的连接器连接至背板上的连接器 SAS A,将标有“SAS B”的连接器连接至背板上的连接器 SAS B。 8 合上系统护盖。 9 将系统重新连接至电源插座,并开启系统和所有已连接的外围设备的
图 10: 卸下和安装 HBA330 卡 1 支架槽口 (3) 2 释放拉杆 3 插卡支架 4 系统上的卡舌 5 系统机箱 6 系统板上的卡连接器 7 HBA 卡连接器 安装 HBA330 MMZ 适配器卡 小心: 多数维修只能由经认证的维修技术人员进行。您只能根据产品说明文件中的授权,或者在联机或电话服务和支持团队的指 导下进行故障排除和简单维修。任何未经 Dell 授权的服务所导致的损坏均不在保修范围之列。请阅读并遵循产品附带的安全说 明。 1 关闭底座和任何连接的外围设备,并从 MX 机箱中卸下底座。 注: 拆装系统内部组件时,建议始终使用防静电垫和防静电腕带。 2 打开系统。 3 将支架槽口与系统两侧的卡舌对齐,然后将 HBA 卡连接器与系统板上的连接器对齐。 4 按压连接器上的 HBA 卡,直至其稳固就位。 5 按压释放拉杆,以将卡固定至底座。 6 关闭底座。 7 将底座插入 MX 机箱,并开启系统和所有连接的 MX 机箱外围设备。 20 部署 Dell HBA 卡
卸下 HBA330 MX 适配器卡 小心: 多数维修只能由经认证的维修技术人员进行。您只能根据产品说明文件中的授权,或者在联机或电话服务和支持团队的指 导下进行故障排除和简单维修。任何未经 Dell 授权的服务所导致的损坏均不在保修范围之列。请阅读并遵循产品附带的安全说 明。 1 关闭底座和任何连接的外围设备,并从 MX 机箱中卸下底座。 注: 平稳关闭机柜之前,确保高速缓存中的任何数据都更新到磁盘,然后再卸下控制器。 注: 拆装系统内部组件时,建议始终使用防静电垫和防静电腕带。 2 打开底座。 3 在系统板上找到 HBA 卡。 4 拉起控制器上的释放拉杆,然后提起该卡以将其从系统板上的连接器中卸下。 5 断开 SAS 电缆与卡的连接。断开电缆连接: a 按住 SAS 电缆连接器上的金属卡舌。 b 从连接器中拉出 SAS 电缆。 6 将卡的一端以一定角度提起,让卡脱离系统板上的卡连接器。 7 从系统板上提起插卡。 8 重新安装存储控制器并连接电缆。有关安装卡的信息,请参阅 安装 HBA330 MX 适配器卡。 9 关闭底座。 10 将底座插入 MX 机箱,并开启系统
图 11: 卸下和安装 HBA330 MX 卡 1 支架槽口 (3) 2 释放拉杆 3 插卡支架 4 系统机箱 5 HBA 卡连接器 6 系统上的卡连接器 安装 HBA330 MX 适配器卡 小心: 多数维修只能由经认证的维修技术人员进行。您只能根据产品说明文件中的授权,或者在联机或电话服务和支持团队的指 导下进行故障排除和简单维修。任何未经 Dell 授权的服务所导致的损坏均不在保修范围之列。请阅读并遵循产品附带的安全说 明。 1 关闭底座和任何连接的外围设备,并从 MX 机箱中卸下底座。 注: 拆装系统内部组件时,建议始终使用防静电垫和防静电腕带。 2 打开系统。 3 将支架槽口与系统两侧的卡舌对齐,然后将 HBA 卡连接器与系统板上的连接器对齐。 注: 为防止损坏卡,您必须仅握住该卡的边缘。 4 按压连接器上的 HBA 卡,直至其稳固就位。 5 按压释放闩锁,以将卡固定至底座。 6 将 SAS 数据电缆连接器连接至卡。 注: 确保按照电缆上的连接器标签连接电缆。如果方向相反,电缆无法正确运行。 7 通过卡上的固定夹和机箱内部的通道进行布线 SAS 数据电
9 关闭底座。 10 将底座插入 MX 机箱,并开启系统和所有连接的 MX 机箱外围设备。 拆卸 HBA330 微型单片机控制器 小心: 多数维修只能由经认证的维修技术人员进行。您只能根据产品说明文件中的授权,或者在联机或电话服务和支持团队的指 导下进行故障排除和简单维修。任何未经 Dell 授权的服务所导致的损坏均不在保修范围之列。请阅读并遵循产品附带的安全说 明。 1 关闭系统,包括所有已连接的外围设备,并断开系统与电源插座和外围设备的连接。 2 打开系统护盖。 3 在系统板上找到 HBA 卡 4 断开存储控制器电缆连接: 注: 拆装系统内部组件时,建议始终使用防静电垫和防静电腕带。 a 卸下两颗将电缆固定到卡上的螺钉。 b 拿住电缆连接器两端的电缆,然后拉动电缆使其脱离 HBA 卡。 5 调整插卡的角度,使插卡另一端从系统板上的存储控制器卡固定器松脱。 6 如果适用,请装回存储控制器卡,然后连接电缆。有关安装卡的详细信息,请参阅安装 HBA330 微型单片机控制器。 7 合上系统护盖。 8 将系统重新连接至电源插座,并开启系统和所有已连接的外围设备的电源。
图 12: 拆卸和安装 HBA330 微型单片机卡 1 存储控制器电缆 2 存储控制器卡 3 存储控制器卡固定器 4 存储控制器固定挂钩 安装 HBA330 微型单片机控制器 小心: 多数维修只能由经认证的维修技术人员进行。您只能根据产品说明文件中的授权,或者在联机或电话服务和支持团队的指 导下进行故障排除和简单维修。任何未经 Dell 授权的服务所导致的损坏均不在保修范围之列。请阅读并遵循产品附带的安全说 明。 1 关闭系统,包括所有连接的外围设备,并断开系统与电源插座的连接。 2 打开系统。 3 在系统板上找到存储控制器卡固定挂钩,然后将插卡的一端以一定角度滑入存储控制器固定挂钩。 4 放下存储控制器卡,以将卡上的螺孔与连接器上的螺孔对齐。 5 连接存储控制器电缆: 注: 拆装系统内部组件时,建议始终使用防静电垫和防静电腕带。 小心: 为防止损坏卡,您必须仅握住该卡的边缘。 6 a 拿住电缆连接器两端的电缆,然后连接至 HBA 卡。 b 拧紧用于将缆线和卡固定至系统板的螺钉。 将 SAS 数据电缆连接器连接至卡。 注: 确保按照缆线上的连接器标签连接缆线。
7 通过卡上的固定夹和机箱内部的通道进行布线 SAS 数据电缆。 8 将标有“SAS A”的连接器连接至背板上的连接器 SAS A,将标有“SAS B”的连接器连接至背板上的连接器 SAS B。 9 合上系统.
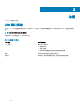
5 驱动程序安装 Dell HBA 卡需要软件驱动程序,才能在受支持的操作系统上使用。 本章包含安装 Dell HBA 控制器的驱动程序的步骤。 注: 适用于 VMware ESXi 的 Dell HBA 控制器的驱动程序在从戴尔支持站点上下载的 VMware ESXi ISO 映像套件中提供。有关更 多信息,请参阅 Vmware 文档,网址:Dell.
从 Dell Systems Service and Diagnostic Tools 介质下载驱动程 序 要从 Dell Systems Service and Diagnostic Tools 介质下载驱动程序,请执行以下操作: 1 将 Dell Systems Service and Diagnostics Tools 介质放入系统。 将显示欢迎使用 Dell 服务和诊断公用程序屏幕。 2 选择您的系统型号和操作系统。 3 单击 Continue(继续)。 4 从显示的驱动程序列表中选择需要的驱动程序。 5 选择自解压 zip 文件,然后单击运行。 6 将驱动程序复制到软盘驱动器、CD、DVD 或 USB 驱动器。 7 为您所需的所有驱动程序重复步骤 1 至 6。 Windows 驱动程序安装 安装用于 Dell HBA 控制器的 Windows 驱动程序之前,首先必须创建设备驱动程序介质。 • 请阅读随操作系统附带的 Microsoft Getting Started(使用入门)说明文件。 • 确保系统具有最新的 BIOS、固件和驱动程序更新。如果需要,从 Dell.
4 单击 Next(下一步)。 5 在查找设备驱动程序屏幕中,选择搜索适于我的设备的驱动程序选项,然后单击下一步。 6 浏览并从查找驱动程序文件屏幕中选择驱动程序。 7 单击 Next(下一步)。 向导将检测并安装正确的设备驱动程序。 8 单击完成以完成安装。 9 在屏幕提示时重新启动系统。 为现有 Windows Server 2012 R2 及更高版本更新 Dell HBA 控 制器驱动程序 注: 更新驱动程序之前,请关闭系统上的所有应用程序。 1 放入包含驱动程序的介质(CD、DVD 或 USB 驱动器)。 2 单击开始 > 设置 > 控制面板 > 系统。 将显示系统属性屏幕。 注: 系统的路径可能会因操作系统系列不同而不同。 3 单击硬件选项卡。 4 单击设备管理器。 将显示设备管理器屏幕。 注: 设备管理器的路径可能会因操作系统系列不同而不同。 5 通过双击条目或单击 SCSI 和 RAID 控制器旁边的加号,展开 SCSI 和 RAID 控制器。 注: 在 Windows Server 2012、Windows Server 2012 R2 和 Windo
安装或更新支持 KMOD 的 RPM 驱动程序软件包 注: 此步骤适用于 Red Hat Enterprise Linux 6.
6 BIOS 配置公用程序 BIOS 配置实用程序 Ctrl+C 是嵌入在 Dell HBA 卡上的存储管理应用程序。Ctrl+C 功能独立于操作系统。 注: 您不能使用外部连接的存储设备引导您的系统。 注: 当您引导系统时,按 Ctrl+C 可加载适用于 HBA 控制器的 BIOS 配置实用程序。BIOS 配置实用程序仅在您选择引导设备后加 载。BIOS 配置实用程序 Ctrl+C 不受 HBA330 MMZ 和 HBA330 MX 支持。 注: 使用 BIOS 配置实用程序 Ctrl+C 可进行初始设置和灾难恢复。您可以通过 Dell OpenManage 存储管理应用程序使用高级功 能。 注: 使用 Ctrl+C 进入 BIOS 配置实用程序将自动导致引导顺序更改。建议您在使用 Ctrl+C 后重新配置引导顺序。 以下部分提供了关于使用 BIOS 配置实用程序 Ctrl+C 的信息。有关更多信息,请参阅联机帮助选项:在 BIOS 配置实用程序 Ctrl+C 中按 F1。 主题: • 进入 BIOS 配置公用程序 • 退出配置公用程序 • 设置引导卷 进入 BIOS 配置公用程序 引导系统时,
设置引导卷 执行以下步骤可在配置公用程序中设置引导卷。 1 进入 BIOS 配置公用程序。 Device Settings(设备设置)屏幕将显示 Dell HBA 卡的列表。 注: 进入 BIOS 配置实用程序 Ctrl+C 后,确保提供系统中所有可用设备,以设置 BIOS 引导顺序为每次进入 BIOS configuration Utility Ctrl+C 时顺序都会重置。 2 选择任意 Dell HBA 卡,然后按 Enter 键。例如,选择 Dell HBA330 Mini 并按 Enter 键。 此时将会显示选定的 Dell HBA 卡控制器属性。 3 使用箭头键选择 SAS Topology(SAS 拓扑),然后按 Enter 键。 4 选择 Direct Attach Devices(直连设备),然后按 Enter 键。 此时将会显示直连设备控制器属性和设备信息列表。 5 要查看引导选择键列表,请按 Alt+M。 6 要选择或取消选择某直连设备作为非首选设备,请按 Alt+B。 7 要选择或取消选择某设备作为备用引导直连设备,请按 Alt+A。 BIOS 配置公用程序
7 人机接口基础架构 (HII) 配置公用程序 HII 配置公用程序是用来查看和设置设备配置的标准方式。HII 配置公用程序提供预操作系统功能和管理,其中包括: • 查看物理设备属性。 • 运行物理设备操作。 • 检索调试信息。 主题: • 进入 HII 配置公用程序 • 退出 HII 配置公用程序 • 在 HII 配置实用工具中选择引导设备 • 导航到 Dell HBA 配置实用工具 • 管理物理磁盘驱动器 进入 HII 配置公用程序 请遵循以下步骤进入 HII 配置公用程序: 1 打开系统电源。 2 在系统启动时按 F2 以进入 System Setup(系统设置)。 在 System Setup Main Menu (系统设置主菜单)屏幕上显示菜单列表。 3 单击 Device Settings(设备设置)。 要访问该控制器的管理菜单,请使用箭头键或鼠标。 注: 有关所有选项的详细信息,请单击浏览器屏幕右上角的 Help(帮助)。 退出 HII 配置公用程序 要退出 HII 配置公用程序,请单击 HII 配置公用程序 System Setup(系统设置)菜单右
注: 这是针对传统 BIOS 模式的引导设备。如果服务器处于 UEFI 引导模式,您将需要在系统 BIOS 中设置引导设备。 在 HII 引导设备中选择物理磁盘驱动器操作 此表描述了 Select Physical Disk Operations (选择物理磁盘操作)屏幕的详细信息: 菜单项 说明 Select Physical Disk 允许您选择计算机的物理磁盘。 (选择物理磁盘) 允许您将所选设备设置为引导设备。 legacy OpROM Bootdevice Write Cache setting 允许您启用或禁用该功能。 导航到 Dell HBA 配置实用工具 1 进入 HII 配置实用工具。请参阅进入 HII 配置实用工具。 Device Settings(设备设置)屏幕将显示 NIC 端口和 Dell HBA 配置实用工具的列表。 2 要访问 Dell HBA 配置实用工具,请单击 Dell HBA configuration utility(Dell HBA 配置实用工具)。 此时将显示 Configuration Options(配置选项)的列表: • 控制器管理 •
菜单项 说明 默认 NVData 版本 表示默认 NVData 的版本。 永久性 NVData 版 本 表示永久性 NVData 的版本。 更改控制器属性 1 进入 Dell HBA Configuration Utility(Dell HBA 配置实用工具)。请参阅 导航到 Dell HBA 配置实用工具。 2 单击 Controller Management(控制器管理) > Change Controller Properties(更改控制器属性)。 您可以 Enable(启用)或 Disable(禁用)传统的 BIOS。 管理物理磁盘驱动器 物理磁盘驱动器管理允许您管理、查看和执行物理磁盘驱动器的属性。 查看物理磁盘驱动器属性 View physical disk properties(查看物理磁盘属性) 屏幕中,您可以查看物理磁盘驱动器的属性。 在 System Setup Main Menu(系统设置主菜单)中,单击 Device Settings(设备设置) > Dell HBA Configuration Utility(Dell HBA 配置实用工具) > Physic
菜单项 说明 硬盘驱动器 RPM 显示硬盘驱动器的 rpm 物理链接速率 显示物理链接速率 逻辑链接速率 显示逻辑链接速率。 选择物理磁盘驱动器操作 1 启动 Dell HBA Configuration Utility(Dell HBA 配置实用工具)。请参阅 导航到 Dell HBA 配置实用工具。 2 单击 Physical Disk Management(物理磁盘管理) > Select Physical Disk Operations(选择物理磁盘操作)。 此表描述了 Select Physical Disk Operations (选择物理磁盘操作)屏幕的详细信息: 菜单项 说明 Select Physical Disk 允许您选择计算机的物理磁盘。 (选择物理磁盘) 启动 Locate/Blink (查找/闪烁) 允许您激活驱动器的 LED 指示灯。 允许您取消激活驱动器的 LED 指示灯。 停止 Locate/ Unblink(查找/取消 闪烁) 人机接口基础架构 (HII) 配置公用程序 35
8 更新固件 执行以下步骤来下载并运行 DUP 来更新固件: 1 2 导航到 Dell.
9 获得帮助 您可以通过联系 Dell 获得 Dell 产品的帮助,或发送关于产品文档的反馈。 联系 Dell 注: 如果没有活动的 Internet 连接,您可以在购货发票、装箱单、帐单或 Dell 产品目录上查找联系信息。 Dell 提供了若干联机及电话支持和服务选项。服务会因所在国家和地区以及产品的不同而有所差异,您所在的地区可能不提供某些服 务。如要联系 Dell 解决有关销售、技术支持或客户服务问题: 访问 Dell.