
Owners Manual


Dell Integrated Systems for Oracle Database - Oracle Enterprise Manager Integration Guide v1.0
11
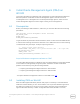
h. Move the cursor to Name Server 1 and add the appropriate DNS server IP
address.
NOTE: The DNS IP address is either the customer’s existing DNS server IP address or the
new one set up in WinVM.
i. Press ALT + u to change the Routing (customer’s network gateway) IP
address of the DAAD Node
j. Press ALT + o to ensure the configuration changes done in previous steps
are accepted and to close the dialogue box.
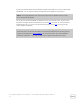
k. At the CLI, enter setup cluster to view the Setup dialog box for
cluster configuration.
l. Press Tab to switch to the Hostname/DNS screen.
m. Press tab and select the Enter Cluster IP address field to
change the IP address of the cluster.
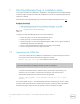
NOTE: Customers need not change the cluster name of the DAAD, unless it is necessary
to conform to their DNS standards and policies.
n. Repeat step j to save changes and to return to CLI.
o. Enter maintenance off
5. Repeat steps 2 to 4 on each of the remaining DAAD nodes.
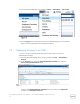
6. In the DNS server, add the DNS (A) records for the cluster names of all the
DAAD HA pairs and map it to their respective public cluster IP addresses that
was assigned in step 4.m. This will establish the FQDN for each of the DAAD HA
pairs. For example, daadcluster1.domain.local, which in turn will map to
their respective cluster IP addresses.
The following sections provide the detailed procedures for the installation, configuration,
and integration of each of the management software.