
Owners Manual

Dell Integrated Systems for Oracle Database - Oracle Enterprise Manager Integration Guide v1.0
31
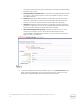
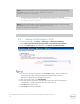
After successful execution of the command the command, the following message is
displayed:
Agent deployment successful, The Agent is configured
successfully.Finished product -- specific root actions.
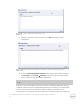
Note: Repeat the step on the other DAAD node and view the results. If it is successful, go
to the next step. Else, check connections between the nodes and continue.
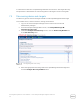
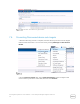
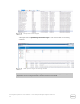
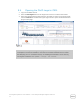
After successful installation on DAAD nodes, go to the OEM console and see the DAAD
nodes under the All Targets tab.
DAAD nodes available under all Targets tab.
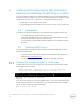
Deploying the DAAD Plug-in on the OEM server
1. In OMS server, log in as root user, and copy the downloaded DAAD plug-in’s opar
file to the /tmp location
2. Change the permissions of that file by running the following commands:
$chown oracle:oinstall
/tmp/12.1.0.17.0_fusion.ion.ion_2000_0.opar
$chmod 775 /tmp/12.1.0.17.0_fusion.ion.ion_2000_0.opar
3. Log in to the emcli
$./emcli login username=sysman
$./emcli sync
4. To deploy the Plug-in to both the server and Agent, you must import the opar file
into OMS server repository by running the following command:
$./emcli import_update --
file=/tmp/12.1.0.17.0_fusion.ion.ion_2000_0.opar -- omslocal
$./emcli setup -- url=https://d***.b***.com:7803/em --
username=sysman -- password=ora***
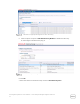
5. Deploy the plug-in to the server by running the command:
$./emcli deploy_plugin_on_server -- plugin=fusionio.ion.ion1 --
sys_password=del**
NOTE: This process will take some time. To get the current status, run the following
command: $./emcli get_plugin_deployment_status –
plugin_id=fusionio.ion.ion1
6. Deploy the plug-in on Agent (each of the DAAD nodes) by running the following
command:
$./emcli deploy_plugin_on_agent --
agent_names=t**t.b****.com:3872 -- plugin=fusionio.ion.ion1