
Administrator Guide


available on the network after you install the VMware Horizon 6. It provides virtualized or hosted desktops and applications through a single
platform to end users. To connect to a virtual desktop, use the VMware Horizon Client window.
To open and use the VMware Horizon Client window:
1 Log in as a user or an administrator.
2 Access the VMware Horizon Client window using one of the following options:
• From the Start Menu, click VMware > VMware Horizon Client.
• Double-click the VMware Horizon Client icon on the desktop.
The VMware Horizon Client window is displayed.
3 In the VMware Horizon Client window, use the following guidelines:
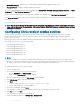
a To add a new server connection, either click the New Server option or double-click the Add Server icon in the VMware Horizon
Client window.
The VMware Horizon Client dialog box is displayed.
b In the VMware Horizon Client dialog box, type a host name or an IP address of a VMware Horizon Connection Server in the
connection server box.
c Click Connect.
d In the Login dialog box, enter the user name and login password in the respective boxes.
e From the Domain drop-down list, select the domain where the server is located.
f Click Login.
The VMware Horizon Client connects to the selected desktop. After connection is established, the list of published desktops is
displayed.
g Right-click the particular application or the desktop icon, and then click Launch to connect to that application or desktop.
For more information on VMware Horizon Client, see www.vmware.com.
NOTE
:
Certicate checking mode—Certicate checking mode determines how the client proceeds when the client cannot verify
that your connection to the server is secure. Dell recommends that you do not change this setting unless instructed by your
system administrator.
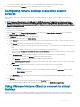
To access the certicate checking mode, click the icon on the upper-right corner of the window, and then click Congure
SSL from the drop-down list. In the VMware Horizon Client SSL conguration dialog box, select from any of the following
options based on your requirements:
• Never connect to untrusted servers
• Warn before connecting to untrusted servers
• Do not verify server identify certicates
Using Ericom Connect and WebConnect client
Ericom Connect and WebConnect client provides you with remote access to Windows desktops and applications from any compatible
phone or tablet. It is dedicated for managed broker access. Ericom Connect and PowerTerm WebConnect connections use the Secure
Gateway as the address. You can access the Ericom Connect-WebConnect client either as a stand-alone application or on a network.
To access the Ericom Connect and WebConnect client as a stand-alone application:
1 Log in as a user or an administrator.
2 Go to Start > Ericom Connect-WebConnect client > Ericom Connect-WebConnect client or double-click the Ericom Connect-
WebConnect client icon on the desktop.
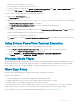
The Ericom AccessPad login window is displayed.
3 In the Ericom AccessPad login window, enter your credentials, and click Login.
The DELL – Ericom Application Zone window is displayed.
NOTE
: By default, the Ericom AccessPad login window is displayed. To set the UI to your preferred language, click the
Globe icon in the lower-right corner of the window, and select your preferred language from the drop-down list.
4 In the DELL – Ericom Application Zone window, published applications such as the Blaze demo server, RDP demo server, the
Ericom server, and Paint are displayed.
14
Accessible applications