
Administrator Guide


1 Enter the BIOS mode.
2 In the TPM conguration, set Change TPM Status to Clear, and then apply the settings.
3 Reboot the device, and enter the BIOS mode again.
4 Set Change TPM Status to Enable and Activate.
To encrypt the ash memory using TPM and BitLocker, do the following:
1 Enable TPM from the BIOS menu.
2 Modify the TPM related part of the script, based on the imaging solution.
3 Uncomment the below lines and update the pin for TPM encryption in the Custom FICore imaging method in C:\Windows\Setup
\CustomSysprep\Modules\Post_CustomSysprep.psm1
• #cd C:\windows\setup\Tools\TPM\
• #.\TPM_enable.ps1 -pin 1234
4 Uncomment the below lines and update the pin for TPM encryption for SCCM push in C:\Windows\Setup\CongMgrSysprep
\Modules\Admin_CongMgrSysprep.psm1
• #cd C:\windows\setup\Tools\TPM\
• #.\TPM_enable.ps1 -pin 1234
5 Uncomment the below lines and update the pin for TPM encryption in Non-Factory environment (WDM,WSI, USB Imaging solution) in
Post_CustomSysprep.psm1
• #cd C:\windows\setup\Tools\TPM\
• #.\TPM_enable.ps1 -pin 1234
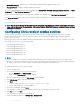
Conguring Bluetooth connections
You can use your thin client device with other Bluetooth enabled devices, if it has Bluetooth capability.
NOTE
:
To retain your settings, disable the Unied Write Filter (UWF) and congure Application Launch Manager and xData Cleanup Manager.
For more information, see Before Conguring your thin clients.
To congure Bluetooth connections, see Connect a Bluetooth device at support.microsoft.com.
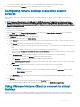
Conguring wireless local area network settings
To congure the wireless local area network settings, use Setup a new connection or network window, if wireless support is allowed on
the thin client device.
To congure the wireless local area network settings, see Setting up a wireless network at support.microsoft.com.
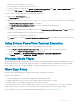
Using custom elds
To enter conguration strings for use by the Wyse Device Manager (WDM) and Wyse Management Suite (WMS), use the Custom Fields
dialog box. The conguration strings can contain information such as location, user, administrator, and so on.
To enter the information that can be used by the WDM and Wyse Management Suite server, do the following:
1 Log in as an administrator.
2 Go to Start > Dell Thin Client Application.
The Dell Thin Client Application window is displayed.
3 On the left navigation bar, click Custom Fields.
4 Enter the custom eld information in the custom eld boxes, and click Apply.
The custom eld information is transferred to the Windows registry which is then available to the WDM/WMS server.
Administrative features
19