
Administrator Guide


To edit the default settings of a standard user or administrator account:
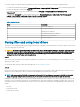
1 On the User Accounts window, click Manage another account.
The Manage Accounts window is displayed.
2 To change as required, select User.
The Change an Account window is displayed. Now make the desired changes using the links provided.
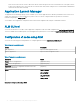
Conguring user proles
Open the User Accounts window as described in Managing User Accounts.
CAUTION:
• By default, all application settings are set to cache to C drive. Dell recommends that you cache to the RAM Disk Z drive as is preset
in the account proles to avoid overowing the Unied Write Filter cache.
• It is recommended that other applications available to new and existing users be congured to prevent writing to the local le
system because of the limited size of the disk space. It is recommended that care be exercised when changing conguration
settings of the factory-installed applications.
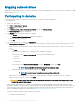
To congure the default admin and user proles stored on the thin client:
1 On the User Accounts window, click Congure Advanced User Prole Properties.
The User Proles dialog box is displayed.
2 Use the command buttons such as Change Type, Delete, and Copy to as described in the Microsoft documentation provided
throughout the wizards.
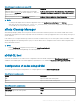
Changing the computer name of a thin client
Administrators can change the computer name of a thin client. The computer name information and the Terminal Services Client Access
License (TSCAL) are preserved regardless of the Unied Write Filter state (enabled or disabled). This maintains the specic computer
identity information and facilitates the image management of the thin client.
To change the computer name of a thin client device, see
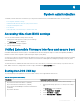
1 Log in as an administrator.
2 Go to Start > Control Panel > System.
The System window is displayed.
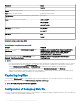
3 In the Computer name, domain, and workgroup settings section, click Change Settings.
The System Properties dialog box is displayed.
4 Click Change to rename the computer name.
5 In the Computer Name window, type the name for the thin client device in the Computer name eld, and click OK.
6 In the Conrmation dialog box, click OK to restart for applying the changes.
7 Click Close, and then click Restart Now to apply the changes.
38
Additional administrator utility and settings information