
Administrator Guide


Thin clients Guidelines to boot the thin client
5 Save the changes and exit.
6 From the pop-up menu, select your USB key, and boot as
Normal.
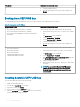
Booting from UEFI USB key
The following table provides the guidelines to boot from a UEFI USB key on the supported thin client devices:
Table 11. Booting from a UEFI USB key
Supported thin clients Guidelines to boot the thin client
• Wyse 5020 Thin Client with Win10 IoT (D90Q10)
• Wyse 7020 Thin Client with Win10 IoT (Z90Q10)
• Wyse 7020 Accelerated Graphics Thin Client with Win10 IoT
(Z90QQ10)
To boot the thin client from a UEFI USB key, do the following:
1 During system start up, press Delete when you see a Wyse
logo.
The BIOS Setup screen is displayed.
2 Set the Secure Boot to Disabled.
3 Set the Boot from USB to Enabled.
4 Save the changes and exit.
5 From the pop-up menu, select your USB key, and boot as
Normal.
• Wyse 5470 Thin Client
• Wyse 5060 Thin Client
• Wyse 7040 Thin Client
• Latitude 3480 Mobile Thin Client
• Latitude 5280 Mobile Thin Client
To boot the thin client from a UEFI USB key, do the following:
1 During system start-up, press F2 when you see a Dell logo.
The BIOS Setup screen is displayed.
2 Set the Secure Boot to Disabled.
3 Click System Conguration > USB Conguration, and select
the Enable USB Boot Support check box.
4 Save the changes and exit.
5
During system start up, press F12, and select USB key in the
boot menu.
NOTE: You can boot the Windows 10 IoT Enterprise
(WIE10) 64–bit devices if the secure boot is set to
Disabled. However for security purposes, this is not
recommended.
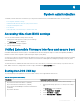
Creating bootable UEFI USB key
To create a bootable UEFI USB key, do the following:
1 Obtain an executable UEFI shell.
2 Save the le as bootx64.e on your client.
3 Format the USB key with FAT32.
4 In the USB key, create the \e\boot directory.
5 Copy the bootx64.e le to the \e\boot directory on the USB key.
The bootable UEFI USB key is created.
40
System administration