Projector Dell™ M410HD Manual do Utilizador
Notas, Advertências e Chamadas de Atenção NOTA: Uma NOTA assinala informação que o ajuda a tirar o máximo partido do seu projector. ADVERTÊNCIA: Uma ADVERTÊNCIA assinala quer potenciais danos ao nível do hardware quer a perda de dados e diz-lhe como evitar o problema. ATENÇÃO: Uma chamada de ATENÇÃO assinala a possibilidade de ocorrência de danos materiais, de ferimentos físicos ou o risco de morte. ____________________ As informações constantes deste documento estão sujeitas a alterações sem aviso prévio.
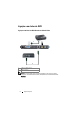
Índice 1 O seu Projector Dell . . . . . . . . . . . . . . . . . . . . . . . . . . . . . . . . . . . . . . . . . . 5 Sobre o Projector 2 ........................................ 6 Ligar o Projector . . . . . . . . . . . . . . . . . . . . . . . . . . . . . . . . . . . . . . . . . . . . . . . 8 Ligação ao Computador . . . . . . . . . . . . . . . . . . . . . . . . . . . . . . . . . . . . . . . 9 Ligar um Computador Usando um Cabo VGA . . . . . . . . . . 9 Ligação a um leitor de DVD . . . . . . . . . . . .
Instalação das Pilhas do Controlo Remoto . . . . . . . . . . . . . . . . . 24 Distância de Funcionamento Com o Controlo Remoto . . . . 25 Utilização da Informação Apresentada no Ecrã (OSD) . . . . 26 Menu Principal . . . . . . . . . . . . . . . . . . . . . . . . . . . . . . . . . . . . . . . . . . 26 AJUSTAMENTO AUTOMÁTICO . . . . . . . . . . . . . . . . . . . . . . . . 26 SELECCIONAR ENTRADA . . . . . . . . . . . . . . . . . . . . . . . . . . . . . . . 27 IMAGEM (no modo PC) . . . . . . . . . . . . . . . .
1 O seu Projector Dell O seu projector vem acompanhado de todos os itens mostrados em baixo. Certifique-se de que tem todos os itens e contacte a Dell™ caso algum deles esteja em falta.
Sobre o Projector Vista Superior Vista Inferior 1 8 6 10 2 3 5 7 4 9 1 Painel de controlo 2 Botão de zoom 3 Anel de focagem 4 Lente 5 Botão de elevação para ajustamentos de altura 6 Receptor IV (Infravermelhos) 7 Tampa da lente 8 Tampa da lâmpada 9 Roda para ajuste da inclinação 10 Pé elevatório ATENÇÃO: Instruções de Segurança 1 Não utilize o projector na proximidade de electrodomésticos que gerem muito calor. 2 Não utilize o projector em áreas onde exista demasiado pó.
Não olhe directamente para a lente enquanto o projector estiver ligado uma vez que poderá sofrer danos à visão. 8 Não coloque quaisquer objectos próximo ou à frente do projector, nem tape a lente, enquanto o projector estiver ligado uma vez que o calor pode ocasionar o derretimento ou incêndio do objecto. NOTA: • Para mais informações, consulte as Informações de Segurança incluídas juntamente com o projector.
2 Ligar o Projector 1 2 3 4 5 6 7 8 9 1 Conector remoto USB 6 Conector de saída de áudio 2 Conector de entrada VGA (Dsub) 7 Conector de entrada de áudio 3 Conector HDMI 8 Ranhura de cabo de segurança 4 Conector S-Vídeo 9 Conector do cabo de alimentação 5 Conector de vídeo composto ATENÇÃO: Antes de iniciar qualquer dos procedimentos desta secção, siga as Instruções de Segurança conforme descrito em página 6 .
Ligação ao Computador Ligar um Computador Usando um Cabo VGA 1 2 1 Cabo de alimentação 2 Cabo VGA para VGA 3 Cabo USB-A para USB-B 3 NOTA: O cabo USB não é fornecido juntamente com o projector. NOTA: O cabo USB deve estar conectado se pretender utilizar as funcionalidades Página Acima e Página Abaixo no controlo remoto.
Ligação a um leitor de DVD Ligação a um Leitor de DVD Usando um Cabo S-Vídeo 1 2 1 Cabo de alimentação 2 Cabo S-Vídeo NOTA: O cabo S-vídeo não é fornecido juntamente com o projector. Pode comprar o cabo de Extensão S-Vídeo (15 mts/30 mts) no sítio Web da Dell em dell.com.
Ligação a um Leitor de DVDs com um Cabo de Sinal Composto 1 2 1 Cabo de alimentação 2 Cabo de sinal de vídeo composto NOTA: O cabo de Vídeo Composto não é fornecido juntamente com o projector. Pode comprar o cabo de Extensão Vídeo Composto (15 mts/30 mts) no sítio Web da Dell em dell.com.
Ligação a um Leitor de DVDs com um Cabo de Sinal Componente 1 2 1 Cabo de alimentação 2 Cabo de Vídeo VGA para Componente NOTA: O cabo de VGA para Vídeo Componente não é fornecido juntamente com o projector. Pode comprar o cabo de Extensão VGA para Vídeo Componente (15mts/30mts) no sítio Web da Dell em dell.com.
Ligação a um Leitor de DVDs Usando um Cabo HDMI 1 2 1 Cabo de alimentação 2 Cabo de HDMI NOTA: O cabo de HDMI não é fornecido juntamente com o projector.
Utilização do Projector 3 Ligar o Projector NOTA: Ligue o projector antes de ligar a fonte (computador, leitor de DVD, etc.). O LED do botão Alimentação pisca em azul até ser premido. 1 Remova a tampa da lente. 2 Ligue o cabo de alimentação e os cabos de sinal apropriados. Para mais informações sobre a ligação do projector, consulte a secção "Ligar o Projector" na página 8.
3 Para desligar o projector rapidamente, prima o botão Alimentação e mantenha durante 1 segundo enquanto as ventoinhas de arrefecimento ainda estiverem em funcionamento. NOTA: Antes de ligar o projector novamente, aguarde 60 segundos para permitir que a temperatura interna estabilize. 4 Desligue o cabo de alimentação da tomada eléctrica e desligue o projector. Ajustamento da Imagem Projectada Elevar o Projector 1 Prima o botão de Elevação.
Ajustamento do Zoom e da Focagem do Projector ATENÇÃO: Para evitar danos no projector, certifique-se de que a lente de zoom e o pé elevatório estão completamente retraídos antes de mover o projector ou antes de o colocar na respectiva mala de transporte. 1 Rode o botão de zoom para aplicar mais zoom ou menos zoom. 2 Rode o anel de focagem até a imagem ficar nítida. O projector foca a partir de distâncias compreendidas entre 1 m e 12 m (3,28 e 39,37 pés).
Ajustamento do Tamanho da Imagem Projectada 361"(916,94 cm) ( 8 " m) 32 2 c ,1 3 83 270"(685,80 cm) 210"(533,40 cm) ( 1 " m) 19 4 c 5,1 8 4 ( 150"(381,00 cm) 7 " m) 13 8 c 7,9 34 90"(288,60cm) ) " 8 2 8 cm ,2 9,84'(3,0m) 16,40'(5,0m) 22,97'(7,0m) ( 29,53'(9,0m) 39,37'(12,0m) Distância do projector ao ecrã ( 6 " m) 24 4 c 4,8 2 6 8 20 30"(76,20 cm) 27,2" (69,09 cm) 3,28'(1,0m) Utilização do Projector 17
Ecrã (Diagonal) Máx. 30" (76,20 cm) 90" (288,60cm) Mín. 27,2" (69,09 cm) 82" 137" 191" 246" 328" (208,28 cm) (347,98 cm) (485,14 cm) (624,84 cm) (833,12 cm) Max.
1 LED LAMP (lâmpada) Se o indicador LAMP âmbar estiver aceso ou intermitente, pode ter ocorrido um dos seguintes problemas: • A lâmpada está a atingir o fim de vida útil. • O modulo de lâmpada não está devidamente instalado • Erro do controlador da lâmpada • Erro da roda de cores Para mais informações, consulte as secções "Resolução de Problemas do Projector" na página 41 e "Sinais de Orientação" na página 45.
7 Baixo / Ajustamento Keystone Prima para navegar pelos itens do menu OSD (Apresentados no Ecrã). Prima para ajustar a distorção da imagem provocada pela inclinação do projector (+40/-35 graus). 8 Botão Menu 9 Esquerda Prima para activar a apresentação de informação no ecrã (OSD). Utilize os botões de direcção e o botão Menu para navegar pela informação no ecrã. / Origem Prima para navegar pelos itens do menu OSD (Apresentados no Ecrã).
Utilizar o Controlo Remoto 1 11 2 12 3 4 13 5 14 6 7 15 16 8 17 18 9 19 10 20 1 Botão de alimentação Liga e desliga o projector. Para mais informações, consulte as secções "Ligar o Projector" na página 14 e "Desligar o Projector" na página 14. 2 Botão Enter Prima para confirmar a selecção. 3 Direita Prima para navegar pelos itens do menu OSD (Apresentados no Ecrã). 4 Baixo Prima para navegar pelos itens do menu OSD (Apresentados no Ecrã).
6 Página Acima Prima para ir para a página anterior. NOTA: O cabo USB deve estar conectado se quiser utilizar a funcionalidade Página Acima. 7 Botão de corte do som Prima para cortar ou repor o som ao nível do altifalante do projector. 8 Página Abaixo Prima para ir para a página seguinte. NOTA: O cabo USB deve estar conectado se quiser utilizar a funcionalidade Página Abaixo.
17 Botão de ajustamento Keystone Prima para ajustar a distorção da imagem provocada pela inclinação do projector (+40/-35 graus). 18 Botão Origem Prima para alternar entre as origens de sinal RGB Analógico, Composto, Componente (YPbPr, via VGA), HDMI e S-Vídeo. 19 Botão Ajustamento Automático Prima para sincronizar o projector com a origem de entrada do sinal. O botão Ajustamento Automático não funciona se houver informação no ecrã.
Instalação das Pilhas do Controlo Remoto NOTA: Remova as pilhas do controlo remoto quando este não estiver em uso. 1 Prima a patilha para tirar a tampa do compartimento das 1 2 Verifique a indicação de polaridade (+/-) nas pilhas. 2 3 Insira as pilhas e alinhe a polaridade correctamente 3 pilhas. consoante as indicações no compartimento das pilhas. NOTA: Não misture tipos de pilhas diferentes nem utilize pilhas novas e pilhas novas em conjunto. 4 Volte a inserir a tampa do compartimento das pilhas.
Distância de Funcionamento Com o Controlo Remoto Distância de Funcionamento Ângulo ±45° Distância Distância Ângulo 10m/32,8feet Ângulo Di stâ nc ia NOTA: A distância de funcionamento efcetiva pode variar ligeiramente do apresentado. Quando as pilhas estiverem fracas o controlo remoto pode não operar o projector devidamente.
Utilização da Informação Apresentada no Ecrã (OSD) • O projector apresenta um menu OSD em vários idiomas, podendo esta ser apresentada com ou sem uma origem de entrada de sinal presente. • Para navegar pelos separadores no Menu Principal, prima os botões ou no painel de controlo do seu projector ou no controlo remoto. • Para seleccionar um menu secundário, prima o botão no painel de controlo do seu projector ou no controlo remoto.
SELECCIONAR ENTRADA O menu de selecção de Entrada permite-lhe seleccionar a fonte de entrada do seu projector. DET AUT ORIGEM—Seleccione a opção Desact (predefinição) para bloquear o sinal de entrada actual. Se premir o botão Origem quando o modo Det aut origem estiver definido para Desact, é possível seleccionar o sinal de entrada manualmente. Seleccione a opção Activ para detectar automaticamente os sinais de entrada disponíveis.
IMAGEM (no modo PC) Usando o menu Imagem , pode ajustar as definições de apresentação do seu projector. O menu Imagem, faculta as seguintes opções: MODO DE VíDEO—Permite-lhe optimizar a imagem apresentada: Apresentação, Brilho, Vídeo, sRGB (proporciona uma representação de cor mais apropriada), e Person. (definição das definições preferidas). Se ajustar as definições de Brilho, Contraste, Saturação, Nitidez, Tonalidade, e Avançado, o projector muda automaticamente para a opção Person..
automaticamente para a opção Person.. NOTA: Se ajustar as definições de Brilho, Contraste, Saturação, Nitidez, Tonalidade, e Avançado, o projector muda automaticamente para a opção Person.. e para ajustar o brilho da imagem. BRILHO—Utilize e para ajustar o contraste de apresentação. CONTRASTE—Utilize ATURA ÇÃ O —Permite ajustar a origem do sinal de vídeo entre preto e do branco e S cor saturada. Prima o botão para reduzir a quantidade de cor na imagem e o botão para aumentar a quantidade de cor na imagem.
ESPAÇO DE COR—Permite-lhe seleccionar o espaço de cor, as opções são: RGB, YCbCr, e YPbPr. ECRÃ (no modo PC) Usando o menu Ecrã , pode ajustar as definições de apresentação do seu projector. O menu Imagem, faculta as seguintes opções: REL. DE ASPECTO—Permite-lhe seleccionar uma relação de aspecto para ajustar a forma como a imagem é apresentada. • Original — Seleccione Original para manter a relação de aspecto da imagem projectada de acordo com a origem de entrada.
POSIÇÃO VERTICAL—Prima para mover a imagem para baixo e para mover a imagem para cima. FREQUÊNCIA—Permite-lhe alterar a frequência de relógio da apresentação dos dados de forma a corresponder à frequência da placa gráfica do seu computador. Se vir uma onda vertical trémula, utilize a opção Frequência para minimizar o aparecimento de tais barras. Este é apenas um ajuste grosseiro. RASTREAMENTO—Esta opção sincroniza a fase do sinal com a placa gráfica.
LÂMPADA Usando o menu LÂMPADA, pode ajustar as definições de apresentação do seu projector. O menu Lâmpada, faculta as seguintes opções: MODO DE LÂMPADA—Permite seleccionar entre os modos Normal e Eco. O modo Normal funciona no nível máximo. O modo ECO funciona a um nível mínimo, o que prolonga a vida útil da lâmpada e permite-lhe desfrutar de um funcionamento mais silencioso com uma redução da luminância ao nível do ecrã. DUR.
IDIOMA—Permite definir o idioma do OSD. Prima para activar o menu Idioma . MODO DO PROJECTOR—Permite-lhe seleccionar o modo do projector, consoante a forma como o projector estiver montado. • Projecção frontal-em cima de uma secretária – Esta é a opção predefinida. • Projecção posterior-em cima de uma secretária — O projector inverte a imagem para que possa projectar por detrás de um ecrã translúcido. KEYSTONE AUTO.
INFORMAÇÕES O menu de Informações apresenta as definições actuais do projector. OUTROS O menu Outros permite alterar as definições de Menu, Ecrã, Áudio, Alimentação, Segurança, e Legendas Ocultas (somente para NTSC). Também é possível executar o Padrão Teste e Predefinições de Fábrica. DEFINIÇÕES DO MENU—Seleccione e prima para activar as definições de menu. As definições de menu consistem das seguintes opções: POSIÇÃO MENU—Permite-lhe alterar a posição do menu OSD no ecrã.
TRANSP MENU—Seleccione para mudar o nível de transparência do fundo do menu. LMT TEMPO MENU. Esta opção permite-lhe definir o tempo para a desactivação do OSD . Por defeito, o menu desaparece após 20 segundos de inactividade. BLOQUEAR MENU—Seleccione Activ para activar o bloqueio do menu OSD e fazer com que este fique oculto. Seleccione a opção Desact para desactivar a função de bloqueio do menu.
ENTRADA DE ÁUDIO—Seleccione a fonte da Entrada de Áudio, as opções são: Áudio e HDMI. VOLUME—Prima volume. para diminuir o volume e para aumentar o CORTAR O SOM—Permite cortar o som de entrada e de saída de áudio. DEFINIçõES DE ENERGIA—Seleccione e prima para activar as definições de alimentação. O menu de definições de alimentação consiste das seguintes opções: POUP. ENERGIA—Seleccione Desact para desactivar o modo de Poupança de Energia.
DEF SEGURA—Seleccione e prima para activar as definições de segurança. O menu de definições de segurança permite activar e definir a protecção por senha. SENHA—Ao activar a utilização de uma senha de protecção, será apresentado um ecrã que lhe pede para introduzir uma senha sempre que ligar a ficha à tomada eléctrica e ligar o projector. Por predefinição, esta função encontra-se desactivada. É possível activar esta funcionalidade ao seleccionar Activ.
b Activar a função de Senha fará aparecer um ecrã para introdução de caracteres, introduza um número composto por 4 dígitos e prima o botão . c Para confirmar, introduza novamente a senha. d Se a confirmação da senha for feita com êxito, pode aceder às funções e utilitários do projector. 2 Caso tenha introduzido uma senha inválida, ser-lhe-ão dadas mais 2 tentativas. Após três tentativas inválidas, o projector desliga-se automaticamente.
ALTERAR SENHAS—Introduza a senha original, de seguida introduza a senha nova e confirme-a novamente. LEGENDAS OCULTAS—Seleccione Activ para activar as legendas ocultas e active o menu de legendas ocultas. Seleccione uma opção de legendas ocultas: CC1, CC2, CC3, e CC4.
NOTA: A opção de legendas ocultas está disponível apenas para NTSC. PADRÃO TESTE—O Padrão Teste é usado para testar a focagem e a resolução. É possível activar ou desactivar o Padrão Teste ao seleccionar Desact, 1 ou 2. Também é possível invocar o Padrão Teste 1 ao premir e manter os botões e no painel de controlo em simutâneo durante 2 segundos. Também é possível invocar o padrão teste 2 ao premir e manter os botões e no painel de controlo em simultâneo durante 2 segundos.
Resolução de Problemas do Projector 4 Se tiver problemas com o projector, consulte as seguintes sugestões para resolução de problemas. Se o problema persistir, contacte a Dell™. Consulte Contactar a Dell™ na página página 53 Problema Solução Possível Não aparece qualquer imagem no ecrã. • Certifique-se de que a tampa da lente está removida e de que o projector está ligado. • Certifique-se de que seleccionou a fonte de entrada correcta no menu SELECÇÃO DE ENTRADA.
Problema (continuação) Solução Possível (continuação) Fonte de Entrada em Falta. Não é possível alternar para uma Fonte de Entrada em particular. Vá a Activar/Desactivar Fontes Avançado, certifique-se de que é possível Activar a Fonte de Entrada em particular. Apresentação parcial ou incorrecta da imagem ou deslocamento da mesma 1 Prima o botão de Ajuste automático existente no controlo remoto ou no painel de controlo.
Problema (continuação) Solução Possível (continuação) A cor da imagem não está correcta • Se o ecrã receber o sinal de saída errado do placa gráfica, por favor defina o tipo de sinal para RGB no separador Ecrã do menu. • UtilizePadrão de Teste no menu Outros. Certifique-se de que as cores do padrão de teste estão correctas. A imagem não está focada A imagem é ampliada no modo de 16:9 do DVD 1 Ajuste o anel de focagem na lente do projector.
Problema (continuação) Solução Possível (continuação) O LED LAMP está cor-delaranja e intermitente Se a luz LAMP se apresentar em âmbar intermitente, a ligação ao módulo de lâmpada pode estar cortada. Verifique por favor o módulo de lâmpada e certifique-se de que este está devidamente instalado. Se as luzes LAMP e Power estiverem a piscar em âmbar, o controlador da lâmpada e o projector desligar-se-ão automaticamente.
Sinais de Orientação Estado do Botões de comando Descrição Botão de Modo de Projector no modo de suspensão. Pronto alimentação AZUL suspensão Modo de para ligar. O projector precisa de algum tempo para aquecimento Lâmpada aquecer e ligar. Projector no modo Normal, preparado ligada para apresentar uma imagem. Modo de Nota: O menu não está acessível. O projector está a arrefecer para desligar. arrefecimento Modo de O modo de poupança de energia foi poupança de activado.
Falha da lâmpada A lâmpada está defeituosa. Substitua a lâmpada. A ligação ao A ligação ao modulo de lâmpada pode módulo de estar cortada. Verifique por favor o módulo lâmpada falhou de lâmpada e certifique-se de que este está Desligado Desligado Desligado Desligado Desligado Desligado Desligado Desligado devidamente instalado. Se o problema persistir, entre em contacto com a Dell.
Substituição da Lâmpada ATENÇÃO: Antes de iniciar qualquer dos procedimentos desta secção, siga as Instruções de Segurança conforme descrito em página 6 . Substitua a lâmpada quando vir a mensagem "A lâmpada está a aproximar-se do fim da sua vida útil em funcionamento total. Sugerimos a sua substituição! www.dell.com/lamps"no ecrã. Se o problema persistir mesmo após a substituição da lâmpada, contacte a Dell™. Para mais informações, consulte a secção "Contacte a Dell™na página 53.
7 Aperte os dois parafusos que seguram a lâmpada. 8 Reponha a tampa da lâmpada e aperte os dois parafusos. 9 Restaure o tempo de utilização da lâmpada seleccionando "Sim" para a opção Reposição de Lâmpada no separador Lâmpada do OSD (consulte o menu de Lâmpada na página página 32). Quando for instalado um novo módulo de lâmpada, o projector detecta-o automaticamente e restaura as horas da lâmpada.
5 Especificações Válvula de Luz 0,65" WXGA S450 DMD, DarkChip3™ Brilho Intensidade luminosa de 2000 ANSI lúmen (máx.) Relação de Contraste 2100:1 Típico (Full on/Full off) Uniformidade 85% Típico (Norma Japonesa - JBMA) Número de Pixéis 1280 x 800 (WXGA) Cores apresentadas no ecrã 1,07 mil milhões de cores Velocidade da Roda de Cores 2X Lente de Projecção F-Stop: F/ 2.5~2.67 Distância focal, f=21,86~24 mm 1.
Nível de Ruído 39 dB(A) no Modo de funcionamento normal, 32 dB(A) no Modo económico Peso 1,18 kg (2,6 lbs) Dimensões (L x A x C) 205 x 75,9 x 155 cm (8,07 x 2,99 x 6,10 polegadas) 8,07"(205 mm) 6, 10 "( 15 5m m ) 2,99"(75,9mm) Condições ambientais Temperatura de funcionamento: 5ºC - 35ºC (41ºF- 95ºF) Humidade: 80% máximo Temperatura de armazenamento: 0ºC a 60ºC (32ºF a 140ºF) Humidade: 90% máximo Temperatura de transporte: -20ºC a 60ºC (-4ºF a 140ºF) Humidade: 90% máximo Conectores de entra
Saída de áudio variável: Um mini conector estéreo de 3,5 mm (Verde). Porta USB: Uma porta USB escrava para suporte remoto. Lâmpada Lâmpada de 165 W OSRAM substituível pelo utilizador (vida útil até 5000 horas no modo económico) NOTA: A especificação de tempo de vida útil da lâmpada para qualquer projector é exclusivamente a medição da degradação de brilho, e não é e especificação do tempo que uma lâmpada leva a falhar e a parar de emitir luz.
Modos de Compatibilidade (Analógica/Digital) 52 Resolução Taxa de Actualização (Hz) Frequência de Sincronização Horizontal (KHz) Relógio de Pixéis (MHz) 640 x 350 70,087 31,469 25,175 640 x 480 59,940 31,469 25,175 640 x 480 p60 59,940 31,469 25,175 720 x 480 p60 59,940 31,469 27,000 720 x 576 p50 50,000 31,250 27,000 720 x 400 70,087 31,469 28,322 640 x 480 75,000 37,500 31,500 848 x 480 60,000 31,020 33,750 640 x 480 85,008 43,269 36,000 800 x 600 60,317 37,879
Como contactar a Dell Para clientes nos Estados Unidos, ligue 800-WWW-DELL (800-9993355). NOTA: Se não tiver uma ligação de Internet, pode encontrar as informações de contacto na sua factura de compra, etiqueta de embalo, talão, ou catálogo de produto Dell. A Dell™ faculta várias opções de serviço e suporte on-line e telefónico. A disponibilidade varia consoante o país e o produto, e alguns serviços podem não estar disponíveis na sua área.
Apêndice: Glossário ANSI LÚMEN — Norma para medição do brilho. É calculado dividindo uma imagem de um metro quadrado em nove rectângulos iguais, medindo a lux (ou brilho), lendo no centro de cada rectângulo, e calculando a média destes nove pontos. RELAÇÃO DE ASPECTO — A relação de aspecto mais popular é a de 4:3 (4 por 3). Os formatos de televisão e de vídeo por computador mais antigos apresentam uma relação de aspecto de 4:3, o que significa que a largura da imagem é 4/3 da altura.
dB— decibél—Unidade utilizada para expressar a diferença relativa em termos da potência ou intensidade, geralmente entre dois sinais acústicos ou eléctricos, igual a dez vezes o logaritmo comum da relação dos dois níveis. Diagonal do ecrã—-Método para medição do tamanho de um ecr ou de uma imagem projectada. A medição é feita a partir de um canto até ao canto oposto. Um ecrã que meça 2,7 m de altura e 3,6 m de largura tem uma diagonal de 4,5 m.
de vídeo de 525 linhas a 30 imagens por segundo. PAL— Phase Alternating Line (Linha com Alternância de Fase). Um padrão Europeu para vídeo e transmissão, com um formato de vídeo de 625 linhas a 25 imagens por segundo. Inverter imagem— Capacidade que permite inverter a imagem na horizontal. Num ambiente de projecção frontal normal, o texto, os gráficos, etc. apresentam-se ao contrário. A inversão da imagem é utilizada numa situação de projecção posterior.
Índice A D Ajustamento da Imagem Projectada 15 Ajustamento da Altura do Projector 15 baixar o projector Botão de elevação 15 Pé elevatório 15 Roda para ajustamento da inclinação 15 Definições de Alimentação 36 Definições do Ecrã 35 Ajustamento do Zoom e da Focagem do Projector Anel de focagem 16 Botão de zoom 16 E Ajuste do Zoom e da Focagem do Projector 16 assistência como contactar a Dell 53 Áudio 8 C Captura Ecrã 35 Contactar a Dell 44, 47 Contacte a Dell 5 Controlo Remoto 21 Receptor IV (Infrave
Peso 50 Relação de Contraste 49 Tamanho do Ecrã de Projecção 49 Uniformidade 49 Válvula de Luz 49 Velocidade da Roda de Cores 49 L Legendas Ocultas 39 Ligação do Projector ao Computador 9 Cabo de alimentação 9, 10, 11, 12, 13 Cabo de HDMI 13 Cabo de sinal de vídeo composto 11 Cabo S-Vídeo 10 Cabo USB para USB 9 Cabo VGA para VGA 9 Cabo VGA para YPbPr 12 Ligação com um Cabo de HDMI 13 Ligação com um Cabo de sinal Componente 12 Ligação com um cabo de sinal composto 11 Ligação com um Cabo S-Vídeo 10 Ligar/Des
R Repor 35 Resolução de problemas 41 Contactar a Dell 41 S Senha 37 Substituição da lâmpada 47 T Transparência do Menu 35 U Unidade Principal 6 Anel de focagem 6 Botão de elevação 6 Botão de zoom 6 Lente 6 Painel de controlo 6 Receptor IV (Infravermelhos) 6 V Volume 36 Index 59