Dell™ Mobile Projector (M900HD) User’s Guide
Notes, Cautions, and Warnings NOTE: A NOTE indicates important information that helps you make better use of your projector. CAUTION: A CAUTION indicates potential damage to hardware or loss of data if instructions are not followed. WARNING: A WARNING indicates a potential for property damage, personal injury, or death. ____________________ Information in this document is subject to change without notice. © 2013 Dell Inc. All rights reserved.
Contents 1 2 Your Dell Projector . . . . . . . . . . . . . . . . . . . . . . . 4 About Your Projector . . . . . . . . . . . . . . . . . . . . . . 5 Connecting Your Projector . . . . . . . . . . . . . . . . Connecting to a Computer . . . . . . . . . . . . . . . Connecting to Smartphone or Tablet Using Wi-Fi Connecting a DVD Player . . . . . . . . . . . . . . . . Connecting to Multimedia. . . . . . . . . . . . . . . . 3 Using Your Projector 7 . . 8 10 11 12 . . . . . . . . . . . . . . . . . . .
1 Your Dell Projector Your projector comes with all the items shown below. Ensure that you have all the items, and contact Dell™ if anything is missing. Package Contents Power cable 1.2 m USB cable (USB-A to USB-A) Remote control Carrying case CD User’s Guide and Documentation Sleeve cover Informacion Importante Dell™ Mobile Project or (M9 00HD) Documen tation Dell ™ Mobile Projector (M900HD) 0RV 7HWA0 0 gh ts re se r ve d. Contents: • User's Guide P/N RV7HW Rev. A00 P/N 36.
About Your Projector Bottom View Top View 7 9 1 62.3 20 6 2 3 5 4 55.00 55.00 8 1 Control panel 2 Focus ring 3 Lens 4 Elevator button for height adjustments 5 3 W speaker 6 IR receivers 7 Mounting holes for ceiling mount: Screw hole M3 x 6.5 mm depth. Recommended torque <15 kgf-cm 8 Mounting hole for tripod: Insert nut 1/4"*20 UNC 9 Elevator foot CAUTION: Safety Instructions 1 Do not use the projector near appliances that generate a lot of heat.
Do not try to touch the ventilation outlet as it can become very hot after the projector has been turned on or immediately after it is turned off. 7 Do not look into the lens while the projector is on as it may cause injury to your eyes. 8 Do not place any objects near or in front of the projector or cover its lens while the projector is on as the heat may cause the object to melt or burn. 9 Do not use alcohol to wipe the lens. 10 Do not use the wireless projector near cardiac pacemakers.
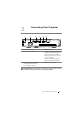
2 1 Connecting Your Projector 2 3 4 5 6 1 2 Security cable slot Power cord connector 4 5 HDMI connector USB type A connector for USB display, multimedia playback (Video/Music/Photo/Office Viewer), USB memory storage access (USB flash drive/internal memory) and projector firmware upgrade 3 SD card slot for multimedia playback (Video/ Music/ Photo/ Office Viewer) 6 Audio-out connector CAUTION: Before you begin any of the procedures in this section, follow the Safety Instructions as described on
Connecting to a Computer Connecting a Computer Using a USB Cable XELOM 2 1 MOLEX 1 2 Power cord USB-A to USB-A cable NOTE: Plug and Play. Only one USB (type A to A) cable is shipped with your projector. An additional USB (type A to A) cable can be purchased on the Dell website at www.dell.com.
Connecting a Computer Using Intel® WiDi or Wi-Fi NOTE: Your computer should be equipped with a wireless connector and properly configured to detect another wireless connection. Refer to your computer’s documentation on how to configure a wireless connection. NOTE: To connect a computer via Intel® WiDi, your computer must be Intel® WiDi compatible.
Connecting to Smartphone or Tablet Using Wi-Fi NOTE: Dell M900HD supports MobiShow and WiFi-Doc functions. They are applications which transmit supported content from your Android or iOS devices wirelessly. After installing and launching the application on your mobile device, enable Wi-Fi on your mobile device and connect to the projector network, Dell M900HD. For more Information, please visit go to Dell Support site at dell.com/support.
Connecting a DVD Player Connecting a DVD Player Using a HDMI Cable 2 1 TOP MENU HDMI MENU OPEN/CLOSE STANDBY/ON ENTER DVD/USB 1 2 USB HOME MENU RETURN Power cord HDMI cable NOTE: The HDMI cable is not shipped with your projector. You can purchase the HDMI cable on the Dell website at www.dell.com.
Connecting to Multimedia Connecting Multimedia Using a USB Flash Disk 2 1 1 2 Power cord USB flash disk NOTE: The USB flash disk is not shipped with your projector.
Connecting Multimedia Using a SD Card 2 1 1 2 Power cord SD card NOTE: The SD card is not shipped with your projector.
3 Using Your Projector Turning Your Projector On NOTE: Turn on the projector before you turn on the source (computer, DVD player, etc.). The Power button light blinks white until pressed. 1 Connect the power cord and appropriate signal cables to the projector. For information about connecting the projector, see "Connecting Your Projector" on page 7. 2 Press the Power button (see "Using the Control Panel" on page 19 to locate the Power button). 3 Turn on your source (computer, DVD player, etc).
NOTE: Before you turn on the projector again, wait for 60 seconds to allow the internal temperature to stabilize. 4 Disconnect the power cord from the electrical outlet and the projector. Adjusting the Projected Image Raising the Projector Height 1 Press the Elevator button. 2 Raise the projector to the desired display angle, and then release the button to lock the elevator foot into position. Lowering the Projector Height 1 Press the Elevator button.
Adjusting the Projector Focus CAUTION: To avoid damaging the projector, ensure that the elevator foot is fully retracted before moving the projector or placing the projector in its carrying case. 1 Rotate the focus ring until the image is clear. The projector focuses at distances ranging between 2.98 ft to 7.87 ft (91 cm to 240 cm).
Adjusting Projection Image Size 80" (203.2 cm) 70" (177.8 cm) Projector to screen distance 60" (152.4 cm) 50" (127.0 cm) 40" (101.6 cm) 3.97' (1.21 m) 4.95' (1.51 m) 5.9' (1.8 m) 6.89' (2.1 m) 7.87' (2.4 m) 30" (76.2 cm) 2.98' (0.
Screen size Desired Distance (m) Diagonal (inch) Top W (cm) x H (cm) From base to top of image (cm) 0.91 30 65 x 41 43 1.21 40 86 x 54 57 1.51 50 108 x 67 71 1.8 60 129 x 80 84 2.1 70 150 x 94 98 2.4 80 171 x 107 113 * This graph is for user reference only. * Offset Ratio: 105±5% Height (Hd): 84 cm W B C " 60 al: n go Dia Di 18 Using Your Projector sta e: nc m 1.
Using the Control Panel 1 2 3 9 8 4 7 5 6 1 TEMP LED If the TEMP amber indicator is on or blinking, one of the following problems could be occurring: • Internal temperature of the projector is too high For more information, see "Troubleshooting Your Projector" on page 71 and "Guiding Signals" on page 74. 2 Error LED Error LED is blinking amber, one of the RGB LED has failed. The projector will automatically shut down.
6 Down / Keystone adjustment Press to navigate through the On-Screen Display (OSD) Menu items. Press to adjust image distortion caused by tilting the projector (+/-40 degrees). 7 Menu 8 Left Press to activate the OSD. Use the directional keys and the Menu button to navigate through the OSD. / Source Press to navigate through the On-Screen Display (OSD) Menu items.
Using the Remote Control 1 13 2 3 14 4 5 15 6 7 16 8 9 17 10 11 18 12 1 Source Press to switch between Analog RGB, Composite, and HDMI source. 2 Video mode The projector has preset configurations that are optimized for displaying data (presentation slides) or video (movies, games, etc.). Press the Video Mode button to toggle between Presentation mode, Bright mode, Movie mode, sRGB, or Custom mode. Pressing the Video Mode button once will show the current display mode.
5 Menu Press to activate the OSD. 6 Up Press to navigate through the On-Screen Display (OSD) Menu items. 7 Left Press to navigate through the On-Screen Display (OSD) Menu items. 8 Enter Press to confirm the selection. 9 Keystone adjustment Press to adjust image distortion caused by tilting the projector (+/-40 degrees). 10 Down Press to navigate through the On-Screen Display (OSD) Menu items.
Installing the Remote Control Battery 1 Remove the battery holder by holding down the side release firmly and pulling out the battery holder. LT O R 20 32 align the polarity correctly according to the marking in the battery holder. S 2 Insert a CR2025 coin cell battery and C 3V NOTE: When you use the remote control S LT R C O 20 32 for the first time, there is a plastic sheet between the battery and its contact. Remove the sheet before use.
Operating Range with Remote Control Distance Angle Operating range Angle Distance ±20° 7 m/22.97 feet Angle Di sta nc e NOTE: Actual operating range may slightly differ from the diagram. Weak battery will also prevent the remote control from properly operating the projector.
Using the On-Screen Display • The projector has a multi-language On-Screen Display (OSD) Menu that can be displayed with or without an input source. • Press the Menu button on the control panel or the remote control to enter the Main Menu. • To select an option, press the or buttons on your projector’s control panel or remote control. • Use the or buttons on the control panel or remote control to adjust the settings.
When you connect the projector and computer via USB cable, a USB Connected message will pop up and allow you to select DoUSB or Storage Mode. VIDEO MODE The Video Mode menu allows you to optimize the display image. The options are: Presentation, Bright, Movie, sRGB (provides more accurate color representation), and Custom (set your preferred settings) mode. VOLUME The Volume menu allows you adjust the volume setting of your projector.
ADVANCED SETTINGS The Advanced Settings menu allows you to change settings for Image, Display, Projector, Menu, Power, and Information. IMAGE SETTINGS—Select and press to activate image settings. The image settings menu provides the following options: BRIGHTNESS—Press image. CONTRAST—Press and and to adjust the brightness of the to adjust the display contrast. COLOR TEMPERATURE—Allows you to adjust the color temperature.
DISPLAY SETTINGS—Select and press to activate display settings. The display settings menu provides the following options: ASPECT RATIO—Allows you to select the aspect ratio to adjust how the image appears. Options are: Origin, 16:10, and 4:3. • Origin — Select Origin to maintain the aspect ratio of the image projector according to the input source. • 16:10 — The input source scales to fit the width of the screen to project a 16:10 screen image.
PROJECTOR MODE—Allows you to select the projector mode, depending upon how the projector is mounted. • Rear Projection-Desktop — The projector reverses the image so that you can project from behind a translucent screen. • Rear Projection-Ceiling Mount — The projector reverses and turns the image upside down. You can project from behind a translucent screen with a ceiling-mounted projection. • Front Projection-Desktop — This is the default option.
FACTORY RESET—Select Confirm and press to reset all settings to its factory default. The below warning message appears: Reset items include both computer sources and Video source settings. MENU SETTINGS—Select and press to activate the menu settings. The menu settings consists of the following options: MENU POSITION—Allows you to change the position of the OSD menu on the screen. MENU TIMEOUT—Allows you to adjust the time for an OSD timeout.
security feature will be activated the next time you turn on the projector. If you enable this feature, you will be asked to enter the projector's password after you turn on the projector: 1 First time password input request: a Go to Menu Settings, press the password settings. and then select Password to Enable b Enabling the Password function will pop up a change screen. Key in a 4-digit number from the screen and press . c To confirm, enter the password again.
4 To delete the password, select the Delete option. CHANGE PASSWORD—Key in the original password. Then, enter the new password and confirm the new password again.
POWER SETTINGS—Select and press to activate power settings. The power settings menu provides the following options: POWER SAVING—By default, the projector is set to enter power saving mode after 120 minutes of no activity. A warning message appears on screen showing a 60 seconds countdown before switching to power saving mode. Press any button during the countdown period to stop the power-saving mode. You can also set a different delay period to enter power saving mode.
LANGUAGE Allows you to set the language for the OSD. Press and different languages and press to change the language.
Multimedia Introduction Multimedia format supported: Photo Format Image Type (Ext Name) GIF PNG BMP JPEG/JPG Sub Type Encode Type Max Pixels Baseline YUV420 YUV422 YUV440 YUV444 progressive YUV420 YUV422 YUV440 YUV444 8000 x 8000 8000 x 8000 8000 x 8000 8000 x 8000 8000 x 8000 Video Format File Format Max.
How to set-up File Type for Multimedia with USB NOTE: A USB flash disk must be plugged into the projector if you want to use the multimedia USB function. Follow these steps to playback the Photo, Video, or Music files on your projector: 1 Connect the power cable and turn on the projector by pressing the power button. 2 Plug in a USB flash disk to your projector.
3 Access the Input Source menu, select the USB option, and press the button. The USB Screen shown below appears: 4 Select the multimedia files: Photo, Video, Music, or Office Viewer, and then press the to start playing. Or select the Setup option to change multimedia settings. See "Multimedia Setup" on page 43.
How to set-up File Type for Multimedia with SD Card NOTE: A SD card must be plugged into the projector if you want to use the multimedia SD function. Follow these steps to playback the Photo, Video, or Music files on your projector: 1 Connect the power cable and turn on the projector by pressing the power button. 2 Plug in a SD card to your projector. The image input source will be automatically switched to SD screen when you plug in a SD card.
3 Access the Input Source menu, select the SD option and press the button. The SD Screen shown below appears: 4 Select the multimedia files: Photo, Video, Music, or Office Viewer, and then press the to start playing. Or select the Setup option to change multimedia settings. See "Multimedia Setup" on page 43.
How to set-up File Type for Multimedia with Internal Memory Follow these steps to playback the Photo, Video, or Music files on your projector: 1 Connect the power cable and turn on the projector by pressing the power button. 2 Access the Input Source menu, select the Internal Memory option and press the 40 button.
The Internal Memory Screen shown below appears: 3 Select the multimedia files: Photo, Video, Music, or Office Viewer, to start playing. Or select the Setup option to and then press the change multimedia settings. See "Multimedia Setup" on page 43.
Office Viewer for the USB, SD, and Internal Memory The Office Viewer feature allows you to use MS Excel, MS Word, MS PowerPoint, and PDF files. Buttons Introduction Use the up, down, left, and right buttons for navigation and your projector's control panel or remote control to select.
Multimedia SETUP for USB, SD Card, and Internal Memory The multimedia setup menu allows you to change settings for Photo, Video, and Music. NOTE: Multimedia setup menu and set are the same for the USB, SD card, and Internal Memory. SLIDESHOW DISPLAY INTERVAL—Press or to select slideshow display interval. The image will automatically switch to the next photo after the time out. Options are: 5 seconds, 10 seconds, 30 seconds, and 1 minute.
Intel® Wireless Display (WiDi) Installation NOTE: Your computer must have the following Intel® Wireless Display system requirements: System Component Requirement Processor ONE of the following mobile processors: 3rd generation Intel® Core™ Processor: all mobile processors 3rd Generation Intel® Core™ i7 Processor: 640M; 660LM; 640LM; 620LM; 620M; 610E; 690UM; 680UM; 660UM; 640UM; 620UM; 660UE; 3610QM; 3770T; 3820QM; 3840QM; 2710QE; 2820QM; 2720QM; 2635QM; 2630QM; 2657M; 2649M; 2629M; 2620M; 2617M; 2540M;
System Component Requirement Software Intel® My Wi-Fi Technology (Intel® MWT) and Intel® Wireless Display must be pre-installed and enabled. Operating System Windows 7 (64-bit), Home Premium, Ultimate or Professional Windows 7 (32-bit), Home Premium, Ultimate, Professional or Basic Windows 8 32-bit and 64-bit editions For more information, see the Intel® WiDi website at www.intel.com/go/widi. Enable Intel® WiDi on the Projector 1 Connect the power cable and press the power button.
2 Press the Menu button on your projector control panel or remote control. NOTE: Use , , and buttons to navigate and 3 Select the input source as Intel® WiDi. to select. The Intel® WiDi Guide Screen shown below appears: 4 Take note of the ADAPTER NAME and PIN CODE. You will need this information to log in later.
Launch the Intel® WiDi on Your Computer 5 Type WiDi in your Windows search bar. If your computer has built-in Intel® WiDi, you will see the “Intel® WiDi” application in your search results. 6 Connect your computer to Dell M900HD. Login Login with the PIN Code provided in Step 4 of Intel® Wireless Display (WiDi) Installation, then click OK.
Wi-Fi Display Installation NOTE: Your computer must have the following minimum system requirements: Operating System: • Windows Microsoft Windows XP Home or Professional Service pack 2 (32-bit recommended), Windows Vista 32-bit, and Windows 7 Home or Professional 32-bit or 64-bit, Windows 8 32-bit or 64-bit • MAC MacBook and above, MacOS 10.5~10.8 Minimum Hardware: a Intel Dual Core 1.
Enable Wi-Fi on the Projector 1 Connect the power cable and press the power button. 2 Press the Menu button on your projector control panel or remote control. NOTE: Use 3 , , and buttons to navigate and Select the input source as Wi-Fi. to select.
The Wireless Guide Screen shown below appears: 4 Take note of the Wireless Network (SSID), IP Address, and Access Code. You will need this information to log in later.
Install the Dell Projector Connection Manager on Your Computer 5 Connect your computer to the M900HD wireless network. NOTE: • Your computer must have wireless network function to detect the connection. • When you connect to the M900HD wireless network, you will lose wireless connectivity with other wireless networks. NOTE: Remember to turn off all proxies. (In Microsoft® Windows Vista: Click Control Panel J Internet Options J Connections J LAN Settings) 6 Open your Internet browser.
NOTE: If the web page does not load automatically, enter the IP address (default IP address is 192.168.100.10) noted from the projector’s screen in the browser’s address bar. 7 The M900HD Web Management page opens. For first time use, click Download. 8 Select the appropriate operating system, then click Download.
9 Click Run to proceed with the one-time installation of the software. NOTE: You may choose to save the file and install it at a later time. To do this, click Save. NOTE: If you are unable to install the application because of inadequate rights on the computer, please contact your network administrator. 10 The installation software will launch. Follow the on-screen instructions to complete setup.
Launch the Dell Projector Connection Manager Once the installation is complete, the program will launch and search automatically. If the program does not launch automatically, you can double-click the icon on the desktop to start the application. Select the Dell M900HD Wireless Mobile, and then click OK. Login Login with the Access Code provided in Step 4 of Wi-Fi Display Installation, then click OK.
Understanding the Buttons After a successful log in, the following screen appears: Item 1 2 Description Status Bar Settings Click to activate the application settings. Minimize button Click to minimize the application. Close button Click to exit the application. Controls Toolbar Information Click to display SSID, IP, and Access Code information. Share mode Click to activate the share mode. Display mode Click to change the display mode. Pause Click to pause projection.
Using the Settings Click to display the settings menu. RESOLUTION—Allows you to setup the resolution. DISPLAY MODE—Allows you to setup the default projection mode.
AUDIO—Allows you to change the audio settings. USB DONGLE—Allows you to create USB dongle. See "Make Application Token" on page 70.
ABOUT—Displays the application version.
Managing the Projector From Web Management Configuring the Network Setting If the projector is connected to a network, you can access the projector using a web browser. Accessing Web Management Use Internet Explorer 6.0 and above or Firefox 2.0 and above and enter the IP address. You can now access Web Management and manage the projector from a remote location. Home Page • Access the Web Management Home page by entering the projector’s IP address at the web browser (default IP address is 192.168.100.
Download the Dell Projector Connection Manager See also "Wi-Fi Display Installation" on page 48. Click the Download button of the corresponding operating system of your computer.
Managing Properties Admin An administrator password is required to access the Admin page. • Admin Password: Enter the administrator password and then click Login. The default password is "admin". To change the password, see "Change Passwords" on page 66.
System Status Displays the Network Status, Connection Status, and Projector Status information.
Network Status IP Setup • Choose Obtain an IP address automatically to assign an IP address to the projector automatically, or Use the following IP address to assign an IP address manually. DHCP Server Setup • Choose Auto to automatically set up the Start IP, End IP, Subnet Mask, Default Gateway, and DNS Server address from a DHCP server, or Disable to disable this function.
Wireless Setup • Choose Enable to set up the Region, SSID, SSID Broadcast, Frequency Band, Channel, Encryption, and Key. Choose Disable to disable the wireless set up. SSID: Up to maximum length of 32 characters. Encryption: You can Disable WPA key or select one of 64-bit or 128 bit in ASCII or HEX string. Key: If Encryption is enabled, you have to set key value according to the Encryption mode you selected. Click the Apply button to save and apply changes.
Projection Setup Projection Setup Login Code: Select how you want the login code to be generated by the projector. There are three options: • Disable: Login code will not be required when logging in to the system. • Random: Default is Random. Login code will be randomly generated. • Use the following code: Enter a 4-digit code. This code will be used to log in to the system. Click the Apply button to save and apply changes. The projector must be restarted for the changes to take effect.
Change Passwords This page allows you to change the administrator password. • Enter New Password: Enter the new password. • Confirm New Password: Enter the password again and click Apply. NOTE: Contact Dell if you forget your administrator password.
Reset to Default Click the Apply button to restore the wireless/network setup to its factory default settings.
Firmware Upgrade Use the Firmware Upgrade page to update your projector’s Wi-Fi and Intel® WiDi firmware. To start firmware update, follow these steps: 1 You can download the firmware files from dell.com/support. 2 Press Browse to select the file to update. 3 Click the Update button to start. Wait while the system updates the firmware in your device. CAUTION: Do not interrupt the update process as this may cause the system to crash! 4 Click OK when the update is complete.
Reboot System Click Reboot to reboot the system.
Make Application Token The Application Token lets you perform Plug and Show using a USB token. 1 From the application software, click > USB Dongle. 2 The following screen appears. Click Next. 3 Plug a flash drive into any of the USB ports on your computer. Select the drive from the list, then click Next. 4 Click Finish to close the wizard.
4 Troubleshooting Your Projector If you experience problems with your projector, see the following troubleshooting tips. If the problem persists, contact Dell (see Contacting Dell™ on page 79). Problem Possible Solution No image appears on the screen • Ensure that the projector is turned on. • Ensure that you have chosen the correct input source on the INPUT SOURCE menu. • Ensure the external graphics port is enabled. If you are using a Dell laptop computer, press (Fn+F8).
Problem (continued) Possible Solution (continued) Partial, scrolling, or If you are using a Dell™ portable incorrectly displayed image computer, set the resolution of the computer to WXGA (1280 x 800): a Right-click the unused portion of your Microsoft® Windows® desktop, click Properties, and then select Settings tab. b Verify that the setting is 1280 x 800 pixels for the external monitor port. c Press (Fn+F8).
Problem (continued) Possible Solution (continued) Image is reversed Select Projector Settings of the Advanced Settings from the OSD and adjust the projector mode. Error LED is blinking amber A projector fan has failed and the projector will automatically shut down. TEMP LED is solid amber The projector has overheated. The display automatically shuts down. Turn the display on again after the projector cools down. If the problem persists, contact Dell.
Guiding Signals Control Buttons Projector Status Description Indicator Power (White/Amber) TEMP (Amber) (Amber) Standby mode Projector in Standby mode. Ready to power on. White Flashing OFF OFF LED on Projector in Normal mode, ready to display an image. White OFF OFF Cooling mode Projector is cooling to shutdown. White OFF OFF Projector overheated Air vents might be blocked or ambient temperature may be above 35 °C. The projector automatically shuts down.
5 Specifications Light Valve 0.45" WXGA S450 DMD, DarkChip3™ Brightness 900 ANSI Lumens (Max.) Contrast Ratio Max: 10000:1 APM Native: 700:1 Typical (Full On/Full Off) Uniformity 85% Typical (Japan Standard - JBMA) Number of Pixels 1280 x 800 (WXGA) Aspect Ratio 16:10 Internal Flash 2 GB Memory (Max.) Displayable Color 1.07 billion colors Projection Lens Fixed Focal Lens, F/1.5 Throw ratio =1.
Dimensions (W x H x D) 9.13 x 1.69 x 6.46 inches (232 x 43 x 164 mm) 9.13 "(23 2 mm ) 1.69"(43 mm) " 46 m 6. 4 m 6 1 ( Environmental ) Operating temperature: 5 °C - 35 °C (41 °F- 95 °F) Humidity: 80% maximum Storage temperature: 0 °C to 60 °C (32 °F to 140 °F) Humidity: 90% maximum Shipping temperature: -20 °C to 60 °C (-4 °F to 140 °F) Humidity: 90% maximum I/O Connectors Power: One AC power socket (3-pin - C14 inlet) HDMI input: One HDMI connector for supporting HDMI 1.3. HDCP compliant.
Wireless Wireless Standard: IEEE 802.11a/b/g/n (2T2R) OS environment: Windows 8/7/Vista/XP/2000, MAC OS X Supports MobiShow and WiFi-Doc projection. Light Source Mercury-free LED (up to 20000 hours in Normal mode) NOTE: The LED life rating for any projector is a measure of brightness degradation only, and is not a specification for the time it takes a LED to fail and cease light output.
Compatibility Modes (Digital) Resolution Refresh Rate (Hz) Hsync Frequency (KHz) Pixel Clock (MHz) 640 x 350 640 x 480 720 x 480 p60 720 x 576 p50 720 x 400 640 x 480 640 x 480 800 x 600 800 x 600 800 x 600 1024 x 768 1280 x 720 p50 1280 x 720 p60 1920 x 1080 i50 1920 x 1080 i60 1280 x 720 1024 x 768 1280 x 800 1366 x 768 1360 x 768 1024 x 768 1440 x 900 1280 x 1024 1400 x 1050 1280 x 800 1280 x 1024 1440 x 900 1680 x 1050 1280 x 960 1920 x 1080 1024 x 768 70.087 59.940 59.940 50.000 70.087 75.000 85.
6 Contacting Dell For customers in the United States, call 800-WWW-DELL (800-999-3355). NOTE: If you do not have an active Internet connection, you can find contact information on your purchase invoice, packing slip, bill, or Dell product catalog. Dell™ provides several online and telephone-based support and service options. Availability varies by country and product, and some services may not be available in your area.
Web Management 7 Appendix: Glossary ANSI Lumens — A standard for measuring the brightness. It is calculated by dividing a square meter image into nine equal rectangles, measuring the lux (or brightness) reading at the center of each rectangle, and averaging these nine points. Aspect Ratio — The most popular aspect ratio is 4:3 (4 by 3). Early television and computer video formats are in a 4:3 aspect ratio, which means that the width of the image is 4/3 times the height.
FT high, 12 FT wide, screen has a diagonal of 15 FT. This document assumes that the diagonal dimensions are for the traditional 4:3 ratio of a computer image as per the example above. DLP® — Digital Light Processing™ — Reflective display technology developed by Texas Instruments, using small manipulated mirrors. Light passing through a color filter is sent to the DLP mirrors which arrange the RGB colors into a picture projected onto screen, also known as DMD.
SXGA — Super Extended Graphics Array, — 1280 x 1024 pixels count. UXGA — Ultra Extended Graphics Array — 1600 x 1200 pixels count. VGA — Video Graphics Array — 640 x 480 pixels count. XGA — Extended Video Graphics Array — 1024 x 768 pixels count. WXGA — Wide Extended Graphics Array — 1280 x 800 pixels count. Zoom Lens — Lens with a variable focal length that allows the operator to move the view in or out making the image smaller or larger.
Index A D Adjusting the Projected Image 15 Adjusting the Projector Height 15 Dell contacting 79, 80 Adjusting the Projector Zoom and Focus 16 Focus ring 16 C Connecting the Projector Connecting with an HDMI Cable 11 HDMI cable 11 Power cord 8, 11, 12, 13 SD card 13 To Computer 8 USB flash disk 12 USB-A to USB-A cable 8 Connection Ports Audio-out connector 7 HDMI connector 7 Power cord connector 7 Security cable slot 7 Contact Dell 4, 73 Control Panel 19 M Main Unit 5 3 W speaker 5 Control panel 5 Elev
Power Settings 33 T Powering On/Off the Projector Powering Off the Projector 14 Powering On the Projector 14 telephone numbers 79 Test Pattern 29 Troubleshooting 71 Contact Dell 71 R Remote Control 21 Reset, Factory 30 S Specifications Aspect Ratio 75 Audio 75 Brightness 75 Contrast Ratio 75 Dimensions 76 Displayable Color 75 Environmental 76 I/O Connectors 76 Internal Flash 75 Light Valve 75 Noise Level 75 Number of Pixels 75 Power Consumption 75 Power Supply 75 Projection Distance 75 Projection Lens