VMware vCenter 용 Dell Management Plug-In 빠른 설치 안내서 버전 1.
주, 주의 및 경고 노트: "주"는 컴퓨터를 보다 효율적으로 사용하는 데 도움을 주는 중요 정보를 제공합니다. 주의: "주의"는 하드웨어 손상이나 데이터 손실의 가능성을 설명하며, 이러한 문제를 방지할 수 있는 방법을 알려줍니다. 경고: "경고"는 재산상의 피해나 심각한 부상 또는 사망을 유발할 수 있는 위험이 있음을 알려줍니다. © 2012 Dell Inc. 본 설명서에 사용된 상표인 Dell™, Dell 로고, Dell Boomi™, Dell Precision™, OptiPlex™, Latitude™, PowerEdge™, PowerVault™, PowerConnect™, OpenManage,™ EqualLogic™, Compellent™, KACE™, FlexAddress™, Force10™ 및 Vostro™는 Dell Inc.의 상표입니 다.
목차 주, 주의 및 경고............................................................................................................................2 장 1: 빠른 시작 설치....................................................................................................................5 설치 소개.................................................................................................................................................................5 필수 구성 요소..................................................................
1 빠른 시작 설치 설치 소개 본 안내서는 Dell 서버의 Dell Management Plug-in 설치 및 구성에 관한 단계별 지침을 제공합니다. 설치가 완료되 면 모든 관리 측면에 관한 정보가 Dell Management Plug-in 사용 설명서에 언급되어 있습니다. 이에는 다음을 포 함합니다. 인벤토리 관리, 모니터링 및 경고, 펌웨어 업데이트, 배포와 프로비저닝, 및 보증 관리. 노트: 이 릴리스 및 PowerEdge 12 세대 서버의 호스트 설치에서 OMSA 에이전트 설치는 필요하지 않습니다. PowerEdge 11 세대 서버 OMSA 에이전트 설치에는 배포 과정동안 자동으로 설치됩니다. OMSA 에 관한 자 세한 정보는, Dell Management Plug-in 사용 설명서의 “11G 호스트에 대한 OMSA 이해” 섹션을 참조하십시 오. PowerEdge 12 세대 서버 및 12 세대 이전 호스트를 보다 잘 이해하려면, 이 릴리스에 대한 릴리스 노트를 참조하십시오.
소프트웨어 요구 사항 vSphere 환경이 가상 어플라이언스, 포트 액세스 및 설치 포트 요구 사항을 충족해야 합니다. 또한 vSphere 클라 이언트 시스템에 Adobe Flash Player 10.0 이상을 설치합니다. vSphere 5 에 데스크탑 클라이언트와 웹 클라이언트가 모두 들어 있습니다. Dell Management Plug-in 은 데스크탑 클라이언트에서만 사용할 수 있습니다. 노트: Dell Management Plug-in 과 vCenter 서버가 동일한 네트워크에 있는 것이 좋습니다. 특정 소프트웨어 요구 사항에 대해 알아보려면 VMware vCenter 용 Dell Management Plug-in 릴리스 정보를 참조 하십시오.
노트: Thick Provision Eager Zeroed 는 이 설치 동안 권장되는 디스크 형식입니다. vSphere 클라이언트를 사용하여 Dell Management Plug-in OVF 를 배포하려면 다음을 수행하십시오. 1. Dell Management Plug-in 가상 디스크를 포함하고 있는 파일의 압축을 풀고 setup.exe 를 실행합니다. 2. Setup.exe 파일을 더블 클릭하여 EULA 에 동의하게 되며, 사용 설명서를 압축해제하고, OVF 파일을 획득합니 다. 3. 어플라이언스에 업로드할 VMware vSphere 호스트에 액세스할 수 있는 위치에 OVF 파일을 복사/이동시킵니 다. 4. VMware vSphere 클라이언트를 시작합니다. 5. VMware vSphere 클라이언트에서 파일 → OVF 템플릿 배포를 선택합니다. 그림 1 . vSphere 에서 OVF 템플릿 배포 6. 소스 창에서 찾아보기 단추를 사용하여 OVF 패키지를 찾습니다.
– 리소스 풀이 구성된 경우 - 리소스 풀 페이지에서 Dell Management Plug-in 을 배포할 가상 서버의 풀 을 선택합니다. – 리소스 풀이 구성되지 않은 경우 - 호스트/클러스터 페이지에서 Dell Management Plug-in 을 배포할 호스트 또는 클러스터를 선택합니다. 13. 호스트에 사용 가능한 데이터 저장소가 둘 이상 있는 경우 Datastore 페이지가 표시됩니다. Dell Management Plug-in 파일을 저장할 위치를 선택하고 다음을 클릭합니다. 14. 디스크 형식 창에서, 가상 디스크에 저장하고자 하는 형식을 선택합니다. a. Thick Provision Lazy Zeroed Lazy Zeroed 씩 디스크는 생성시 할당된 모든 디스크 공간을 가지나 각각의 블록은 최초 쓰기에서 만 지워집니다. 이는 보다 짧은 생성 시간을 가지지만 블록이 처음으로 쓰기할 때 성능이 저하됩니다. 후 속 쓰기는 Eager Zeroed 씩 디스크와 같은 성능을 가집니다. b.
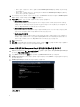
5. 웹 브라우저를 열고 어플라이언스의 IP 주소와 호스트 이름을 입력합니다. 예: https://10.210.126.120 또는 https://myesxihost. URL 은 대소문자를 구분하지 않습니다. 그림 3 . Administration Console 6. Administration Console 로그인 창에서 암호를 입력하고 로그인을 클릭합니다.
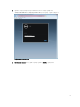
그림 4 . Administration Console 내에서의 vCenter 등록 창 7. vCenter 등록 창에서 새 vCenter 서버 등록을 클릭합니다. 8. 새 vCenter 등록 창에서 다음을 수행하십시오. a) vCenter 이름 아래의 vCenter 서버 IP 또는 호스트 이름 텍스트 상자에 서버 IP 또는 호스트 이름을 입력하 고 설명 텍스트 상자에 선택적 설명을 입력합니다. b) 관리 사용자 계정 아래의 관리 사용자 이름 텍스트 상자에 관리 사용자 이름을 입력합니다. 관리 사용자 계정은 vCenter 관리용 Dell Management Plug-in 에서 사용됩니다. c) 암호 텍스트 상자에서 암호를 입력합니다. d) 암호 확인 텍스트 상자에서 암호를 다시 입력합니다. 9. 등록을 클릭합니다. 10. Dell Management Plug-in 평가판을 사용하는 경우 12 단계로 건너뜁니다. 풀 버전 제품을 사용하는 경우에는 제품 다운로드 패키지에 license.
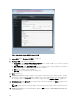
그림 5 . Dell Managment Plug-in 이 vCenter 에 성공적으로 추가됨 설치 확인 다음 단계에서는 Dell Management Plug-in 설치가 완료되었는지 확인합니다. 1. vSphere 클라이언트 내에서 Dell Management Plug-in 아이콘이 표시되는지 확인합니다. 표시되지 않는 경우 vSphere 클라이언트를 다시 시작하고 재확인합니다. 2. vCenter 서버에서 가상 어플라이언스 IP 주소 또는 호스트 이름에 ping 명령을 시도하여 vCenter 가 Dell Management Plug-in 과 통신할 수 있는지 확인합니다. 3. vSphere 클라이언트에서 플러그 인 → 관리되는 플러그 인을 클릭합니다. 플러그 인 관리자 창에서 Dell Management Plug-in 이 설치되고 활성화되어 있는지 확인합니다.
마법사를 사용하여 Dell Management Plug-in 을 구성하는 방법 이해 2 Dell Management Plug-in 기본 설치를 완료한 후 이를 구성해야 합니다. 일반적으로는 구성 마법사를 사용하여 수 행하지만 Dell 관리 센터의 설정 옵션을 사용하여 수행할 수도 있습니다. 마법사에서는 저장 후 계속을 클릭하지만 설정 옵션에서는 적용을 클릭한다는 점을 제외하고 두 영역에 있는 사 용자 인터페이스가 비슷합니다. 이 섹션에서는 마법사를 사용하여 구성하는 방법에 대해 설명합니다. Dell Management Plug-in 을 구성하기 위해 Dell 관리 센터의 설정 옵션 사용에 대한 자세한 내용은 Dell Management Plug-in 사용 설명서를 참조하십시오. 구성 마법사를 사용하는 구성 작업 구성 마법사를 사용하여 Dell Management Plug-in 를 구성할 때 다음과 같은 작업을 수행합니다. 1. 구성 마법사 시작 페이지 2. 새 연결 프로필 생성 3.
1. 연결 프로필 탭에서 새로 생성을 클릭합니다. 2. 프로필 이름 및 설명 패널에서 사용자 지정 연결 프로필을 관리하는 데 유용한 프로필 이름과 선택 항목인 설명을 입력하고 다음을 클릭합니다. 3. 연결된 호스트 패널에서 연결 프로필에 사용할 호스트를 선택하고 다음을 클릭합니다. 4. 자격 증명 및 연결 프로토콜에 대한 정보를 확인하고 다음을 클릭합니다. 5. iDRAC 패널에서 iDRAC 자격 증명 정보를 입력합니다. a) 사용자 이름, 암호 및 암호 확인을 입력합니다. 사용자 이름은 공백을 포함하여 최대 16 자를 포함합니 다. /(슬래시), \\(백슬래시), @(골뱅이), \"(따옴표) 및 문자 없이 공백만은 지원되지 않습니다. 암호가 반드 시 일치해야 하며 ASCII-인쇄 가능 문자만 사용해야 합니다. 노트: 암호는 최대 20 개의 프린트 가능한 ASCII 문자를 포함합니다. 도메인 이름에는 영숫자, -(대 시) 및 .(마침표)만 포함됩니다.
– 2. 가상화 관련 위험 및 경고 이벤트만 게시 - 가상화 관련 위험 및 경고 이벤트만 게시합니다. 기본 이 벤트 게시 수준입니다. 모든 하드웨어 알람 및 이벤트를 사용하려면 Dell 호스트에 알람 활성화 확인란을 선택합니다. 노트: 알람이 활성화된 Dell 호스트가 유지관리 모드로 전환되어 위험 이벤트에 대응합니다. 3. 표시되는 대화상자에서 계속을 클릭하여 변경을 허용하거나 취소를 클릭합니다. 노트: 이 단계는 Dell 호스트에 알람 활성화를 선택한 경우에만 표시됩니다. 4. 관리되는 모든 Dell 서버에서 기본 vCenter 알람 설정을 복원하려면 기본 알람 복원을 클릭합니다. 변경이 적용되는 데 1 분 정도 걸릴 수 있습니다. 5. 마법사를 계속하려면 저장 후 계속을 클릭합니다. 프록시 서버 설정 [마법사] 구성 마법사에서 프록시 서버를 설정하거나 Dell Management Center 의 설정 → 프록시 페이지를 사용하여 나중 에 설정합니다.
c) 마법사가 완료될 때 인벤토리 작업이 자동으로 실행되도록 하려면 마법사가 끝날 때 인벤토리 실행 [권 장] 확인란을 선택합니다. 이 확인란은 선택한 날짜에 확인란이 선택되면 표시됩니다. 3. 변경사항을 적용하고 계속하려면 저장 후 계속을 클릭합니다. 보증 검색 작업 실행 [마법사] 보증 검색 작업 구성 방법은 마법사 및 Dell 관리 센터의 설정 옵션에서와 비슷합니다. 마법사에서는 보증 검색 작업을 즉시 실행할 수 있는 옵션을 제공한다는 점이 다릅니다. 또한 작업 큐에서 보증 검색 작업을 즉시 실행할 수 있습니다. 보증 검색 작업을 실행하려면 다음을 수행합니다. 1. 2. 구성 마법사의 보증 스케줄 창에서 다음 중 하나를 수행합니다. – 보증 스케줄을 실행하려면 선택한 요일을 클릭합니다. – 보증 스케줄을 실행하지 않으려면, 보증 데이터 검색 안 함을 선택합니다. 선택한 요일을 선택한 경우 다음을 수행합니다. a) 보증 작업을 실행할 각 요일 옆에 있는 텍스트 상자를 선택합니다.
– Dell 온라인 스테이징 폴더가 있는 기본 펌웨어 리포지토리(ftp.dell.com)입니다. Dell Management Plug-in 은 선택 한 펌웨어 업데이트를 다운로드하고 이를 스테이징 폴더에 저장하며 이후에 업데이트가 필요에 따 라 적용됩니다. – 로컬/공유 리포지토리 Dell Repository Manager 응용프로그램을 사용하여 생성됩니다. 로컬 리포지토리는 Windows 기반 파 일 공유에 있어야 합니다. 2. 로컬/공유 리포지토리를 선택한 경우 다음을 수행합니다. a) 다음과 같은 형식을 사용하여 카탈로그 파일 위치를 입력합니다. * xml 파일용 NFS 공유: host:/share/filename.xml * gz 파일용 NFS 공유: host/share/filename.gz * xml 파일용 CIFS 공유: \\host\share\filename.xml * gz 파일용 CIFS 공유: \\host\share\filename.
4. 사용자 하위 탭을 클릭하고 사용자 ID 링크를 선택하여 편집할 사용자를 선택합니다. 5. 사용자 구성 옵션 단추가 선택되어 있는지 확인하고 다음 페이지를 계속 진행합니다. 6. 사용자를 구성하려면 다음 중 하나를 수행합니다. – 사용자를 사용 안 함으로 설정하려면 사용자 활성화 확인란을 선택 취소하고 적용을 클릭합니다. – 사용자를 사용으로 설정하려면 사용자 활성화 확인란을 선택하고 적용을 클릭합니다. 7. iDRAC 사용자 인터페이스를 수동으로 닫은 후 시스템을 다시 부팅하고 다시 로그인합니다. 8. 시스템이 다시 부팅된 후 iDRAC IP 주소가 표시될 때 키를 누릅니다. 9. LAN 사용자 구성으로 이동하고 사용할 자동 검색 플래그를 설정합니다. iDRAC 관리자 계정이 비활성화되어 있어야 합니다. 자동 검색 및 핸드셰이크의 네트워크를 설정하려면 http://www.delltechcenter.