Dell Management Plug-In for VMware vCenter Version 1.
Notes, Cautions, and Warnings NOTE: A NOTE indicates important information that helps you make better use of your computer. CAUTION: A CAUTION indicates potential damage to hardware or loss of data if instructions are not followed. WARNING: A WARNING indicates a potential for property damage, personal injury, or death. Information in this publication is subject to change without notice. © 2012 Dell Inc. All rights reserved.
Contents Notes, Cautions, and Warnings...................................................................................................2 1 Quick Start Installation...............................................................................................................5 Installation Introduction............................................................................................................................................5 Prerequisites......................................................
Quick Start Installation 1 Installation Introduction The following sections provide installation and quick start information, including step-by-step instructions for Dell Management Plug-in installation and initial configuration on Dell servers. Once the installation is complete, refer to the Dell Management Plug-in User's Guide for configuration and deployment information. NOTE: With this release, and with installations on hosts that are version 12G and above, OMSA agent installation is not required.
Software Requirements The vSphere environment must meet virtual appliance, port access, and listening port requirements. In addition, install Adobe Flash player 10.0 or higher on the vSphere client system. vSphere 5 has both a desktop client and Web client. The Dell Management Plug-in is only available in the desktop client. NOTE: It is recommended that the Dell Management Plug-in and vCenter server are located on the same network.
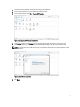
1. Double-click the executable file to begin the extracting the executable file. 2. Save the extracted files to a location available to the vSphere Client. 3. From the vSphere Client, select File → Deploy OVF Template . Figure 1. Deploying the OVF Template from vSphere 4. In the Source window, use the Browse button to locate the OVF package. The location can be a local drive, network drive, CD/DVD, or from the Internet. The Dell Management Plug-in file size is approximately 2.1 GB.
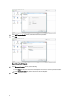
6. In the OVF Template Details window, review the information presented. 7. Click Next. Figure 3. Name the OVF Template 8. In the Name and Location window, do the following: a. In the Name text box, enter the name of the template. This name can contain up to 80 characters. 9. 8 b. In the Inventory Location list, select a location to store the template. Click Next.
Figure 4. Choose a Resource Pool/Host or Cluster 10. Depending on the vCenter configuration, one of the following options displays: – If resource pools are configured — On the Resource Pool page, select the pool of virtual servers to which the Dell Management Plug-in will be deployed. If resource pools are not configured — On the Hosts/Clusters page, select the host or cluster to which the Dell Management Plrug-in will be deployed. 11.
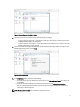
13. Click Next. Figure 6. Ready to Complete 14. In the Ready to Complete window, review the selected options for the OVF deployment task and click Finish. The deployment job runs and provides a completion status window where you can track job progress. Importing The License File and Registering The Dell Management Plug-in within vCenter To import the license file and register it within vCenter: 1.
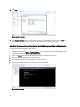
6. Launch another browser window, and enter the Admin Portal URL displayed in the Console tab. The URL is case sensitive and uses the following format: https:///DellAdminPortal/index.html. Figure 8. Administration Console 7. In the Administration Console login window, enter the password, and then click Login. Figure 9. vCenter Registration Window 8. In the vCenter Registration window, click Register a new vCenter Server.
Figure 10. Register a New vCenter 9. On the Register a New vCenter window, do the following: a) Under vCenter Name, in the vCenter Server IP or Hostname text box, enter the server IP or hostname and then in the Description text box, enter the optional description. b) Under Admin User Account, in the Admin User Name text box, enter the Admin user name. The Admin user account is used by the Dell Management Plug-in for vCenter administration. c) In the Password text box, enter the password.
. Once the Dell Management Plug-in is registered, the Dell Management Plug-in icon displays under the Management category of the vCenter home page. Figure 11. The Dell Managment Plug-in Successfully Added to vCenter Installation Verification The following steps verify that the Dell Management Plug-in installation was successful: 1. Confirm that the icon appears inside of vSphere Client. If it does not, restart the vSphere Client and check again. 2.
Understanding How To Configure the Dell Management Plug-in Using the Wizard 2 After you do the basic installation of the Dell Management Plug-in, it needs to be configured. This is typically done using the Configuration Wizard, but you can also do it using the Settings page options in the Dell Management Center Setting's options. The user interface in both areas is similar except in the wizard you Save and Continue, whereas in the Settings options you click Apply.
To create a new connection profile using the wizard: 1. From the Connection Profiles tab, click Create New. 2. In the Profile Name and Description panel, enter the Profile Name and an optional Description that are used to help manage custom connection profiles, and then click Next. 3. In the Associated Hosts panel, select the hosts for the connection profile and click Next. 4. View the information about credentials and connection protocols and click Next. 5.
– 2. Post only Virtualization-Related Critical and Warning Events - Post only virtualization-related critical and warning events; this is the default event posting level. To enable all hardware alarms and events, select the Enable Alarms for Dell Hosts check box. NOTE: Dell hosts that have alarms enabled respond to critical events by entering maintenance mode. 3. In the dialog box that displays, click Continue to accept this change, or click Cancel.
3. To automatically run the inventory task once the wizard is complete, select the Run inventory at the end of the wizard [Recommended] check box. 4. To apply the changes and continue, click Save and Continue. Running A Warranty Retrieval Job [Wizard] The warranty retrieval job configuration is similar between the wizard and from the Dell Management Center, Settings option. The only difference is that the wizard supplies an option to run the warranty retrieval job immediately.
– Dell Online This uses the default firmware update repository of Dell online (ftp.dell.com) with a required staging folder. The Dell Management Plug-in downloads selected firmware updates and stores them in the staging folder, and then they are applied as necessary. – Local/shared repository These are created with the Dell Repository Manager application. These local repositories should be located on Windows-based file shares. 2.
4. Click the Users sub tab, and select the user to edit by selecting the user ID link. 5. Make sure that the Configure User option button is selected, and continue to the next page. 6. To configure the user, do one of the following: – To disable a user, uncheck the Enable User check box and then click Apply. – To enable a user, check the Enable User check box and then click Apply. 7. Manually close the iDRAC user interface, then reboot the system and log back in. 8.