
User's Manual

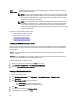
Table Of Contents
- Contents
- Notes, Cautions, and Warnings
- Overview
- Dell Management Plug-in Configuration
- Understanding How To Configure or Edit the Dell Management Plug-in
- Dell Management Plug-In Home Page
- Configuration Wizard Welcome Page
- Creating A New Connection Profile [Wizard]
- Configuring Events And Alarms [Wizard]
- Setting Up A Proxy Server [Wizard]
- Scheduling Inventory Jobs [Wizard]
- Running A Warranty Retrieval Job [Wizard]
- Configuring the Deployment Credentials [Wizard]
- Setting The Default Firmware Update Repository [Wizard]
- Enabling The OMSA Link [Wizard]
- Configuring Dell iDRAC Auto-Discovery And Initial Start-up
- Configuring NFS Shares
- Settings Overview
- About Host, Bare Metal, and iDRAC Compliance Issues
- Upgrading Dell Management Plug-In For VMware VCenter
- About Dell Management Plug-in Licensing
- End-To-End Hardware Management
- Monitoring the Datacenter And Host System
- vSphere Client Host Overview
- About Inventory Schedule
- Viewing Storage Inventory
- Viewing Host Power Monitoring
- Displaying The Entire Datacenter Hardware Configuration And Status
- Managing Connection Profiles
- Understanding System Event Logs In vSphere Client Host View
- About Firmware Updates
- Advanced Host Management Using vCenter
- Zero-Touch Hardware Provisioning And Deployment
- Hardware Prerequisites
- Provisioning Overview
- Understanding Deployment Job Times
- Server States Within The Deployment Sequence
- Downloading Custom Dell ISO Images
- Understanding How To Configure A Hardware Profile
- About Managing Hardware Profiles
- Creating A New Hypervisor Profile
- Managing Hypervisor Profiles
- Building A New Deployment Template
- Running The Deployment Wizard
- Deployment Wizard - Step 1: Select Servers
- Deployment Wizard Step 2: Deployment Templates
- Deployment Wizard Step 3: Global Settings
- Deployment Wizard Step 4: Server Identification
- Deployment Wizard Step 5: Connection Profile
- Deployment Wizard Step 6: Scheduling Jobs
- Understanding Job Queue
- Adding A Server Manually
- Removing A Bare Metal Server
- Dell Management Plug-In Administration
- Web-based Administration Portal
- Managing vCenter Server Connections
- Virtual Appliance Management
- Setting Up Global Alerts
- Managing Backup And Restore
- Understanding vSphere Client Console Tab
- Troubleshooting
- Upgrading Issues
- Common Questions
- How Do I Test Event Settings By Using OMSA To Simulate A Temperature Hardware Fault?
- I Have The OMSA Agent Installed On A Dell Host System, But I Still Get An Error Message That OMSA Is Not Installed.What Should I Do?
- Can The Dell Management Plug-in Support ESX/ESXI with Lockdown Mode Enabled?
- Inventory is Failing on Hosts ESXi 4.0 Update2 and ESXi Update 3 in Lockdown Mode After a Reboot.
- When I tried to use lockdown mode, it failed.
- What Setting Should I Use For UserVars.CIMoeMProviderEnable With ESXi 4.1 U1?
- I Am Using A Reference Server To Create A Hardware Profile But It Failed. What Should I Do?
- I Am Attempting To Deploy ESX/ESXi On A Blade Server And It Failed. What Should I Do?
- Why Do I See Auto-discovered Systems Without Model Information In The Deployment Wizard
- The NFS Share Is Set Up With The ESX/ESXI ISO, But Deployment Fails With Errors Mounting The Share Location.
- How Do I Force Removal Of The Virtual Appliance?
- Entering A Password In The Backup Now Screen Receives An Error Message
- In vSphere, Clicking The Dell Server Management Tab Or Dell Management Icon Returns A 404 Error
- My Firmware Update Failed. What Do I Do?
- My vCenter Update Failed. What Can I Do?
- Performance during Connection Profile Test Credentials is extremely slow or unresponsive
- Bare Metal Deployment Issues
- Contacting Dell
- Where To Get Additional Help For This Software
- Dell Management Plug-in For VMware vCenter Related Information
- Virtualization—Related Events

RAID
Configuration
The RAID configuration displays the current RAID topology on the reference server at the time the
hardware profile was extracted.
NOTE: If using the customized settings from the reference server option in the hardware profile,
the RAID configuration task defaults to RAID1 on the first two drives of the integrated controller
that are RAID1 capable. Additionally, a dedicated hot-spare for the RAID1 array is created if a
candidate drive meeting the criteria exists.
NOTE: The Dell Management Plug-in enables certain BIOS settings under the Processor group
in the BIOS on all deployed servers, regardless of the settings on the reference server. Before
using a reference server to create a new hardware profile, it must have the Collect System
Inventory On Reboot (CSIOR) setting enabled and be rebooted to provide accurate inventory and
configuration information.
The tasks for creating hardware profiles include:
• Enabling CSIOR On A Reference Server
• Creating A New Hardware Profile
• Cloning A New Hardware Profile
• About Managing Hardware Profiles
Enabling CSIOR On A Reference Server
Before creating a hardware profile using a reference server, enable the Collect System Inventory On Reboot (CSIOR)
setting and reboot the server to provide accurate inventory and configuration information. There are two methods for
enabling CSIOR:
Locally This uses an individual host using the Dell Lifecycle Controller United Server Configurator (USC) user
interface.
Remotely This uses a WS-Man script. For more information on scripting this functionality, see the
Dell Tech Center
and the
DCIM Lifecycle Controller Management Profile
.
To enable CSIOR locally on a reference server:
1. Power on the system, and during POST press <F10> to launch USC.
2. Select Hardware Congfiguration → Part Replacement Configuration.
3. Enable the Collect System Inventory on Reboot setting, and exit USC.
Creating A New Hardware Profile
To create a new hardware profile:
1. In the Dell Management Center, select Deployment → Deployment Templates → Hardware Profile.
2. Click Create New.
3. In the New Hardware Profile page, do the following:
– In the Profile Name text box, enter the profile name.
– In the Description text box, type an optional description.
4. Click Save.
5. To continue, in the left pane, click Reference Server.
6. In the Reference Server window, click Edit.
60