
Users Guide


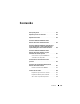
Table Of Contents
- Overview
- Pre-Installation Requirements
- System Requirements
- Installing Microsoft Windows Small Business Server 2011 Using Dell USC
- Installing Microsoft Windows Small Business Server 2011 Using the Dell Systems Management Tools and Documentation Media
- Installing Microsoft Windows Small Business Server 2011 Using the Operating System Media
- Completing the Operating System Installation
- Installing Windows Small Business Server 2011 Premium Add-On
- Partitioning a Drive
- 概览
- 预安装要求
- 系统要求
- 使用 Dell USC 安装 Microsoft Windows Small Business Server 2011
- 使用 Dell Systems Management Tools and Documentation 介质安装 Microsoft Windows Small Business Server 2011
- 使用操作系统介质安装 Microsoft Windows Small Business Server 2011
- 完成操作系统安装
- 安装 Windows Small Business Server 2011 Premium 加载项
- 对驱动器进行分区
- 概觀
- 預安裝要求
- 系統需求
- 使用 Dell USC 安裝 Microsoft Windows Small Business Server 2011
- 使用 Dell Systems Management Tools and Documentation 媒體安裝 Microsoft Windows Small Business Server 2011
- 使用作業系統媒體安裝 Microsoft Windows Small Business Server 2011
- 完成作業系統安裝
- 安裝 Windows Small Business Server 2011 Premium 附加元件
- 分割磁碟機
- Présentation
- Tâches préalables à l'installation
- Configuration système requise
- Installation de Microsoft Windows Small Business Server 2011 à l'aide de l'utilitaire Dell USC
- Installation de Microsoft Windows Server Small Business 2011 à l'aide du support Dell Systems Management Tools and Documentation (Documentation et outils de gestion des systèmes Dell)
- Installation de Microsoft Windows Small Business Server 2011 à l'aide du support du système d'exploitation
- Finalisation de l'installation du système d'exploitation
- Installation du module complémentaire Windows Small Business Server 2011 Premium
- Partitionnement d'un disque dur
- Übersicht
- Maßnahmen vor der Installation
- Systemanforderungen
- Installation von Microsoft Windows Small Business Server 2011 mit dem Dell USC
- Installation von Microsoft Windows Small Business Server 2011 mit dem Dell Systems Management Tools and Documentation-Medium
- Installation von Microsoft Windows Small Business Server 2011 vom Betriebssystemmedium
- Abschließen der Betriebssysteminstallation
- Installation von Windows Small Business Server 2011 Premium-Add-On
- Partitionieren eines Laufwerks
- 概要
- インストール前の要件
- システム要件
- Dell USC を使用した Microsoft Windows Small Business Server 2011 のインストール
- Dell Systems Management Tools and Documentation メディアを使用した Microsoft Windows Small Business Server 2011 のインストール
- 『再インストール用』メディアを使用した Microsoft Windows Small Business Server 2011 のインストール
- OS のインストールの完了
- Microsoft Windows Small Business Server 2011 Premium Add-On のインストール
- ドライブのパーティション
- 개요
- 사전 설치 요구 사항
- 시스템 요구 사항
- Dell USC를 사용하여 Microsoft Windows Small Business Server 2011 설치
- Dell Systems Management Tools and Documentation 매체를 사용하여 Microsoft Windows Small Business Server 2011 설치
- 운영 체제 매체를 사용하여 Microsoft Windows Small Business Server 2011 설치
- 운영 체제 설치 완료
- Windows Small Business Server 2011 Premium 추가 기능 설치
- 드라이브 분할
- Descripción general
- Requisitos previos a la instalación
- Requisitos del sistema
- Instalación de Microsoft Windows Small Business Server 2011 mediante Dell USC
- Instalación de Microsoft Windows Small Business Server 2011 mediante el soporte multimedia Dell Systems Management Tools and Documentation
- Instalación de Microsoft Windows Small Business Server 2011 mediante el soporte multimedia del sistema operativo
- Finalización de la instalación del sistema operativo
- Instalación del complemento Windows Small Business Server 2011 Premium
- Partición de una unidad

126 Windows Small Business Server 2011 설치
운영 체제 설치 완료
운영 체제를 설치한 후 다음 절차를 수행하여 필요한 정보를 입력합니다.
1
Verify the clock and time zone settings
(
클럭
및
시간대
설정
확인
)
화면
에서
Open Date and Time to verify the clock and time zone settings
(
날
짜
및
시간을
열고
클럭
및
시간대
설정
확인
)
를
클릭한
다음
설정을
변
경합니다
.
2
다음을
클릭합니다
.
중요
업데이트
받기
화면이
표시됩니다
.
운영
체제에
네트워크
컨트롤러의
드라이버가
없으면
네트워크
어댑터
를
찾을
수
없음
화면이
표시됩니다
.
다음
옵션
중
하나를
사용하여
네트
워크
컨트롤러
드라이버를
설치합니다
.
•
장치
관리자를
열어
드라이버
설치
•
찾아보기
주: 네트워크 컨트롤러 드라이버를 설치하지 않으면 설치를 계속할 수
없습니다.
3
온라인에서
가장
최신의
설치
업데이트
받기를
선택합니다
.
주: 시스템이 인터넷에 연결된 경우에만 이 옵션을 선택할 수 있습니다.
시스템이 인터넷에 연결되어 있지 않은 경우
가장
최신의
설치
업데이트
를
받지
않음
을 선택합니다.
설치
업데이트
진행률과
함께
서버에
연결
화면이
표시됩니다
.
업데이트가
완료되면
회사
정보
화면이
표시됩니다
.
4
회사
세부
정보
(
선택
사항
)
를
입력하고
다음을
클릭합니다
.
서버와
네트워크
개인화
화면이
표시됩니다
.
5
내부
도메인
이름인
서버
이름을
선택하고
다음을
클릭합니다
.
주: 설치한 후에는 서버 이름 및 내부 도메인 이름을 변경할 수 없습니다.
네트워크
관리자
계정
추가
화면이
표시됩니다
.
6
네트워크
관리자
사용자
이름과
암호를
입력하고
다음을
클릭합니다
.
보안
서비스
설치
화면이
표시됩니다
.
7
해당
보안
서비스
(
선택
사항
)
를
선택하고
다음을
클릭합니다
.