
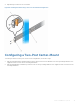
Setup Guide
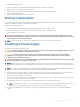

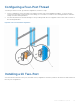

3 Tighten the captive screws on the fan tray with a screwdriver. Ensure that the fan tray is secure.
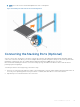
Figure 24. Installing a Fan Tray
Replacing a Fan Tray
To replace a fan tray, follow these steps:
NOTE
: Environmental factors can decrease the amount of time required between fan replacements. Check the
environmental factors regularly. An increase in temperature and/or particulate matter in the air might affect performance
(for example, new equipment installation).
CAUTION: Check the fans at six-month intervals and replace them as necessary. To accurately determine replacement
intervals, monitor the speeds of the cooling fans regularly.
NOTE: If a fan tray fails, you must completely replace it. There are no field serviceable components in the fan tray unit. To
request a replacement, see Dell Networking Support.
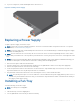
1 Loosen the securing screws on the sides of the failed fan tray.
2 Use the grab handle to slide the fan tray out of the bay.
3 Use the grab handle on the replacement fan tray to slide it into the bay.
4 Tighten the captive screws on the replacement fan tray with a screwdriver. Ensure that the fan tray is secure.
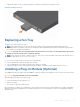
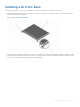
Installing a Plug-In Module (Optional)
The S3100 series switches support SFP+ and 10GBase-T plug-in modules in the expansion slots on the PSU side of the switch.
CAUTION
: The plug-in modules are not hot-swappable.
To install a plug-in module, follow these steps:
1 Insert the module into an expansion slot.
2 Reboot the switch.
The switch recognizes the new module.
After a module is recognized, its configuration is stored locally on the switch as the switch default. The module configuration
appears in the running configuration for informational purposes. For more information, see the Dell Configuration Guide for
the S3100 Series.
Install a S3100 Series System 33