
Install Guide


Upgrade firmware through DiagOS
This section describes the steps to take to upgrade the VEP4600’s firmware if your VEP4600 arrived from Dell with the DiagOS
as the only operating system.
The Unified Firmware Updater will need to be copied to a USB and run from the mounted USB.
Topics:
• Check the existing firmware version
• Copy the Unified Firmware Updater to USB
• Mount USB on the VEP4600
• Run the Unified Firmware Updater through USB
Check the existing firmware version
To check the current VEP4600 firmware versions from the DiagOS run the following command:
DiagOS installed: log in and type updatetool -D ALL -V
Copy the Unified Firmware Updater to USB
1. Download the Unified Firmware Updater (UFW) from the Dell support site.
2. Unzip vep4600_ufw_2.9.zip file to access vep4600_ufw_2.9 (UFW) script.
3. vep4600_ufw_2.9 contains the following firmware versions:
● CPLD – v10
● BMC – v2.10
● BIOS – 3.41.0.9-16
● rNDC CPLD image – 0x02
● rNDC nvm images (DUP package – 18.08.9)
4. From a Windows or Linux server copy the vep4600_ufw_2.9 file to a USB. (USB size 2GB is sufficient)
Mount USB on the VEP4600
1. Insert the USB into the USB port in the VEP4600 front panel.
2. From the serial console DiagOS:
a. Run the command mkdir /mnt/usb to create the mount point
b. Run the command mount /dev/sdb /mnt/usb
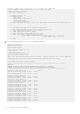
3. The USB can take a different device name, but usually VEP4600 DIAG OS assigns sdb for the USB. If you run fdisk -l
the USB is usually one of the last drives in the list.
Device Boot Start End Sectors Size Id Type
/dev/sdb1 32 30031871 30031840 14.3G c W95 FAT32 (LBA)
5
12 Upgrade firmware through DiagOS