
Users Guide


Providing user access privileges for association objects
To provide access privileges to the authenticated users for accessing the created association objects:
1. Go to Administrative Tools > ADSI Edit. The ADSI Edit window is displayed.
2. In the right-pane, navigate to the created association object, right-click and select Properties.
3. In the Security tab, click Add.
4. Type Authenticated Users, click Check Names, and click OK. The authenticated users is added to the list of Groups
and user names.
5. Click OK.
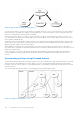
Adding objects to association object
Using the Association Object Properties window, you can associate users or user groups, privilege objects, and iDRAC
devices or iDRAC device groups.
You can add groups of users and iDRAC devices.
Adding users or user groups
To add users or user groups:
1. Right-click the Association Object and select Properties.
2. Select the Users tab and click Add.
3. Enter the user or user group name and click OK.
Adding privileges
To add privileges:
Click the Privilege Object tab to add the privilege object to the association that defines the user’s or user group’s privileges
when authenticating to an iDRAC device. Only one privilege object can be added to an Association Object.
1. Select the Privileges Object tab and click Add.
2. Enter the privilege object name and click OK.
3. Click the Privilege Object tab to add the privilege object to the association that defines the user’s or user group’s privileges
when authenticating to an iDRAC device. Only one privilege object can be added to an Association Object.
Adding iDRAC devices or iDRAC device groups
To add iDRAC devices or iDRAC device groups:
1. Select the Products tab and click Add.
2. Enter iDRAC devices or iDRAC device group name and click OK.
3. In the Properties window, click Apply and click OK.
4. Click the Products tab to add one iDRAC device connected to the network that is available for the defined users or user
groups. You can add multiple iDRAC devices to an Association Object.
Configuring Active Directory with Extended schema using iDRAC web
interface
To configure Active Directory with extended schema using Web interface:
NOTE: For information about the various fields, see the iDRAC Online Help.
1. In the iDRAC Web interface, go to iDRAC Settings > Users > Directory Services > Microsoft Active Directory. Click
Edit
The Active Directory Configuration and Management Step 1 of 4 page is displayed.
2. Optionally, enable certificate validation and upload the CA-signed digital certificate used during initiation of SSL connections
when communicating with the Active Directory (AD) server.
158
Configuring user accounts and privileges