
Service Manual

The argument options are:
• server — show omi-server log
• provider — show dell-provider log
• agent — show omi-agent log
• client — show omi-client log
• dsc — show dsc log
• logger — show dell-logger log
• httpsend — show HTTP send trace log
• httprecv — show HTTP recv trace log
The additional (optional) arguments are:
• top — show the status from top
• bottom — show the status from bottom
• number of lines — specify the number of lines
NOTE
: The script path is/usr/pkg/omi108/bin.
Example:
Dell# script execute omi-server-show args “server”
Dell# script execute omi-server-show args “server top 10”
Dell# script execute omi-server-show args "provider bottom 10"
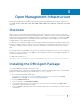
Getting Started with OMI
This section describes how you start configuring the OMI. To configure the OMI, follow these steps:
1 Get the chassis ready with the packages installed.
2 Get the DellNetworking DSC module from the chassis to install in the Windows server.
a Copy the MOF file (ZIP file) to flash as flash:/DellNetworkingDSC.zip
EXEC mode
script execute omi-server-config args “get-mof”
b Copy the DellNetworkingDSC.zip to the Windows server.
NOTE: The complete schema implemented can be referred in the MOF files present in the extracted
sub–folders.
3 Configure rest server http.
4 To communicate from Windows server, configure the user with privilege level 15. Default user is admin.
5 Install the DellNetworking DSC module.
• Unzip the DellNetworkingDSC.zip file and place it in one of the paths available in
$env:PSModulePath or add the folder to the $env:PSModulePath. For additional information,
see
https://msdn.microsoft.com/en-us/library/dd878326(v=vs.85).aspx.
6 In the Windows PowerShell environment, create the configuration block.
Following example uses the name MSFT_NetworkDevice_EthernetPortViewConfig.
Configuration MSFT_NetworkDevice_EthernetPortViewConfig
{
Open Management Infrastructure 70