Dell EMC OpenManage Integration für Microsoft System Center Version 7.1.
Anmerkungen, Vorsichtshinweise und Warnungen ANMERKUNG: Eine ANMERKUNG macht auf wichtige Informationen aufmerksam, mit denen Sie Ihr Produkt besser einsetzen können. VORSICHT: Ein VORSICHTSHINWEIS macht darauf aufmerksam, dass bei Nichtbefolgung von Anweisungen eine Beschädigung der Hardware oder ein Verlust von Daten droht, und zeigt auf, wie derartige Probleme vermieden werden können.
Inhaltsverzeichnis 1 Einführung in OMIMSSC................................................................................................................................ 5 2 OMIMSSC-Komponenten.............................................................................................................................. 6 3 Workflows zum Installieren oder Verwalten von OMIMSSC............................................................................7 Planen der Installation von OMIMSSC auf SCCM............
Anzeigen von Lizenzdetails.............................................................................................................................................20 7 Verwalten von OMIMSSC und seiner Komponenten..................................................................................... 21 Anzeigen der OMIMSSC-Gerätedetails......................................................................................................................... 21 Anzeigen der OMIMSSC-Benutzerverwaltung.........
1 Einführung in OMIMSSC OpenManage Integration for Microsoft System Center (OMIMSSC) bietet eine Integration in die System Center Produkt-Suite. OMIMSSC ermöglicht die vollständige Verwaltung des Lebenszyklus von Dell EMC PowerEdge-Servern mithilfe des integrierten Dell Remote Access Controllers (iDRAC) mit Lifecycle Controller (LC) und von modularen Systemen (Dell EMC PowerEdge MX7000) mithilfe der OpenManage Enterprise Modular Edition.
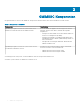
2 OMIMSSC-Komponenten Im folgenden finden Sie eine Liste der OMIMSSC-Komponenten und deren Namen, die in diesem Handbuch verwendet werden: Tabelle 1. Komponenten in OMIMSSC Komponenten Beschreibung OpenManage Integration for Microsoft System Center, auch bekannt als virtuelle Maschine für das OMIMSSC-Gerät.
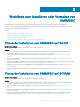
3 Workflows zum Installieren oder Verwalten von OMIMSSC Basierend auf Ihren Anforderungen können Sie entweder die OMIMSSC-Konsolenerweiterung für SCCM oder die OMIMSSCKonsolenerweiterung für SCVMM installieren, ein bestehendes OMIMSSC aktualisieren oder OMIMSSC migrieren, indem Sie die in den folgenden Themen genannten Tasks ausführen: Themen: • Planen der Installation von OMIMSSC auf SCCM • Planen der Installation von OMIMSSC auf SCVMM • Planen der Aktualisierung von OMIMSSC • Migration von einem OM
5 Registrieren Sie die SCVMM-Konsole bei OMIMSSC durch die Eingabe der Details. Weitere Informationen finden Sie unter MicrosoftKonsole registrieren. 6 Importieren Sie die OMIMSSC-Konsolenerweiterung für SCVMM. Weitere Informationen finden Sie unter Importieren der OMIMSSCKonsolenerweiterung für SCVMM. 7 Starten Sie die OMIMSSC-Konsolenerweiterung in SCVMM. Weitere Informationen finden Sie unter Starten der OMIMSSCKonsolenerweiterung für SCVMM.
4 Systemanforderungen für OMIMSSC Themen: • Kontoberechtigungen • Allgemeine Systemanforderungen für OMIMSSC • Systemanforderungen der OMIMSSC-Konsolenerweiterung für SCCM • Systemanforderungen der OMIMSSC-Konsolenerweiterung für SCVMM • Netzwerkanforderungen Kontoberechtigungen Alle zur Verwendung von OMIMSSC erforderlichen Kontenberechtigungen lauten wie folgt: Kontoberechtigungen für die OMIMSSC-Konsolenerweiterung für SCCM bestehen darin, dass der Benutzer Mitglied der folgenden Gruppen in SCC
– Sie können jetzt eine beliebige Anzahl von SCCM- oder SCVMM-Konsolen an einem OMIMSSC-Gerät registrieren, da OMIMSSC die Multikonsolenregistrierung unterstützt. Basierend auf der Anzahl der Konsolen, die Sie anmelden möchten, gelten folgende Hardwareanforderungen: Tabelle 3.
Tabelle 4. Portinformationen Verwendung Protokoll Schnittstellennummer iDRAC-Kommunikation WSMan — Modulare Systeme REST — Auto-Ermittlung HTTPS — iDRAC – Diese Ports sind für den iDRACZugriff auf die durch das Installationsprogramm erstellte CIFSFreigabe aktiviert.
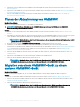
5 Installation und Konfiguration von OMIMSSC Themen: • Herunterladen von OMIMSSC aus dem Web • Einrichten des OMIMSSC-Geräts • Registrieren mehrerer Microsoft-Konsolen • Starten des OMIMSSC-Admin-Portals zum Download der OMIMSSC-Komponenten • Registrieren der Microsoft-Konsole in OMIMSSC • Starten von OMIMSSC über eine registrierte Microsoft-Konsole Herunterladen von OMIMSSC aus dem Web Info über diese Aufgabe Zum Herunterladen von OMIMSSC von https://www.dell.
f g h i Wählen Sie unter Netzwerk konfigurieren in Verbindung das Netzwerk aus, das Sie verwenden möchten, und klicken Sie dann auf Weiter. Wählen Sie unter Virtuelle Festplatte verbinden die Option Eine vorhandene virtuelle Festplatte verwenden aus, navigieren Sie zum Speicherort, auf dem die VHD-Datei OMIMSSCOMIMSSC_v7.1.0_for_VMM_and_ConfigMgr vorhanden ist, und wählen Sie die Datei aus. Bestätigen Sie in Zusammenfassung die von Ihnen eingegebenen Details, und klicken Sie auf Fertigstellen.
Starten des OMIMSSC-Admin-Portals zum Download der OMIMSSC-Komponenten 1 Starten Sie einen Browser und melden Sie sich beim OMIMSSC-Admin-Portal unter Verwendung der gleichen Anmeldeinformationen an, die bei der Anmeldung am OMIMSSC-Gerät verwendet wurden. Format: https:// ANMERKUNG: Fügen Sie die URL des OMIMSSC-Admin-Portals unter lokaler Intranetstandort hinzu.
Die folgenden Ordner werden nach der Installation der Konsolenerweiterung erstellt: • Log: Dieser Ordner enthält protokollbezogene Protokollinformationen. • 6 OMIMSSC_UPDATE: Dieser Ordner enthält alle Aktivitäten, die für das Cluster Aware Update (CAU) erforderlich sind. Dieser Ordner verfügt nur über Lese- und Schreibberechtigungen für CAU-Vorgänge. WMI-Berechtigungen (Windows Management Instrumentation) sind für diesen Ordner konfiguriert.
Starten von OMIMSSC über eine registrierte Microsoft-Konsole Starten Sie OMIMSSC über eine registrierte SCCM- oder SCVMM-Konsole. Hinzufügen der OMIMSSC-IP-Adresse im Browser Info über diese Aufgabe Vor dem Starten von OMIMSSC fügen Sie die IP-Adresse von OMIMSSC als Voraussetzung in die Standortliste Lokales Intranet ein, indem Sie die folgenden Schritte ausführen: Schritte 1 Klicken Sie auf IE-Einstellungen und anschließend auf Internetoptionen.
Starten der OMIMSSC-Konsolenerweiterung für SCVMM 1 Wählen Sie in der SCVMM-Konsole Struktur und dann die Servergruppen Alle Hosts aus. ANMERKUNG: Um die OMIMSSC-Konsole zu starten, können Sie eine beliebige Host-Gruppe auswählen, für die Sie eine Zugriffsberechtigung haben. 2 Wählen Sie in der Multifunktionsleiste Home die Option Dell EMC OMIMSSC.
6 OMIMSSC-Lizenzierung OMIMSSC verfügt über zwei Arten von Lizenzen: • Testlizenz: Dies ist eine Testversion der Lizenz, die eine Testlizenz für fünf Server (Hosts oder nicht zugeordnete) enthält, die nach der Installation automatisch importiert wird. Dies gilt nur für die 11. und spätere Generationen der Dell EMC-Server. • Produktionslizenz: Sie können eine Produktionslizenz von Dell EMC für eine beliebige Anzahl von Servern erwerben, die von OMIMSSC verwaltet werden.
Wenn Sie bereits mehrere Lizenzen hochgeladen haben, ist die Anzahl unterstützter Server die Summe der Server in den nicht abgelaufenen Lizenzen zu dem Zeitpunkt, zu dem die letzte Lizenz hochgeladen wurde. Ersatz von Lizenzen Wenn bei Ihrer Bestellung ein Problem auftritt oder wenn Sie versuchen, eine geänderte oder beschädigte Datei hochzuladen, wird eine entsprechende Fehlermeldung angezeigt. Sie können eine weitere Lizenzdatei vom digitalen Schließfach von Dell anfordern.
Importieren der Lizenz in OMIMSSC Info über diese Aufgabe Importieren Sie nach dem Kauf einer Lizenz diese mit den folgenden Schritten in OMIMSSC: Schritte 1 Klicken Sie im OMIMSSC-Admin-Portal auf Lizenzzenter. 2 Klicken Sie auf Lizenz importieren und wählen Sie die aus dem Dell Digital Store heruntergeladene Lizenzdatei aus. ANMERKUNG: Sie können nur gültige Lizenzdateien importieren. Wenn die Datei beschädigt oder manipuliert ist, wird eine entsprechende Fehlermeldung angezeigt.
7 Verwalten von OMIMSSC und seiner Komponenten Anzeigen der OMIMSSC-Gerätedetails 1 Starten Sie das OMIMSSC-Admin-Portal über einen Browser. 2 Melden Sie sich beim OMIMSSC-Admin-Portal unter Verwendung der gleichen Anmeldeinformationen an, die bei der Anmeldung an der OMIMSSC-Gerät-VM verwendet wurden, und klicken Sie auf Gerätedetails. Die IP-Adresse und der Hostname des OMIMSSCGeräts werden angezeigt. Anzeigen der OMIMSSC-Benutzerverwaltung 1 Starten Sie das OMIMSSC-Admin-Portal über einen Browser.
• Reparieren der OMIMSSC-Konsolenerweiterung für SCVMM Reparieren der OMIMSSC-Konsolenerweiterung für SCCM Um die OMIMSSC-Dateien im Falle einer Beschädigung zu reparieren, führen Sie folgende Schritte durch: 1 Führen Sie das Installationsprogramm für die OMIMSSC-Konsolenerweiterung für SCCM aus. Der Welcome-Bildschirm (Startbildschirm) wird angezeigt. 2 Klicken Sie auf Next (Weiter).
Sichern des OMIMSSC-Geräts Speichern Sie mithilfe der Option Gerätedaten sichern vom OMIMSSC-Gerät OMIMSSC-Informationen wie registrierte MicrosoftKonsolen, erkannte Geräte, Profile, Update-Quellen, Betriebsvorlagen, Lizenzen und abgeschlossene Jobs in OMIMSSCKonsolenerweiterungen. OMIMSSC-Gerät wieder aktivieren Voraussetzung • Stellen Sie sicher, dass in OMIMSSC keine Jobs ausgeführt werden.
Nächste Schritte Führen Sie nach dem Wiederherstellen des alten OMIMSSC-Geräts die folgenden Schritte aus. • Es wird empfohlen, die geplanten Aufträge nach dem Wiederherstellen des alten OMIMSSC-Geräts neu zu erstellen. • Stellen Sie für die Hypervisor-Profile, die aus einer früheren Version von OMIMSSC exportiert wurden, sicher, dass Sie das Profil bearbeiten, um den ISO-Dateipfad und das Windows-Berechtigungsprofil anzugeben.
• Sichern Sie die OMIMSSC-Gerätedaten. ANMERKUNG: Weitere Informationen zur Sicherung finden Sie im Abschnitt Sicherung des OMIMSSC-Geräts im Installationshandbuch zu Dell EMC OpenManage Integration für Version 7.1.1 von Microsoft System Center für Configuration Manager und System Center Virtual Machine Manager.
Schritte 1 Öffnen Sie den IIS-Manager auf dem Server, auf dem die Repo-Dateien gespeichert sind. 2 Erweitern Sie den Host-Namen. Klicken Sie auf Standorte und dann auf Standardwebsite. 3 Klicken Sie im Fensterbereich Maßnahme auf Hinzufügen. Das Fenster MIME-Typ hinzufügen wird angezeigt. 4 Geben Sie .BZ2 als Dateinamenserweiterung und APP/BZ2 als MIME-Typ an und klicken Sie auf OK. Repository vorbereiten 1 Platzieren Sie die Service Packs-Dateien direkt in den HTTP-Server.
So überprüfen Sie die Service Pack-Aktualisierung: 1 Zeigen Sie im OMIMSSC-Admin-Portal unter Info die Details der Service Pack-Aktualisierungsversion an. 2 Weitere Informationen finden Sie im OMIMSSC-Admin-Portal unter der Option Einstellungen > Protokolle. 3 Wählen Sie im Verzeichnis upgradelogs zum Anzeigen oder Herunterladen der Protokolldateien für das Service Pack-Upgrade das Verzeichnis aus, zum Beispiel das Verzeichnis "1.2.0.
7 Klicken Sie auf der Seite Zur Installation des Programms bereit auf Installieren. 8 Klicken Sie auf der Seite InstallShield-Assistent abgeschlossen auf Fertigstellen, um die Installation abzuschließen. 9 Löschen Sie die OMIMSSC-Konsolenerweiterung für SCVMM und importieren Sie die Konsolenerweiterung erneut. Weitere Informationen zum Entfernen der Konsole finden Sie unter Entfernen der OMIMSSC-Konsolenerweiterung für SCVMM.
• Wenn eine OMIMSSC-Konsole während dem Aufheben der Registrierung bereits geöffnet ist, schließen Sie die Microsoft-Konsole, um die Aufhebung abzuschließen. • Für SCVMM-Benutzer: – Wenn Sie die Registrierung der SCVMM-Konsole am OMIMSSC zwangsweise aufheben, wenn der SCVMM-Server nicht erreichbar ist, löschen Sie das Anwendungsprofil in SCVMM manuell. OMIMSSC-Konsolenerweiterung für SCCM deinstallieren Doppelklicken Sie auf OMIMSSC_SCCM_Console_Extension.
Löschen von OMIMSSC-Anwendungsprofilen 1 Klicken Sie in der SCVMM-Konsole auf Library (Bibliothek), Profiles (Profile) und klicken Sie anschließend auf Applications profiles (Anwendungsprofile). Alle Anwendungsprofile, die in SCVMM verwendet werden, werden angezeigt. 2 Wählen Sie OMIMSSC Registration Profile (OMIMSSC-Registrierungsprofil) aus und löschen Sie es.
8 Zugriff auf Dokumente der Dell EMC SupportWebsite Sie können über die folgenden Links auf die erforderlichen Dokumente zugreifen: • Für Dokumente zu Dell EMC Enterprise Systems Management – unter www.dell.com/esmmanuals • Für Dokumente zu Dell EMC OpenManage – Www.dell.com/openmanagemanuals • Für Dokumente zu Dell EMC Remote Enterprise Systems Management – unter www.dell.com/esmmanuals • Für Dokumente zu iDRAC und Dell Lifecycle Controller – Www.dell.
3 Wählen Sie das Land bzw. die Region in der Drop-Down-Liste Land oder Region auswählen am unteren Seitenrand aus. 4 Klicken Sie je nach Bedarf auf den entsprechenden Service- oder Support-Link.