Dell OpenManage Server Administrator Version 7.
メモ、注意、警告 メモ: コンピュータを使いやすくするための重要な情報を説明しています。 注意: ハードウェアの損傷やデータの損失の可能性を示し、その問題を回避するための方法を説明してい ます。 警告: 物的損害、けが、または死亡の原因となる可能性があることを示しています。 © 2012 Dell Inc. 本書に使用されている商標:Dell™、Dell のロゴ、Dell Boomi™、Dell Precision™、OptiPlex™、Latitude™、PowerEdge™、PowerVault™、 PowerConnect™、OpenManage™、EqualLogic™、Compellent™、KACE™、FlexAddress™、Force10™ および Vostro™ は Dell Inc. の商標で す。Intel®、Pentium®、Xeon®、Core® および Celeron® は米国およびその他の国における Intel Corporation の登録商標です。 AMD® は Advanced Micro Devices, Inc.
目次 メモ、注意、警告.......................................................................................................................2 章 1: はじめに...............................................................................................................................7 インストール..........................................................................................................................................................7 個々のシステムコンポーネントのアップデート...........................................................
Server Administrator 管理下システムログイン — デスクトップアイコンを使用................................30 Server Administrator 管理システムログイン — ウェブブラウザを使用した場合................................30 Central Web Server ログイン.........................................................................................................................30 Active Directory ログインの使用..................................................................................................................31 シングルサインオン.................................................
プラットフォームのイベントフィルタアラートの設定...............................................................................69 プラットフォームのイベントアラート送信先の設定.............................................................................70 章 6: Server Administrator ログ................................................................................................71 組み込み機能........................................................................................................................................................71 ログウィンドウタスクボタン.
はじめに 1 Dell OpenManage Server Administrator(OMSA)は、包括的で 1 対 1 のシステム管理ソリューションを、統合さ れたブラウザベースのグラフィカルユーザーインタフェース(GUI)とオペレーティングシステム上のコマン ドラインインタフェース(CLI)という 2 つの方法を提供します。Server Administrator では、システム管理者 がローカルでも、ネットワーク経由でリモートでもシステムを管理できます。システム管理者に包括的で 1 対 1 のシステム管理を提供することにより、ネットワーク全体の管理に集中できます。Server Administrator の コンテキストでは、システムがスタンドアロンシステム、別のシャーシにネットワークストレージが取り付 けられたシステム、またはモジュラーエンクロージャに複数のサーバーモジュールがあるモジュラーシステ ムを意味します。Server Administrator は次のような情報を提供します。 • 正常に動作しているシステムと問題があるシステム • リモート回復操作が必要なシステム Server
メモ: Dell システムのアップデート、またはリポジトリに表示されているシステムに使用できるアップデ ートのリストを表示するために、Server Update Utility(SUU)を入手して使用する方法の詳細は、『Dell Server Update Utility ユーザーズガイド』(dell.com/support/manuals)を参照してください。 Storage Management Service Storage Management Service は、統合されたグラフィック表示でストレージ管理情報を提供します。 メモ: ストレージ管理サービスの詳細については、support.dell.com/manuals の『Dell OpenManage Server Administrator Storage Management ユーザーズガイド』(dell.
• OMSA の検索機能とのオンラインヘルプインタフェースが改善されました。 • ストレージ管理で次の機能がサポートされるようになりました。 – サーバーに接続された対応テープドライブを一覧表示したテープドライブレポート。 – 物理ディスクファームウェアは、新しいファームウェアバージョンが使用できるディスクをユ ーザーが識別できる、グラフィカルユーザーインタフェース(GUI)上でレポートします。こ のレポートは、コントローラまたはシステムレベルで生成して、サーバーに接続されたすべて の物理ディスクのファームウェアバージョンの連結情報を取得できます。 仮想ディスクウィザードの画面が単純化されて数も減少し、ユーザー体験が改善されました。 – メモ: 詳細については、 『Dell OpenManage Server Administrator ユーザーズガイド』 (dell.
利用可能なシステム管理標準 Dell OpenManage Server Administrator では、次の主要なシステム管理プロトコルがサポートされています。 • HTTPS • 共通情報モデル(CIM) • 簡易ネットワーク管理プロトコル(SNMP) ご利用のシステムが SNMP をサポートしている場合、サービスをインストールし、オペレーティングシステ ムで有効にする必要があります。ご利用のオペレーティングシステムで SNMP サービスが利用できる場合 は、Server Administrator のインストールプログラムは、SNMP のサポートエージェントをインストールしま す。 HTTPS は、すべてのオペレーティングシステムでサポートされています。CIM および SNMP のサポートは、 オペレーティングシステムに依存します。また、オペレーティングシステムのバージョンに依存する場合も あります。 メモ: SNMP のセキュリティ上の懸念については、Dell OpenManage Server Administrator の readme ファイ ル(Server Administra
オペレーティングシステム snmp CIM メモ: ESXi は SNMP トラップをサポート していますが、SNMP を介したハードウ ェアのインベントリをサポートしてい ません。 Citrix XenServer 6.
• 『Dell Remote Access Controller 5 ユーザーズガイド』では、DRAC 5 コントローラのインストールと設定 方法、および DRAC 5 を使用した作動不能システムへのリモートでのアクセス方法について詳しく説 明しています。 • 『Dell Update Packages ユーザーズガイド』は、システムアップデート対策の一環としての Dell Update Packages の入手方法と使い方を説明しています。 • 『Dell OpenManage Server Update Utility ユーザーズガイド』では、Dell システムをアップデートしたり、 リポジトリに登録されているシステムに適用可能なアップデートを表示できる、サーバーアップデー トユーティリティ(SUU)の入手方法と使用法に関する情報が記載されています。 • 『Dell Management Console ユーザーズガイド』は、Dell 管理コンソールのインストール、設定、使用に ついて説明しています。 • 『Dell Lifecycle Controller ユーザーズガイド』は、システムのライフサイクル
2 設定と管理 Dell OpenManage Server Administrator は、ウェブをベースとするインタフェースとコマンドラインインタフェ ースの両方に対し、役割をベースとしたアクセス制御(RBAC)、認証、および暗号化を使ってセキュリティ を提供します。 役割ベースのアクセスコントロール RBAC は特定の役割内のユーザーが実行できる操作を決定して、セキュリティを管理します。各ユーザーに は 1 つ、または複数の役割が割り当てられており、各役割にはその役割内のユーザーが使用できるユーザー 権限が 1 つまたは複数割り当てられています。RBAC によってセキュリティ管理は組織の構造に密接に対応 しています。 ユーザー特権 Server Administrator は割り当てられたユーザーのグループ権限に応じて、異なるアクセス権を与えます。ユー ザー権限には、ユーザー、パワーユーザー、管理者、昇格管理者の 4 つのレベルがあります。 表 2.
計装 ユーザー、パワーユーザー、管理 者、昇格管理者 パワーユーザー、管理者、昇格管 理者 リモートアクセス ユーザー、パワーユーザー、管理 者、昇格管理者 管理者、昇格管理者 ストレージ管理 ユーザー、パワーユーザー、管理 者、昇格管理者 管理者、昇格管理者 認証 Server Administrator 認証スキームを使用すると、正しいアクセスタイプが正しいユーザー権限に割り当てられ ます。さらに、コマンドラインインタフェース(CLI)が起動すると、Server Administrator 認証スキームが現 在のプロセスが実行されているコンテキストを検証します。この認証スキームを使うことにより、Server Administrator ホームページと CLI のいずれからアクセスした場合でもすべての Server Administrator 機能が正 しく認証されます。 Microsoft Windows 認証 対応 Microsoft Windows オペレーティングシステムの場合、Server Administrator の認証に、統合 Windows 認証 (旧称 NTLM)が使
メモ: VMware ESXi Server 5.
対応の Red Hat Enterprise Linux および SUSE Linux Enterprise Server オペレーティン グシステムでの Server Aministrator ユーザーの作成 システム管理者のアクセス権限は、ルートでログインしているユーザーに割り当てられます。ユーザー権限 とパワーユーザー権限を持つユーザーを作成するには、以下の手順に従います。 メモ: これらの手順を実行するには、ルート ユーザーまたはそれと同等の権限を有するユーザーとして ログインする必要があります。 メモ: これらの手順を実行するには、システムに useradd ユーティリティがインストールされている必要 があります。 ユーザーの作成 メモ: ユーザーとユーザーグループの作成の詳細については、オペレーティングシステムのマニュアルを 参照してください。 ユーザー特権を持つユーザーの作成 1.
表 4. OpenManage Server Administrator に役割の定義を追加する凡例 ユーザー名 ホスト名 システム管理者 (+)グループ名 ドメイン ユーザー ワイルドカード(*) ワイルドカード(*) ユーザー [Tab] = \t (tab 文字) 次の表は、omarolemap ファイルへの役割定義の追加例を示しています。 表 5. OpenManage Server Administrator に役割の定義を追加する例 3. Bob Ahost パワーユーザー + ルート Bhost システム管理者 + ルート Chost システム管理者 Bob *.aus.amer.com パワーユーザー Mike 192.168.2.
3. ユーザー テーブルを右クリックし、追加 をクリックして、新規ユーザーの追加 ダイアログボックスを 開きます。 4. ログイン、ユーザー名、数字から成るユーザー ID(UID)、パスワードを入力します。ユーザー名と UID の指定はオプションです。UID を指定しない場合、vSphere クライアントが利用可能な UID を割り当てま す。 5. コマンドシェルを通じてユーザーが ESX/ESXi ホストにアクセスできるようにするには、このユーザーに シェルアクセスを許可する を選択します。vSphere クライアントからのみホストにアクセスするユーザ ーは、シェルアクセスを必要としません。 6. ユーザーをグループに追加するには、グループ ドロップダウンメニューからグループ名を選択し、追 加 をクリックします。 7. OK をクリックします。 対応 Windows オペレーティングシステム上でのゲストアカウントと匿名アカウ ントの無効化 メモ: この手順を実行するには、システム管理者権限でログインしている必要があります。 1. コンピュータの管理 ウィンドウを開きます。 2.
メモ: IT Assistant が Server Administrator を実行しているシステムからの管理情報を取得するには、IT Assistant が使用するコミュニティ名が Server Administrator を実行しているシステムのコミュニティ名と 一致する必要があります。IT Assistant が Server Administrator を実行中のシステムで情報を変更するか、 またはアクションを実行するには、IT Assistant で使用しているコミュニティ名が Server Administrator を 実行中のシステムで設定操作を許可するコミュニティ名と一致する必要があります。IT Assistant が Server Administrator を実行中のシステムからトラップ(非同期イベント通知)を受け取るには、Server Administrator を実行中のシステムが、IT Assistant を実行中のシステムにトラップを送信するよう設定す る必要があります。 以下の手順は、対応している各オペレーティングシステムで SNMP エージェントを設定する方法を説明して い
1. コンピュータの管理 ウィンドウを開きます。 2. 必要に応じて、同ウィンドウの コンピュータの管理 アイコンを展開します。 3. サービスとアプリケーション アイコンを展開して、サービス をクリックします。 4. サービスのリストを下にスクロールして SNMP サービス を見つけ、SNMP サービス を右クリックしてか ら、プロパティ をクリックします。 SNMP サービスプロパティ ウィンドウが表示されます。 5.
SNMP サービスプロパティ ウィンドウが表示されます。 5. トラップ タブをクリックしてトラップのコミュニティを追加するか、トラップコミュニティのトラップ 送信先を追加します。 a) トラップのコミュニティを追加するには、コミュニティ名 ボックスにコミュニティ名を入力し、コ ミュニティ名 ボックスの横にある リストに追加 をクリックします。 b) トラップコミュニティのトラップ送信先を追加するには、コミュニティ名 ドロップダウンボックス からコミュニティ名を選択して、トラップ送信先 ボックスの下の 追加 をクリックします。 SNMP サービス設定 ウィンドウが表示されます。 c) ホスト名、IP または IPX アドレスボックス 内で、トラップ送信先を入力し、追加 をクリックします。 SNMP サービスプロパティ ウィンドウが表示されます。 6.
があるため、存在しない場合は、インストール中に Server Administrator は SNMP エージェント設定ファイル / etc/snmp/snmpd.conf に次のラインを追加します: smuxpeer .1.3.6.1.4.1.674.10892.1 SNMP コミュニティ名の変更 SNMP コミュニティ名を設定すると、どのシステムが SNMP を使用してシステムを管理できるかが決まりま す。管理アプリケーションが Server Administrator から管理情報を取得するには、管理アプリケーションで使 用される SNMP コミュニティ名が、Server Administrator のシステムで設定されている SNMP コミュニティ名 と一致する必要があります。 Server Administrator のシステムから管理情報を取得するために使用される SNMP コミュニティ名を変更する には、以下の手順を行います。 1. SNMP エージェント設定ファイル、/etc/snmp/snmpd.conf を開きます。 2.
対応 SUSE Linux Enterprise Server が実行されるシステムでの SNMP エージェントの設定 Server Administrator は、net-snmp エージェントにより提供される SNMP サービスを使用します。 SNMP エー ジェントを設定して、リモートホストから SNMP へのアクセスの有効化、コミュニティ名の変更、Set 操作の 有効化、管理ステーションへのトラップ送信ができます。 IT Assistant などの管理アプリケーションと適切に 対話できるよう SNMP エージェントを設定するには、次のセクションの手順を実行します。 メモ: SNMP 設定の詳細については、オペレーティングシステムのマニュアルを参照してください。 Server Administrator SNMP インストールアクション Server Administrator SNMP は、SMUX プロトコルを使って SNMP エージェントと通信します。 Server Administrator SNMP が SNMP エージェントと接続すると、SNMP エージェントにオブジェクト識別子を送信し
ョンで使用される SNMP コミュニティ名が、Server Administrator のシステムで設定されている SNMP コミュ ニティ名と一致する必要があります。 Server Administrator を実行するシステムから、管理情報を取得するために使用されるデフォルトの SNMP コミ ュニティ名を変更するには、以下の手順を行います。 1. SNMP エージェント設定ファイル、/etc/snmp/snmpd.conf を開きます。 2. 次の行を見つけます。rocommunity public 127.0.0.1. 3. この行の public を新しい SNMP コミュニティ名と置き換え編集します。編集後の行は、次のようにな ります。rocommunity コミュニティ名 127.0.0.1. 4. SNMP 設定の変更を有効にするには、/etc/init.
メモ: カンマ区切りで複数の IP アドレスを入力することも可能です。 VMware SNMP サービスを有効にするには、次のコマンドを実行します。 b) vicfg-snmp.pl --server --username root --password - E 設定を表示するには、次のコマンドを実行します。 c) vicfg-snmp.pl --server --username root --password -s 変更後の設定ファイルの例は次の通りです: true public 143.166.152.248@162/public 167 2.
SNMP トラップを管理ステーションに送信するためのシステム設定 Server Administrator は、センサーおよびその他の監視パラメータのステータス変更に対して、SNMP トラップ を生成します。管理ステーションに SNMP トラップを送信するには、Server Administrator を実行しているシス テム上で 1 つ、または複数のトラップ先を設定する必要があります。 管理ステーションにトラップを送信するように Server Administrator を実行するお使いの ESXi システムを設定 するには、次の手順を実行します。 1. VMware vSphere CLI をインストールします。 2. VMware vSphere CLI をインストールしたシステム上で、コマンドプロンプトを開きます。 3. VMware vSphere CLI がインストールされたディレクトリを変更します。Linux のデフォルトロケーション は /usr/bin です。Windows のデフォルトロケーションは C:\Program Files\VMware\VMware vSphere C
メモ: ファイアウォールのセキュリティレベルの詳細については、 を押します。SNMP のデフォ ルトでのポート番号は、161 となっています。X Window System グラフィックユーザーインタフェー スを使用している場合は、 を押しても新しいバージョンの Red Hat Enterprise Linux ではファイア ウォールのセキュリティレベルが表示されないことがあります。 a) ファイアウォールを無効にするには、ファイアウォールなし または 無効 を選択して手順 7 に進みま す。 b) ネットワークインタフェース全体または SNMP ポートを開くには、高、中 または 有効 を選択して手 順 4 に進みます。 4. を押して カスタマイズ へ移動し、 を押します。 ファイアウォールの設定-カスタマイズ 画面が表示されます。 5.
Server Administrator の使用 3 Server Administrator セッションを開始するには、デスクトップ上の Dell OpenManage Server Administrator アイ コンをダブルクリックします。 Server Administrator ログイン 画面が表示されます。Dell OpenManage Server Administrator のデフォルトポート は 1311 となっています。必要に応じてポートを変更できます。システムのプリファレンスの設定について は、『Dell Systems Management Server Administration』を参照してください。 メモ: XenServer 6.
Server Administrator 管理下システムログイン — デスクトップアイコンを使用 このログインは、Server Administrator Web Server コンポーネントがシステムにインストールされている場合に のみ使用できます。Server Administrator にログインしてリモートシステムを管理するには、次の手順を実行し ます。 1. デスクトップ上の Dell OpenManage Server Administrator アイコンをダブルクリックします。 2.
4. 5. Active Directory Login を選択して、Microsoft Active Directory を使用してログインします。「Active Directory ログインの使用」を参照してください。 送信 をクリックします。 Server Administrator セッションを終了するには、グローバルナビゲーションバーで ログアウト をクリッ クします。 メモ: Mozilla Firefox バージョン 3.0 および 3.5 または Microsoft Internet Explorer version 7.0 または 8.0 を 使って Server Administrator を起動すると、中程度の警告ページにセキュリティ証明書に関する問題 が表示されます。システムセキュリティを確保するには、新しい X.509 証明書を生成する、既存 X.
ローカルマシンのユーザーアカウントに対してシングルサインオン認証を使用して Server Administrator を起 動するには、次のパラメータも渡す必要があります。 authType=ntlm&application=[プラグイン名]&locallogin=true ここで、 プラグイン名 = omsa、ita 等となります。 たとえば、次のとおりです。 https://localhost:1311/?authType=ntlm&application=omsa&locallogin=true また、Server Administrator は他の製品(Dell OpenManage IT Assistant など)もログインページを介さずに直接 Server Administrator の Web ページにアクセスできるように機能が拡張されています(既にログインしており、 適切な権限を持っている場合)。 対応 Microsoft Windows オペレーティングシステムが稼動するシステム上のセキ ュリティ設定 対応の Microsoft Windows オペレーティングシステムが稼動するリモート管
1. お使いのウェブブラウザで、ツール → インターネットオプション → セキュリティ の順にクリックしま す。 2. 表示するゾーンの選択またはセキュリティ設定の変更 で、信頼済みサイト をクリックし、サイト をク リックします。 3. このウェブサイトをゾーンに追加する フィールドに、リモート管理下システムにアクセスする際に使用 するウェブアドレスを貼り付けます。 4. 追加 をクリックします。 5. カスタムレベル をクリックします。 6. ユーザー認証 で、現在のユーザー名とパスワードで自動ログイン を選択します。 7. OK をクリックし新しい設定を保存します。 8. ブラウザを閉じて Server Administrator にログインします。 Mozilla Firefox でのクライアント側スクリプト使用の有効化 1. ブラウザを開きます。 2. 編集 → プリファレンス の順にクリックします。 3. 詳細設定 → スクリプトおよびプラグイン をクリックします。 4.
サーバーモジュール モジュラーシステム メインシステム モジュラーシステム システム 非モジュラーシステム メインシステムシャーシ 非モジュラーシステム 次の図は、非モジュラーシステムに管理者特権でログインしたユーザー用の、サンプル Server Administrator ホームページのレイアウトを示します。 図 1. Server Administrator ホームページの例 — 非モジュラーシステム 次の図は、モジュラーシステムに管理者特権でログインしたユーザー用の、サンプル Server Administrator ホ ームページのレイアウトを示します。 図 2.
機能レベルがさらにあることを示しています。 下線付きのアイテムをクリックすると、処置ウィンドウに新 しいデータ領域が作成され、より詳しい情報が含まれます。 たとえば、プロパティ処置タブの 正常性 サブ カテゴリの下にある メインシステムシャーシ/メインシステム をクリックすると、正常性がモニタされてい るメインシステムシャーシ/メインシステムオブジェクトに含まれる、すべてのコンポーネントの正常性ステ ータスが表示されます。 メモ: 設定可能なシステムのツリーオブジェクト、システムコンポーネント、処置タブ、およびデータ領 域機能の大部分を表示するには、管理者またはパワーユーザーの権限が必要です。 さらに、管理者権限 でログインしているユーザーのみが、シャットダウン タブに含まれるシャットダウン機能のような、重 要なシステム機能にアクセスできます。 モジュラーおよび非モジュラーシステムにおける Server Administrator ユーザーイ ンタフェースの違い 以下の表では、モジュラーおよび非モジュラーシステムにおいて利用できる Server Administrator 機能を記載 しています。 表 7.
機能 モジュラーシステム 非モジュラーシステム 電圧 モジュラーエンクロ ージャ(シャーシ情報 および CMC 情報) グローバルナビゲーションバー グローバルナビゲーションバーとそのリンクは、プログラム内のすべてのユーザーレベルで使用可能です。 • • • • プリファランス をクリックして プリファランス ホームページを開きます。「プリファランスホーム ページの使い方」を参照してください。 サポート をクリックして、デルサポートサイトに接続します。 バージョン情報 をクリックすると、Server Administrator のバージョン情報と著作権情報が表示されま す。 ログアウト をクリックすると、現在の Server Administrator プログラムセッションが終了します。 システムツリー システムツリーは Server Administrator ホームページの左側に表示され、システムの表示可能なコンポーネン トを一覧表示します。システムコンポーネントはコンポーネントの種類によって分類されています。モジュ ラエンクロージャ → システム / サーバーモジュール のメインオブジェクト
Server Administrator ユーザーインタフェースでは、 の形式で日付を表示します。 システム / サーバーモジュールコンポーネントステータスインジケータ コンポーネント名の横のアイコンはそのコンポーネントの状態を表します(ページの最終更新時点)。 表 8.
下線付きアイテム 処置ウィンドウのデータ領域の下線付きアイテムをクリックすると、そのアイテムの詳細が表示されます。 ゲージインジケータ 温度プローブ、ファンプローブ、電圧プローブはそれぞれゲージインジケータによって示されます。例えば、 次の図はシステムの CPU のファンプローブの読み取り値の例を示しています。 図 3.
• 処置ウィンドウには、管理下システムまたは Server Administrator ウェブサーバー用に利用可能な、設 定およびプリファレンスが表示されます。 次の図は、プリファランス ホームページレイアウトの例を示しています。 図 4.
Dell Systems Management Server Administration 接続サービスおよびセキュリティ設 定 ユーザーとシステムのプリファランスの設定 プリファランス ホームページから、ユーザーとセキュアポートシステムのプリファランスを設定します。 メモ: ユーザーまたはシステムのプリファランスをリセットするには、システム管理者権限でログインす る必要があります。 ユーザープリファランスをセットアップするには、次の手順を実行します。 1. グローバルナビゲーションバーの プリファランス をクリックします。 プリファランス ホームページが表示されます。 2. 一般設定 をクリックします。 3.
– – – – – SMTP Server Name(または IP アドレス) および DNS Suffix for SMTP Server フィールドは、会社 の SMTP およびドメイン名サーバー(DNS)サフィックスを指定します。Server Administrator が電 子メールを送信できるようにするには、該当するフィールドに会社または組織の SMTP Server の IP アドレスおよび DNS suffix for the SMTP Server を入力する必要があります。 メモ: セキュリティ上の理由から、SMTP サーバーから外部アカウントへの電子メール送信を 許可していない会社や組織もあります。 コマンドログサイズ フィールドは、コマンドログファイル の最大ファイルサイズを MB 単位で指 定します。 メモ: Server Administrator Web Server を管理するためにログインした場合にのみ、このフィー ルドが表示されます。 サポートリンク フィールドでは、管理下システムのサポートを提供する事業体の URL を指定しま す。 カスタム区切り文字 フィールドは
メモ: 暗号化レベルを 128 ビット以上 に設定している場合は、同レベルまたはより高い暗号レベルの ブラウザを使用して、Server Administrator の設定にアクセスしたり、その設定を変更したりするこ とができます。 サーバープリファレンス ウィンドウのオプション設定が完了したら、適用 をクリックします。 4. メモ: 変更を適用するには、Server Administrator Web Server を再起動する必要があります。 X.509 証明書管理 メモ: 証明書を管理するには、システム管理者権限でログインする必要があります。 リモートシステムの身元を確認し、リモートシステムとやり取りする情報を他の人が閲覧したり変更したり できないようにするには、ウェブ証明書が必要です。システムのセキュリティを保護するために、以下が推 奨されています。 • • 新しい X.509 証明書の生成、既存の X.
の結果は、ファイルに保存して後に分析できます。レポートにより、管理者は、使用パタンを調整し、新し いシステムリソースの購入を正当化し、問題のコンポーネントの正常性に焦点を当てるのに役立つ情報を入 手することができます。 CLI の機能と使い方の詳細については、『Dell OpenManage Server Administrator コマンドラインインタフェース ユーザーズガイド』(dell.
Server Administrator サービス 4 Dell OpenManage Server Administrator Instrumentation Service は、システムの正常性をモニタし、業界標準シス テム管理エージェントにより収集された詳しい障害およびパフォーマンス情報への迅速なアクセスを提供し ます。レポートおよび表示機能により、システムを構成する各シャーシの総合的正常性ステータスを取得で きます。サブシステムレベルでは、システムのキーポイントにおける電圧、温度、ファン RPM、およびメモ リ機能を表示できます。システムの関連する各所有コスト(COO)詳細の明細アカウントは、概要ビューで 表示できます。BIOS、ファームウェア、オペレーティングシステム、およびすべてのインストールされたシ ステム管理ソリューションのバージョン情報も取得することができます。 さらに、システム管理者は Instrumentation Service を使用して次の重要タスクを実行することができます。 • 特定の重要なコンポーネントについて最小および最大値を指定します。この値はしきい値と呼ばれ、 その
システム / サーバーモジュールツリーオブジェクトの管理 Server Administrator のシステム / サーバーモジュールツリーには、管理下システムとユーザーのアクセス権限 で Server Administrator が検出するソフトウェアとハードウェアのグループに基づいて、表示可能なシステム オブジェクトがすべて表示されます。システムコンポーネントはコンポーネントの種類によって分類されて います。メインオブジェクトである モジュラエンクロージャ、システム / サーバーモジュール を展開する と、 システムコンポーネントの主要なカテゴリとして メインシステムシャーシ/メインシステム、ソフトウ ェア、ストレージ などが表示されます。 Storage Management Service がインストールされると、システムに実装されているコントローラやストレージ に応じて、ストレージツリーのオブジェクトが展開され、様々なオブジェクトが表示されます。 Storage Management Service コンポーネントの詳細については、dell.
モジュラーシステムのシャーシ情報と Chassis Management Controller(CMC)情報を表示するには、モジュラ ーエンクロージャ オブジェクトをクリックします。 • タブ: プロパティ • サブタブ: 情報 プロパティ タブでは、次の操作が可能です。 • 監視下のモジュラーシステムのシャーシ情報を表示する。 • 監視下のモジュラーシステムの Chassis Management Controller(CMC)に関する詳細情報を表示する。 Chassis Management Controller にアクセスして使用する Server Administrator ホームページから Chassis Management Controller ログイン ウィンドウを起動するには次の 操作を行います。 1. モジュラーエンクロージャ オブジェクトをクリックします。 2.
メモ: オペレーティングシステムのウォッチドッグタイマーが BIOS で有効になっていると、自動 回復オプションが使えない場合があります。自動回復オプションを設定するには、必ずオペレー ティングシステムのウォッチドッグタイマーを無効にしてください。 メモ: 応答していないシステムをウォッチドッグが認識している場合は、設定したタイムアウト 時間(n 秒)に従って自動システム回復処置が実行されないことがあります。処置の実行時間は n-h+1 ~ n+1 秒で、n は設定したタイムアウト時間、h はハートビート間隔です。ハートビート間 隔の値は n < 30 の場合は 7 秒、n > 30 の場合は 15 秒です。 メモ: システム DRAM Bank_1 で修復できないメモリイベントが発生した場合は、ウォッチドッグ タイマー機能の動作を保証できません。修復できないメモリイベントがこの場所で発生すると、 この領域の BIOS コードレジデントが破損する場合があります。ウォッチドッグ機能は BIOS へ の呼び出しを使ってシャットダウンまたは再起動の動作を実行するため、この機能は正常に作動 しない場合があります。この
アラート管理 サブタブ:アラート処置 | プラットフォームイベント | SNMP トラップ アラート管理 タブでは、次の操作が可能です。 • • 現在のアラート処置設定の表示と、システムコンポーネントセンサーが警告値またはエラー値を返し たときに実行するアラート処置を設定します。 現在のプラットフォームイベントフィルタ設定を表示し、システムコンポーネントセンサーが警告値 またはエラー値を返したときに実行するプラットフォームイベントフィルタ処置を設定します。送 信先の設定 オプションを使って、プラットフォームイベントのアラートが送信される先(IPv4 また は IPv6 アドレス)を選択することもできます。 メモ: Server Administrator は、グラフィカルユーザーインタフェースの IPv6 アドレスのスコープ ID を表示しません。 • インストルメント化されたシステムコンポーネントに対して現行の SNMP トラップを表示して、アラ ートしきい値レベルを設定します。選択したトラップは、システムが選択した重大度レベルで対応イ ベントを生成した場合にトリガーされます。 メモ: すべての潜在的
• プロセッサ • リモートアクセス • リムーバブルフラッシュメディア • スロット • 温度 • 電圧 メモ: ハードウェアパフォーマンスは、Dell PowerEdge x0xx システムのみでサポートされています。電源 装置 オプションは、Dell PowerEdge 1900 で使用できません。電源管理は、一部の Dell PowerEdge xx0x お よびそれ以降のシステムでサポートされています。電源装置モニタリングおよび電源モニタリング機 能は、複数の冗長、ホットスワップ可能な電源装置が取り付けられているシステムにのみ対応します。 これらの機能は、電力管理回路がない永久的に取り付けられた非冗長の電源装置には使用できません。 メインシステムシャーシ / メインシステムプロパティ システム / サーバーモジュールは、1 つのメインシステムシャーシで構成される場合と複数のシャーシで構成 される場合があります。メインシステムシャーシ / メインシステムには、システムに不可欠なコンポーネン トが含まれます。メインシステムシャーシ / メインシステム オブジェクト処置ウィンドウには、次の項目が 含まれ
メモ: QLogic QLE2460 4Gb シングルポートファイバーチャネル HBA、QLogic QLE2462 4Gb デュアルポートフ ァイバーチャネル HBA、Qlogic QLE2562 デュアルポート FC8 アダプタ、または Qlogic QLE2560 シングルポ ート FC8 アダプタカードが yx2x システムに設置されている場合、システムコンポーネント(FRU)画面 は表示されません。 • ホスト名、iDRAC バージョン、Lifecycle Controller バージョン、シャーシモデル、シャーシロック、シ ャーシサービスタグ、Express Service Code、およびシャーシ資産タグなどのメインシステムのシャー シ属性についての情報を表示します。Express Service Code(ESC)属性は、Dell システムのサービスタ グを 11 桁の数値のみのコードに変換したものです。Dell テクニカルサポートに電話する際は、この ESC を入力することにより自動的に適切な担当者が応答します。 • システムに設置されているフィールド交換可能装置(FRU)についての詳
らに、トラステッドプラットフォームモジュール(TPM)およびトラステッド暗号化モジュール(TCM)設 定も設定できます。 特定のシステム構成によっては、その他のセットアップ項目が表示される場合があります。ただし、いくつ かの BIOS セットアップオプションは、Server Administrator でアクセスできない BIOS セットアップ画面につい て表示される可能性があります。 yx2x システムの場合、設定可能な BIOS 機能は特定のカテゴリにグループ化されています。カテゴリには、シ ステム情報、メモリ設定、システムプロファイル設定、Unified Extensible Firmware Interface(UEFI)起動設定、 ネットワークインタフェースコントローラカード、1 回限りの起動、およびスロット無効化などがあります。 たとえば、システム BIOS 設定 ページで、メモリ設定 リンクをクリックすると、システムメモリに関する機 能が表示されます。各カテゴリに移動することにより、設定を表示または変更できます。 BIOS セットアップパスワードは、BIOS セットアップ - システムセキュリテ
す。ファームウェア オブジェクト処置ウィンドウには、ユーザーのグループ権限に応じて、プロパティ タブ などが表示されます。 プロパティ サブタブ:情報 プロパティ タブでは、システムのファームウェア情報を表示できます。 ハードウェアパフォーマンス ハードウェアのパフォーマンス オブジェクトをクリックすると、システムパフォーマンスの低下状態とその 原因が表示されます。ハードウェアのパフォーマンス オブジェクト処置ウィンドウには、ユーザーのグルー プ権限に応じて、プロパティ タブなどが表示されます。 次の表には、状態の一覧とプローブの原因が示されています。 表 9.
プロパティ サブタブ:メモリ プロパティ のタブで、メモリの冗長性状態、メモリアレイの属性、総容量、詳細、メモリデバイスの詳細、 状態を表示できます。メモリデバイスの詳細では、デバイスの状態、デバイス名、サイズ、種類、速度、ラ ンク、エラーなどのコネクタ上のメモリデバイスの詳細がわかります。ランクとは、ダイナミックランダム アクセスメモリ(DRAM)デバイスの列であり、各デュアルインラインメモリモジュール(DIMM)ごとに 64 ビットのデータで構成されています。ランクの可能な値は、シングル、デュアル、クアッド、オクタル、ヘ キサ です。ランクでは、DIMM のランクを表示し、サーバー上の DIMM の保守に役立ちます。 メモ: スペアバンクメモリが有効になっているシステムが冗長性喪失状態に入った場合、どのメモリモジ ュールが原因か明らかでない場合があります。交換する DIMM を特定できない場合は、ESM システムロ グの検出されたスペアメモリバンクに切り替えというエントリを参照し、エラーが発生したメモリモジ ュールを見つけてください。 アラート管理 サブタブ:アラート処置 | SNMP トラップ アラート
ポート ポート オブジェクトをクリックすると、システムの外部ポートを管理できます。 Server Administrator は、シ ステムに存在する各外部ポートの状態を管理します。 メモ: ブレードサーバーが取り付けられた CMC USB ポートは、OMSA では列挙されません。 ポート オブジェクト処置ウィンドウには、ユーザーのグループ権限に応じて、プロパティ タブなどが表示さ れます。 サブタブ:情報 プロパティ プロパティ タブでは、システムの内部および外部ポート情報を表示できます。 電源管理 メモ: 電源モニタリングおよび電源モニタリング機能は、複数の冗長、ホットスワップ可能な電源装置が 取り付けられているシステムにのみ対応します。これらの機能は、電力管理回路がない永久的に取り付 けられた非冗長の電源装置には使用できません。 監視 サブタブ:消費量 | 統計 消費量 タブでは、システムの電力消費量情報をワットと BTU/hr で表示できます。 BTU/hr=Watt X 3.
サブタブ:要素 プロパティ タブでは、次の操作が可能です。 • 電源装置の冗長性属性についての情報を表示します。 • 各電源装置要素について、ファームウェアバージョン、定格入力ワット数、および最大出力ワット数 などの状態をチェックします。定格入力ワット数属性は、xx1x で始まる PMBus システムでのみ表示さ れます。 アラート管理 サブタブ:アラート処置 | SNMP トラップ アラート管理タブでは、次の操作が可能です。 • • • 現在のアラート処置設定の表示と、システム電源が警告値またはエラー値を返したときに実行するア ラート処置の設定を行います。 IPv6 アドレスのプラットフォームイベントアラートの宛先を設定します。 システム電力ワット数に対して現行の SNMP トラップを表示して、アラートしきい値レベルを設定し ます。選択したトラップは、システムが選択した重大度レベルで対応イベントを生成した場合にトリ ガーされます。 メモ: システムのピーク電力トラップは重大度が情報のイベントのみを生成します。 プロセッサ プロセッサ オブジェクトをクリックして、システムのマイクロプロセッサを管理
リモートアクセス オブジェクト処置ウィンドウには、ユーザーのグループ権限に応じて、 プロパティ タブ、 設定 タブ、ユーザー タブ などが表示されます。 サブタブ:情報 プロパティ プロパティ タブで、リモートアクセスデバイスの一般情報を表示します。IPv4 および IPv6 アドレスの属性を 表示することもできます。 デフォルトにリセット をクリックすると、すべての属性がシステムのデフォルト値にリセットされます。 サブタブ:LAN | シリアルポート | シリアルオーバー LAN | 追加設定 構成 BMC/iDRAC を設定する場合、設定 タブで、LAN 上の BMC/iDRAC、BMC/iDRAC のシリアルポート、およびシリ アルオーバー LAN 接続の BMC/iDRAC を設定できます。 メモ: 追加設定 タブは、iDRAC 搭載システムでのみ表示されます。 DRAC が設定されている場合、設定 タブでネットワークプロパティを設定できます。 メモ: NIC を有効にする、NIC の選択、および 暗号化キー フィールドは、Dell PowerEdge x9xx システム上 でのみ表示されます。 追加
アラート管理は、内蔵 SD モジュールおよび vFlash で共通となります。SD モジュールまたは vFlash のアラー ト処置/SNMP/PEF を設定すると、その両方に対してこれらが自動的に設定されます。 スロット スロット オブジェクトをクリックすると、拡張カードなど、プリント回路基板を使用するシステム基板のコ ネクタまたはソケットを管理できます。スロット オブジェクト処置ウィンドウには プロパティ タブがあり ます。 プロパティ サブタブ:情報 プロパティ タブでは、各スロットと取り付けられたアダプタについての情報を表示できます。 温度 温度 オブジェクトをクリックして、システムの内部コンポーネントが高温により破損しないよう、システム 温度を管理します。Server Administrator は、システムのシャーシのさまざまなロケーションの温度をモニタし て、シャーシ内の温度が高くなりすぎないようにします。温度 オブジェクト処置ウィンドウには、ユーザー のグループ権限により、プロパティ と アラート管理のいずれかのタブが表示されます。 サブタブ:温度プローブ プロパティ • • プロパティ
メモ: 一部のファンプローブフィールドは、BMC または ESM など、システムで使用されているファーム ウェアの種類によって異なります。一部のしきい値は BMC をベースとしたシステムでは編集できませ ん。 アラート管理 サブタブ:アラート処置 | SNMP トラップ アラート管理 タブでは、次の操作が可能です。 • • 現在のアラート処置設定の表示と、システム電圧センサーが警告値またはエラー値を返したときに実 行する、アラート処置の設定を行います。 現在の SNMP トラップアラートしきい値を表示し、電圧センサーのアラートしきい値レベルを設定し ます。選択した重大度レベルのイベントをシステムが生成した場合に、選択したトラップがトリガさ れます。 ソフトウェア ソフトウェア オブジェクトをクリックすると、オペレーティングシステムやシステム管理ソフトウェアな ど、管理下システムの重要なソフトウェアコンポーネントの詳しいバージョン情報が表示できます。 ソフト ウェア オブジェクト処置ウィンドウには、ユーザーのグループ権限に応じて、 プロパティ タブなどが表示 されます。 サブタブ:概要 プロパティ プロパテ
プリファランスの管理:ホームページ設定オプション プリファランス ホームページの左ペイン(システムツリーが Server Administrator ホームページで表示されて いる)には、システムツリーウィンドウの使用可能な設定オプションがすべて表示されます。 使用可能な プリファランス ホームページ設定オプションは次の通りです。 • 一般設定 • Server Administrator 一般設定 一般設定 オブジェクトをクリックすると、選択した Server Administrator 機能のユーザーと DSM SA 接続サー ビス(Web Server)の環境を設定できます。一般設定 オブジェクト処置ウィンドウには、ユーザーのグルー プ権限に応じて、 ユーザー タブおよび Web Server タブなどが表示されます。 サブタブ:プロパティ ユーザー ユーザー タブでは、ホームページの外観や 電子メール ボタン用のデフォルト電子メールアドレスなどのユ ーザー設定を設定できます。 • Web Server • サブタブ: プロパティ | X.
メモ: SNMP Set 操作を設定した後で変更を有効にするには、サービスを再起動する必要がありま す。対応 Microsoft Windows オペレーティングシステムが稼動するシステムでは、Windows SNMP サービスを再起動する必要があります。対応 Red Hat Enterprise Linux および SUSE Linux Enterprise Server オペレーティングシステムが稼動するシステムでは、srvadmin-services.
Remote Access Controller の操作 5 本章では、BMC/iDRAC と DRAC のリモートアクセス機能へのアクセスおよび使用方法を説明します。 Dell システムベースボード管理コントローラ(BMC)/組み込み Dell リモートアクセスコントローラ(iDRAC) は、システムボード上のさまざまなセンサーと通信して重要なイベントを監視し、一定のパラメータが事前 設定されたしきい値を超えたときにアラートとログイベントを送信します。BMC/iDRAC は、業界標準のイン テリジェントプラットフォーム管理インタフェース(IPMI)仕様に対応しており、システムをリモートで設 定、監視および復旧することができます。 メモ: ベースボード管理コントローラ(BMC)は Dell PowerEdge x9xx システムでサポートされ、組み込 み Dell リモートアクセスコントローラ(iDRAC)は Dell PowerEdge xx0x および xx1x システムでサポート されています。 DRAC は、Dell システムのリモート管理機能、クラッシュしたシステムのリカバリ、電源制御機能などを
メインシステム モジュラーシステム システム 非モジュラーシステム メインシステムシャーシ 非モジュラーシステム リモートアクセスデバイスのシステムサポートの詳細については、dell.
IPv4 アドレス • IP アドレスソース • IP アドレス • IP サブネット • IP ゲートウェイ IPv6 アドレス • IP アドレスソース • IPv6 アドレス 1 • デフォルトゲートウェイ • IPv6 アドレス 2 • リンクのローカルアドレス • DNS アドレスソース • 優先 DNS サーバー • 代替 DNS サーバー メモ: リモートアクセス タブの 追加設定 で IPv4 と IPv6 アドレスプロパティを有効にした場合にのみ、 IPv4 と IPv6 アドレスの詳細を表示できます。 LAN 接続用リモートアクセスデバイスの設定 LAN 接続を通して通信するリモートアクセスデバイスを設定するには、次の操作を行います。 1. モジュラーエンクロージャ → システム / サーバーモジュール → メインシステムシャーシ / メインシス テム → リモートアクセス オブジェクトの順にクリックします。 2. 設定 タブをクリックします。 3.
メモ: NIC の選択 オプションは yx1x またはそれ以前のシステムでのみ使用できます。 – プライマリーネットワークおよびフェイルオーバーネットワークのオプション yx2x システムでは、リモート管理(iDRAC7)NIC のプライマリネットワークオプションは、LOM1、LOM2、 LOM3、LOM4、および 専用 となっており、フェイルオーバーネットワークオプションは、LOM1、 LOM2、 LOM3、LOM4、すべての LOM および なし となっています。 専用のオプションは iDRAC7 エンタープライズの有効なライセンスがある場合にのみ使用できます。 メモ: LOM の数はシステムまたはハードウェアの構成によって異なります。 5.
1. モジュラーエンクロージャ → システム / サーバーモジュール → メインシステムシャーシ / メインシス テム → リモートアクセス の順にクリックします。 2. 設定 タブをクリックします。 3. シリアルポート をクリックします。 シリアルポート設定 ウィンドウが表示されます。 4. 次の詳細を設定します。 – 接続モード設定 – ボーレート – フロー制御 5. – チャネル特権レベルの制限 変更の適用 をクリックします。 6. ターミナルモード設定 をクリックします。 ターミナルモード設定 ウィンドウでは、シリアルポートのターミナルモード設定を指定できます。 7.
– 文字送信しきい値 8. 変更の適用 をクリックします。 9. シリアルオーバー LAN 設定に戻る をクリックすると、シリアルオーバー LAN 設定 ウィンドウに戻りま す。 iDRAC の追加設定 追加設定 タブを使って IPv4 と IPv6 プロパティを設定するには、次の操作を行います。 1. モジュラーエンクロージャ → システム / サーバーモジュール → メインシステムシャーシ / メインシス テム → リモートアクセスオブジェクト とクリックします。 2. 設定 タブをクリックします。 3. 追加設定 をクリックします。 4. IPv4 と IPv6 のプロパティを 有効 または 無効 に設定します。 5. 変更の適用 をクリックします。 メモ: ライセンス管理についての詳細は、dell.com/support/manuals で『Dell License Manager ユーザー ズガイド』を参照してください。 リモートアクセスデバイスユーザーの設定 リモートアクセスページを使ってリモートアクセスデバイスユーザーの設定をするには、次の操作を行いま す。 1.
メモ: DRAC がインストールされている場合、6 つの追加ユーザーエントリが設定可能です。これに よりユーザー合計数は 16 になります。BMC/iDRAC および RAC ユーザーに対しても同じユーザー名 およびパスワードの規定が適用されます。DRAC/iDRAC6 がインストールされると、16 のユーザーエ ントリすべては DRAC に割り当てられます。 プラットフォームのイベントフィルタアラートの設定 Server Administrator Instrumentation Service を使用してプラットフォームイベントフィルタ(PEF)のパラメー タやアラートの宛先などの最も関連のある BMC 機能を設定するには、次の操手順を行います。 1. システム オブジェクトをクリックします。 2. 警告管理 タブをクリックします。 3.
6. メモ: 電源の低減はすべてのシステムでサポートされているわけではありません。電源モニ タリングおよび電源モニタリング機能は、複数の冗長、ホットスワップ可能な電源装置が取 り付けられているシステムにのみ対応します。これらの機能は、電力管理回路がない永久的 に取り付けられた非冗長の電源装置には使用できません。 送信するアラートの アラートの生成 チェックボックスを選択します。 7. メモ: アラートを生成するには、アラートの生成 と プラットフォームイベントアラートの有効化 設 定の両方を選択する必要があります。 適用 をクリックします。 8.
Server Administrator ログ 6 Server Administrator を使用すると、ハードウェア、アラート、およびコマンドなどのログを表示して管理でき ます。すべての ユーザーが Server Administrator ホームページまたはコマンドラインインタフェースからログ にアクセスして、レポートを印刷できます。ログをクリアするには管理者権限でログインし、ログを指定の サービス連絡先に電子メールで送信するには管理者権限またはパワーユーザー権限でログインする必要があ ります。 コマンドラインからのログの表示およびレポートの作成については、dell.
• コマンドログ ハードウェアログ Dell PowerEdge x9xx および xx1x システムでは、システムのハードウェアの問題発生を探知するためのハード ウェアログがあります。ログファイルの容量が 100% に達すると、ハードウェアログの状態インジケータが重 要状態( )に変わります。システムによって、組み込みシステム管理(ESM)ログとシステムイベント ログ(SEL)の 2 種類の異なるハードウェアログがあります。 ESM ログと SEL はそれぞれ、システム管理ソ フトウェアにハードウェアの状態メッセージを送ることができる、一組の組み込み指示です。ログに一覧表 示された各コンポーネントには、名前の横にステータスインジケータアイコンがあります。 次の表は状態イ ンジケータを表しています。 表 12.
アラートログにアクセスするには、システム をクリックし、ログ タブをクリックしてから、アラート をク リックします。 アラートログに表示される情報は次のとおりです。 • イベントの重大度 • イベント ID • イベントがキャプチャされた日時 • イベントのカテゴリ • イベントの説明 メモ: 将来のトラブルシューティングおよび診断目的でログ履歴が必要となる場合があります。そのた め、ログファイルを保存しておくことをお勧めします。 アラートメッセージの詳細については、『Server Administrator メッセージリファレンスガイド』(dell.
アラート処置の設定 7 対応 Red Hat Enterprise Linux および SUSE Linux Enterprise Server オペレーティングシステムが実行されるシステムにお けるアラート処置の設定 イベントにアラート処置を設定する場合は、処置でサーバにアラートを表示するよう指定できます。この処 置を実行するには、Server Administrator がメッセージを /dev/console に送信します。Server Administrator シス テムが X Window System を実行している場合、メッセージは表示されません。X Windows System を実行中の Red Hat Enterprise Linux システムでアラートメッセージを表示するには、イベントが発生する前に xconsole ま たは xterm -C を起動する必要があります。X Windows System を実行中の SUSE Linux Enterprise Server システム でアラートメッセージを表示するには、イベント発生前に xterm -C などの端末を起動する必要があ
Microsoft Windows Server 2003 および Windows Server 2008 に おけるアラート処置の設定 アラート処置を指定する場合、アプリケーションの実行機能は Visual Basic スクリプトを自動的に解釈しませ んが、ファイルをアラート処置として指定するだけで、cmd、.com、.bat、または .exe ファイルを実行で きます。 この問題を解決するには、まずコマンドプロセッサ cmd.exe を呼び出してスクリプトを起動します。たと えば、アプリケーションを実行するアラート処置の値は次のように設定できます。 c:\winnt\system32\cmd.exe /c d:\example\example1.vbs ここで、d:\example\example1.
DSM SA Data Manager サービスがこの変更によって再起動されると、サービスコントロールマネージャは次の メッセージをシステムログに記録します。 DSM SA Data Manager サービスは、対話型サービスとしてマークされます。対話型サービス検出サービ スを有効にすると、DSM SA Data Manager サービスがアラート処置に対して対話型アプリケーションを 適切に実行できます。 これらの変更が適用されると、オペレーティングシステムにより、対話型サービスダイアログ検出 ダイアロ グボックスが表示され、対話型アプリケーションのインタフェース / プロンプトにアクセスできるようにな ります。 BMC/iDRAC プラットフォームイベントフィルタアラートメッ セージ 次の表では、使用可能なすべてのプラットフォームイベントフィルタ(PEF)メッセージと、各イベントの説 明を示します。 表 13.
イベント 説明 リムーバブルフラッシュメディア 障害 リムーバブルフラッシュメディアは障害が差し迫った状態です。 リムーバブルフラッシュメディア 警告 リムーバブルフラッシュメディアは障害が差し迫った状態です。 内蔵デュアル SD モジュールカー ド重要 内蔵デュアル SD モジュールカードが故障しました。 内蔵デュアル SD モジュールカー ド警告 内蔵デュアル SD モジュールカードは障害が差し迫った状態です。 内蔵デュアル SD モジュールの冗 長性損失 内蔵デュアル SD モジュールカードの冗長性が失われました。 内蔵デュアル SD モジュールカー ド不在 内蔵デュアル SD モジュールカードが取り外されました。 78
トラブルシューティング 8 接続サービスエラー Red Hat Enterprise Linux では、SELinux が強制モードに設定されている場合、Dell Systems Management Server Administrator(SM SA)接続サービスが起動できません。次の手順のいずれかを実行して、このサービスを起 動してください。 • SELinux を無効モードまたは許可モードに設定する。 • SELinux の allow_execstack プロパティを ON 状態に変更します。次のコマンドを実行します: a.
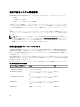
対応 Windows オペレーティングシステムで Server Administrator のインストールエラーを修正する 再インストールを強制し、次に Server Administrator のアンインストールを実行するとインストールの不具合 を修正できます。 再インストールを強制するには: 1. インストールされている Server Administrator のバージョンを特定します。 2. support.dell.com から、該当するバージョンのインストールパッケージをダウンロードします。 3. srvadmin\windows\SystemsManagement ディレクトリから SysMgmt.msi を見つけます。 4. コマンドプロンプトに次のコマンドを入力して、再インストールを強制します。 msiexec /i SysMgmt.msi REINSTALL=ALL REINSTALLMODE=vamus 5.
サービス名 説明 障害の影響 ェアのインベント リを実行します。 ZENworks など)を使 って行うことがで きます。 リカバリメカニズ ム 重大度 メモ: 32 ビット互換性ライブラリが 64 ビット Linux システムにインストールされていない場合、共有サ ービスはインベントリコレクタを起動できず、インベントリコレクタを実行するには libstdc+ +.so.5 が必要です。というエラーメッセージが表示されます。 srvadmin-cm.rpm は、インベントリコ レクタにバイナリを提供します。srvadmin-cm が依存する RPM のリストについては、『Dell OpenManage Server Administrator インストールガイド』(dell.
よくあるお問い合わせ 9 本項には、OpenManage Server Administrator に関してのよくあるお問い合わせ(FAQ)を掲載しています。 メモ: 以下の質問は、このリリースの Server Administrator に特定のものではありません。 1. OpenManage Server Administrator から ESXi 4.x(4.0 U3) および ESXi 5.x ホスト再起動機能を実行すると失 敗するのはなぜですか ? この問題は VMware スタンドアロンライセンス(SAL)キーに原因があります。詳細に関しては、 kb.vmware.com/kb/kb1026060 のサポート技術情報の記事を参照してください。 2. VMware ESX 4.0 U3 または ESX 4.1 U2 オペレーティングシステムを Active Directory ドメイン に追加した 後に実行する必要のあるタスクは何ですか? VMware ESX 4.0 U3 および ESX 4.
メモ: ポート番号を無効または使用中のポート番号に変更すると、他のアプリケーションまたはブ ラウザが管理下システムの Server Administrator にアクセスできなくなる場合があります。デフォル トポートのリストに関しては、 『Dell OpenManage Installation およびセキュリティユーザーズガイド』 (dell.com/support/manuals)を参照してください。 8. Server Administrator を Fedora、College Linux、 Mint、 Ubuntu、Sabayon、または PClinux にインストールで きますか? いいえ、Server Administrator はこれらのオペレーティングシステムをサポートしていません。 9. Server Administrator に問題があった場合に電子メールを送信できますか? いいえ、Server Administrator は問題があった場合に電子メールを送信するようには設計されていません。 10.
14. Kerberos 認証を行ってウェブサーバーからログインするときに必要な操作は何ですか? 認証に関して、管理下ノードの /etc/pam.d/openwsman と /etc/pam.d/sfcb ファイルの内容を以下で置き換 える必要があります。 32 ビットの場合 auth required pam_stack.so service=system-auth auth required /lib/security/ pam_nologin.so account required pam_stack.so service=system-auth 64 ビットの場合 auth required pam_stack.so service=system-auth auth required /lib64/ security/pam_nologin.so account required pam_stack.