
Users Guide

To open the SNMP port on Red Hat Enterprise Linux using one of the previously described methods:
1. At the Red Hat Enterprise Linux command prompt, type setup and press <Enter> to start the Text
Mode Setup Utility.
NOTE: This command is available only if you have performed a default installation of the
operating system.
The Choose a Tool menu appears.
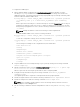
2. Select Firewall Configuration using the down arrow and press <Enter>.
The Firewall Configuration screen appears.
3. Press <Tab> to select Security Level and then press the spacebar to select the security level you
want to set. The selected Security Level is indicated by an asterisk.
NOTE: For more information about the firewall security levels, press <F1>. The default SNMP
port number is 161. If you are using the X Window System graphical user interface, pressing
<F1> may not provide information about firewall security levels on newer versions of Red Hat
Enterprise Linux.
a) To disable the firewall, select No firewall or Disabled and go to Step7.
b) To open an entire network interface or the SNMP port, select High, Medium, or Enabled and
proceed to step 4.
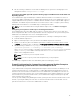
4. Press <Tab> to go to Customize and press <Enter>.
The Firewall Configuration-Customize screen appears.
5. Select whether to open an entire network interface or just the SNMP port on all network interfaces.
a) To open an entire network interface, press <Tab> to go to one of the Trusted Devices and press
the spacebar. An asterisk in the box to the left of the device name indicates that the entire
interface is opened.
b) To open the SNMP port on all network interfaces, press <Tab> to go to Other ports and type
snmp:udp.
6. Press <Tab> to select OK and press <Enter>
The Firewall Configuration screen appears.
7. Press <Tab> to select OK and press <Enter>
The Choose a Tool menu appears.
8. Press <Tab> to select Quit and press <Enter>.
Firewall Configuration
To open the SNMP port on SUSE Linux Enterprise Server:
1. Configure SuSEfirewall2 by running the following command on a console: a.# yast2 firewall
2. Use the arrow keys to navigate to Allowed Services.
3. Press <Alt><d> to open the Additional Allowed Ports dialog box.
4. Press <Alt><T> to move the cursor to the TCP Ports text box.
5. Type snmp in the text box.
6. Press <Alt><O> <Alt><N> to go to the next screen.
7. Press <Alt><A> to accept and apply the changes.
28