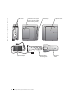
Dell™ OptiPlex™ SX Systems Setup and Quick Reference Guide Guide de configuration et de référence rapide Setup- und Schnellreferenzhandbuch Guida di installazione e consultazione rapida Guía de instalación y de referencia rápida Kurulum ve Hızlı Başvuru Kılavuzu Model DCT w w w. d e l l . c o m | s u p p o r t . e u r o . d e l l .
Dell™ OptiPlex™ SX Systems Setup and Quick Reference Guide Model DCT w w w. d e l l . c o m | s u p p o r t . e u r o . d e l l .
Notes, Notices, and Cautions NOTE: A NOTE indicates important information that helps you make better use of your computer. NOTICE: A NOTICE indicates either potential damage to hardware or loss of data and tells you how to avoid the problem. CAUTION: A CAUTION indicates a potential for property damage, personal injury, or death. Abbreviations and Acronyms For a complete list of abbreviations and acronyms, see the “Glossary” in the User’s Guide.
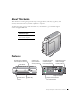
Contents About This Guide Features . . . . . . . . . . . . . . . . . . . . . . . . . . . 5 . . . . . . . . . . . . . . . . . . . . . . . . . . . . . . 5 CAUTION: Safety Instructions General . . . . . . . . . . . . . . . . . . . 7 . . . . . . . . . . . . . . . . . . . . . . . . . . . . . 7 When Using Your Computer . . . . . . . . . . . . . . . . . . . . When Working Inside Your Computer . . . . . . . . . . . . . . 11 . . . . . . . . . . . . . . . . . . . . . . . .
4 Contents
About This Guide This document contains getting started/setup; solving problems; and safety, regulatory, and warranty information about your Dell™ OptiPlex™ computer. To obtain the latest versions of the documents on your hard drive, go to the Dell Support website at support.dell.com.
w w w. d e l l . c o m | s u p p o r t . e u r o . d e l l .
CAUTION: Safety Instructions Use the following safety guidelines to help ensure your own personal safety and to help protect your computer and working environment from potential damage. General • Do not attempt to service the computer yourself unless you are a trained service technician. Always follow installation instructions closely. • To help prevent electric shock, plug the computer and device power cables into properly grounded electrical outlets.
w w w. d e l l . c o m | s u p p o r t . e u r o . d e l l . c o m CAUTION: Safety Instructions (continued) • To avoid shorting out your computer when disconnecting a network cable, first unplug the cable from the network adapter on the back of your computer, and then from the network jack. When reconnecting a network cable to your computer, first plug the cable into the network jack, and then into the network adapter.
When Using Your Computer As you use your computer, observe the following safe-handling guidelines. CAUTION: Do not operate your computer with any cover(s) (including computer covers, bezels, filler brackets, front-panel inserts, and so on) removed.
w w w. d e l l . c o m | s u p p o r t . e u r o . d e l l . c o m When Using Your Computer (continued) When Working Inside Your Computer Before you open the computer cover, perform the following steps in the sequence indicated. CAUTION: Do not attempt to service the computer yourself, except as explained in your online Dell™ documentation or in instructions otherwise provided to you by Dell. Always follow installation and service instructions closely.
When Using Your Computer (continued) Protecting Against Electrostatic Discharge Static electricity can harm delicate components inside your computer. To prevent static damage, discharge static electricity from your body before you touch any of your computer’s electronic components, such as the microprocessor. You can do so by touching an unpainted metal surface on the computer chassis.
w w w. d e l l . c o m | s u p p o r t . e u r o . d e l l . c o m Getting Started/Setup CAUTION: Before performing any of the procedures listed below, read and follow the safety instructions on page 7. NOTICE: Do not turn on your computer until all setup steps are completed.
2 Installing a Device in the Module Bay NOTE: To locate the module device locking switch, remove the hard-drive cover. Your Dell computer ships with either a floppy drive or an airbay installed in the module bay. To install a CD, DVD, or second hard drive in the module bay, first remove the airbay and then install the device.
w w w. d e l l . c o m | s u p p o r t . e u r o . d e l l . c o m 3 Attaching the Stand NOTE: If you are installing the computer under a desktop or tabletop, first attach all cables, and then attach the stand to the mounting plate (see "Attaching the Stand to the Mounting Plate" on page 19). 1 Raise the captive screw and slide the chassis stand slat into one of three mounting slots on the back of the computer. 2 When the stand is in place, tighten the screw.
Connecting the AC Adapter 4 NOTE: The power adapter LED will light when the adapter is properly plugged into a wall outlet and into the computer. 1 Connect the power adapter to the connector on the back of the computer. 2 Connect the power cable to the power adapter. NOTICE: The following steps apply to Japan only.
w w w. d e l l . c o m | s u p p o r t . e u r o . d e l l . c o m 5 Connecting External Devices NOTE: Connect only one keyboard and one mouse. CAUTION: To help prevent electric shock, use only the power adapter and power cable provided, and ensure that they are plugged into a properly grounded power source.
Connecting a VGA Monitor If you have a VGA monitor and a DVI connector on the back of your computer, plug the VGA-DVI adapter into the DVI connector and connect the monitor cable to the adapter as shown. 6 Attaching the Cable Cover NOTICE: If you are installing the computer under a desktop or tabletop, do not attach the cable cover until the computer is firmly attached to the mounting plate (see Step 7, "Attaching the Stand to the Mounting Plate" on page 19).
w w w. d e l l . c o m | s u p p o r t . e u r o . d e l l . c o m 4 Grasp the top piece of the cable cover and align the two tabs with the two slots in the computer’s back panel. 5 Insert the tabs into the slots and slide the piece toward the diagnostic lights (see the illustration). 6 Install a security device in the security cable slot (optional).
To remove the cable cover, remove the device installed in the security cable slot, if used. 1 Grasp the top piece of the cable cover and slide it to the left until it stops, and then lift it up and away. 2 To remove the bottom piece of the cable cover, while pressing the lever, slide the piece to the left until it stops, and then lift it up and away.
w w w. d e l l . c o m | s u p p o r t . e u r o . d e l l . c o m 3 Lift the computer and stand, insert the stand into the mounting bracket, and slide the stand until the release-lever tab is inserted through the slot in the mounting plate. 4 Attach the cable cover (if used). screw holes (4) mounting-plate slot solid surface with a 1-inch (2.
Finding Information and Assistance What Are You Looking For? Find it Here • • • • Drivers and Utilities CD (also known as the ResourceCD) A diagnostic program for my computer Drivers for my computer My computer documentation My device documentation You can use this CD to access documentation, reinstall drivers, or run diagnostics tools.
w w w. d e l l . c o m | s u p p o r t . e u r o . d e l l .
Troubleshooting Tools The Dell Diagnostics tests various components in your computer and helps to identify the cause of computer problems. For more information, see "Running the Dell Diagnostics" on page 24. The following features can indicate a possible failure and help you troubleshoot a computer problem: • System Lights — Located on the front of the computer. • Diagnostic Lights — Located on the back of the computer. • System Messages — Appear on your monitor screen.
w w w. d e l l . c o m | s u p p o r t . e u r o . d e l l . c o m Drivers for Your Computer To display a list of device drivers for your computer, perform the following steps: 1 Click My Drivers in the Topic pull-down menu. The Drivers and Utilities CD scans your computer’s hardware and operating system, and then a list of device drivers for your system configuration is displayed on the screen. 2 Click the appropriate driver and follow the instructions to download the driver to your computer.
From the Drivers and Utilities CD: 1 Insert the Drivers and Utilities CD into the CD drive. 2 Shut down and restart the computer. When the DELL logo appears, press immediately. If you wait too long and the Windows logo appears, continue to wait until you see the Windows desktop. Then shut down your computer through the Start menu and try again. NOTE: This feature changes the boot sequence for one time only. On the next start-up, the computer boots according to the devices specified in system setup.
w w w. d e l l . c o m | s u p p o r t . e u r o . d e l l . c o m Regulatory Information Electromagnetic Interference (EMI) is any signal or emission, radiated in free space or conducted along power or signal leads, that endangers the functioning of a radio navigation or other safety service or seriously degrades, obstructs, or repeatedly interrupts a licensed radio communications service.
Systèmes Dell™ OptiPlex™ SX Guide de configuration et de référence rapide Modèle DCT w w w. d e l l . c o m | s u p p o r t . e u r o . d e l l .
Remarques, avis et précautions REMARQUE : Une REMARQUE indique des informations importantes qui vous aident à mieux utiliser votre ordinateur. AVIS : Un AVIS vous avertit d'un risque de dommage matériel ou de perte de données et vous indique comment éviter le problème. PRÉCAUTION : Une PRÉCAUTION indique un risque potentiel d'endommagement du matériel, de blessure corporelle ou de mort.
Sommaire Présentation de ce guide Caractéristiques . . . . . . . . . . . . . . . . . . . . . . 31 . . . . . . . . . . . . . . . . . . . . . . . . . . 31 PRÉCAUTION : Consignes de sécurité Généralités . . . . . . . . . . . . . . . 33 . . . . . . . . . . . . . . . . . . . . . . . . . . . 33 Lors de l'utilisation de votre ordinateur . . . . . . . . . . . . . . Intervention à l'intérieur de votre ordinateur . . . . . . . . . . 37 . . . . . . . . . . . . . . . . . . . 37 . . . . . . . . . . . .
30 Sommaire
Présentation de ce guide Ce document contient des informations sur la mise en route/configuration, la résolution des problèmes ainsi que sur les instructions de sécurité, les réglementations et la garantie concernant votre ordinateur Dell™ OptiPlex™. Pour obtenir les dernières versions des documents sur votre disque dur, visitez le site Web de support de Dell à l'adresse support.dell.com.
w w w. d e l l . c o m | s u p p o r t . e u r o . d e l l .
PRÉCAUTION : Consignes de sécurité Pour votre sécurité et pour protéger votre ordinateur ainsi que votre environnement de travail contre d'éventuels dommages, respectez les consignes de sécurité ci-dessous. Généralités • Ne tentez pas d'assurer vous-même l'entretien de votre ordinateur à moins que vous ne soyez un technicien de maintenance qualifié. Suivez toujours scrupuleusement les instructions d'installation.
w w w. d e l l . c o m | s u p p o r t . e u r o . d e l l . c o m PRÉCAUTION : Consignes de sécurité (suite) • Pour aider à protéger votre ordinateur contre des augmentations et des diminutions soudaines et passagères de l'alimentation électrique, utilisez un protecteur de surtension, un élément de conditionnement de ligne ou un onduleur (UPS).
Lors de l'utilisation de votre ordinateur Lorsque vous utilisez votre ordinateur, observez les consignes de sécurité suivantes : PRÉCAUTION : Ne faites pas fonctionner votre ordinateur avec le(s) capot(s) retiré(s) (y compris le capot de l'ordinateur, les cadres, les languettes métalliques, les inserts du panneau avant, etc.).
w w w. d e l l . c o m | s u p p o r t . e u r o . d e l l . c o m Lors de l'utilisation de votre ordinateur (suite) Intervention à l'intérieur de votre ordinateur Avant de retirer le capot de l'ordinateur, effectuez les étapes suivantes dans l'ordre indiqué. PRÉCAUTION : Ne tentez pas d'assurer vous-même l'entretien de l'ordinateur, sauf comme expliqué dans la Dell™ documentation Dell™ en ligne ou dans les in instructions fournies par Dell.
Lors de l'utilisation de votre ordinateur (suite) Protection contre les décharges électrostatiques L'électricité statique peut endommager les composants fragiles à l'intérieur de votre ordinateur. Pour éviter de tels dommages, déchargez l'électricité statique de votre corps avant de toucher tout composant électronique de votre ordinateur, comme un microprocesseur. Pour ce faire, touchez une surface métallique non peinte du châssis de l'ordinateur.
w w w. d e l l . c o m | s u p p o r t . e u r o . d e l l . c o m Mise en route/configuration PRÉCAUTION : Avant d'effectuer l'une des procédures énumérées ci-après, lisez attentivement les consignes de sécurité de la page 33. AVIS : Ne mettez pas votre ordinateur sous tension tant que la procédure de configuration n'est pas terminée.
2 Installation d'un périphérique dans la baie modulaire REMARQUE : Pour trouver le loquet de verrouillage du périphérique modulaire, retirez le capot de l'unité de disque dur. Votre ordinateur Dell est livré avec un lecteur de disquette ou un emplacement prédécoupé dans la baie modulaire. Pour installer un CD, un DVD ou une deuxième unité de disque dur dans la baie modulaire, retirez d'abord l'emplacement prédécoupé et installez le périphérique.
w w w. d e l l . c o m | s u p p o r t . e u r o . d e l l . c o m 3 Installation du support REMARQUE : Si vous installez l'ordinateur sous un bureau ou une table, connectez d'abord tous les câbles, puis installez le support sur la plaque de montage (reportez-vous à la section « Installation du support sur la plaque de montage » à la page 45). 1 Soulevez la vis imperdable et faites glisser le support de châssis dans l'une des trois fentes de montage à l'arrière de l'ordinateur.
Connexion de l'adaptateur CA/CC 4 REMARQUE : Le voyant de l'adaptateur d'alimentation s'allume lorsque l'adaptateur est correctement branché à la fois à une prise murale et à l'ordinateur. 1 Connectez le câble d'alimentation au connecteur situé à l'arrière de l'ordinateur. 2 Connectez le câble d'alimentation à l'adaptateur. AVIS : Seules les installations japonaises sont concernées par la procédure suivante.
w w w. d e l l . c o m | s u p p o r t . e u r o . d e l l . c o m 5 Connexion de périphériques externes REMARQUE : Connectez seulement un clavier et une souris. PRÉCAUTION : Pour prévenir tout risque d'électrocution, n'utilisez que l'adaptateur et le câble d'alimentation fournis et vérifiez qu'ils sont branchés sur une source d'alimentation électrique correctement reliée à la terre.
Connexion d'un moniteur VGA Si vous disposez d'un moniteur VGA et d'un connecteur DVI à l'arrière de votre ordinateur, branchez l'adaptateur VGA-DVI au connecteur DVI et le câble du moniteur à l'adaptateur de la façon indiquée.
w w w. d e l l . c o m | s u p p o r t . e u r o . d e l l . c o m 4 Saisissez la partie supérieure du capot et alignez les deux onglets avec les deux fentes sur le panneau arrière de l'ordinateur. 5 Insérez les onglets dans les fentes et faites glisser cette partie vers les voyants de diagnostic (voir illustration) jusqu'à ce qu'elle se positionne correctement. 6 Installez un appareil de sécurité dans le capot de la fente pour câble de sécurité (en option).
Pour retirer le capot, enlevez l'appareil installé dans la fente pour câble de sécurité (le cas échéant). 1 Saisissez la partie supérieure du capot de l'emplacement pour câble et faites-la glisser sur la gauche jusqu'à ce qu'elle s'arrête, puis soulevez-la pour la retirer. 2 Pour retirer la partie inférieure du capot de l'emplacement pour câble, tout en appuyant sur le levier, faites glisser la pièce sur la gauche jusqu'à ce qu'elle s'arrête, puis soulevez-la pour la retirer.
w w w. d e l l . c o m | s u p p o r t . e u r o . d e l l . c o m 3 Soulevez l'ordinateur et le support, insérez le support dans le support de montage et faites-le glisser jusqu'à ce que l'onglet de verrouillage soit inséré dans la fente sur la plaque de montage. 4 Fixez le capot de l'emplacement pour câble (le cas échéant).
Recherche d'informations et d'assistance Que recherchez-vous ? Retrouvez les éléments ici • Programme de diagnostics pour mon ordinateur • Pilotes pour mon ordinateur • La documentation de mon ordinateur • Documentation concernant mon périphérique CD Pilotes et utilitaires (appelé aussi ResourceCD) • Code de service express et numéro de service • Étiquette de licence Microsoft® Windows® Code de ser vice express et clé du produit • Comment retirer et remplacer des composants • Caractéristiques techniqu
w w w. d e l l . c o m | s u p p o r t . e u r o . d e l l .
Résolution des problèmes Dell fournit un certain nombre d'outils qui vous aideront si votre système ne fonctionne pas de la manière escomptée. Pour obtenir les dernières informations sur le dépannage disponibles pour votre système, consultez le site Web du support technique de Dell à l'adresse support.dell.com. Vous pouvez aussi trouver une description des outils de dépannage Dell dans la section « Obtention de l'aide » du Guide d'utilisationen ligne.
w w w. d e l l . c o m | s u p p o r t . e u r o . d e l l . c o m Utilisation du CD Pilotes et utilitaires Dell Pour utiliser le CD Pilotes et utilitaires Dell pendant l'exécution du système d'exploitation Microsoft® Windows®, procédez comme suit : REMARQUE : Pour accéder aux pilotes de périphériques et à la documentation utilisateur, vous devez utiliser le CD Pilotes et utilitaires pendant l'exécution de Windows. 1 Allumez l'ordinateur et démarrez-le à partir du bureau Windows.
Exécution des Diagnostics Dell Le programme de Diagnostics Dell teste les différents composants de votre ordinateur. Exécutez ce programme en cas de problème avec l'ordinateur pour vous aider à identifier l'origine du problème. Vous pouvez exécuter les Diagnostics Dell à partir de l'unité de disque dur ou du CD Pilotes et utilitaires.
w w w. d e l l . c o m | s u p p o r t . e u r o . d e l l . c o m À partir du CD Pilotes et utilitaires : 1 Insérez le CD Pilotes et utilitaires dans le lecteur de CD. 2 Arrêtez, puis redémarrez l'ordinateur. Lorsque le logo DELL apparaît, appuyez immédiatement sur . Si vous attendez trop longtemps et que le logo Windows apparaît, attendez encore jusqu'à ce que le bureau Windows s'affiche. Arrêtez ensuite votre ordinateur à partir du menu Start (Démarrer) et faites une nouvelle tentative.
Informations de réglementation Une interférence électromagnétique (EMI, Electromagnetic Interference) est un signal ou une émission, véhiculé(e) dans l'espace libre ou par des conducteurs électriques ou de signaux, qui peut mettre en danger le fonctionnement d'une radionavigation ou d'un autre service de sécurité ou encore sérieusement dégrader, obstruer ou interrompre de manière répétée un service de communications radio autorisé.
54 Guide de configuration et d e r é f é r e n c e r a p i d e w w w. d e l l . c o m | s u p p o r t . e u r o . d e l l .
Dell™ OptiPlex™ SX Computersysteme Setup- und Schnellreferenzhandbuch Modell DCT w w w. d e l l . c o m | s u p p o r t . e u r o . d e l l .
Hinweise, Vorsichtshinweise und Warnungen HINWEIS: Ein HINWEIS macht auf wichtige Informationen aufmerksam, mit denen Sie das System besser einsetzen können. VORSICHT: VORSICHT warnt vor möglichen Beschädigungen der Hardware oder vor Datenverlust und zeigt, wie diese vermieden werden können. WARNUNG: Eine WARNUNG weist auf Gefahrenquellen hin, die materielle Schäden, Verletzungen oder sogar den Tod von Personen zur Folge haben können.
Inhalt Über dieses Handbuch Leistungsmerkmale . . . . . . . . . . . . . . . . . . . . . . . 59 . . . . . . . . . . . . . . . . . . . . . . . . . 59 WARNUNG: Sicherheitshinweise . Allgemein . . . . . . . . . . . . . . . . . 61 . . . . . . . . . . . . . . . . . . . . . . . . . . . . 61 Arbeiten mit dem Computer . . . . . . . . . . . . . . . . . . . . Bei der Arbeit an Komponenten im Inneren des Computers . . . 64 . . . . . . . . . . . . 65 . . . . . . . . . . . . . . . . . . . .
58 Inhalt
Über dieses Handbuch Dieses Dokument enthält Informationen zum Einrichten, Hinweise zur Problemlösung, zur Sicherheit sowie zu den Zulassungsbestimmungen für den Dell™ OptiPlex™-Computer. Die neuesten Versionen der Dokumentation für Ihr Festplattenlaufwerk können Sie im Internet von der Support-Website von Dell unter support.dell.com herunterladen.
w w w. d e l l . c o m | s u p p o r t . e u r o . d e l l .
WARNUNG: Sicherheitshinweise Die folgenden Sicherheitshinweise schützen den Computer sowie die Arbeitsumgebung vor möglichen Schäden und dienen der persönlichen Sicherheit des Benutzers. Allgemein • Wartungsarbeiten dürfen nur von qualifizierten Servicetechnikern vorgenommen werden. Beachten Sie alle Installationsanweisungen stets genau. • Um Stromschläge zu vermeiden, schließen Sie Computer und Peripheriegeräte an geerdete Steckdosen an.
w w w. d e l l . c o m | s u p p o r t . e u r o . d e l l . c o m WARNUNG: Sicherheitshinweise (Fortsetzung) • Schützen Sie den Computer vor plötzlichen Spannungsschwankungen durch einen Überspannungsschalter, Leitungsfilter oder eine unterbrechungsfreie Stromversorgung (USV). • Die Kabel zum Computer sollten so verlegt werden, dass keine Gegenstände darauf stehen und niemand darüber stolpern kann. • Stecken Sie keine Gegenstände in die Öffnungen des Computergehäuses.
Arbeiten mit dem Computer Beim Arbeiten mit dem Computer sind folgende Sicherheitshinweise zu beachten: WARNUNG: Betreiben Sie den Computer nicht, wenn Gehäuseteile (einschließlich Systemabdeckung, Verkleidung, Abdeckbleche, Frontblenden u. a.) entfernt wurden.
w w w. d e l l . c o m | s u p p o r t . e u r o . d e l l . c o m Arbeiten mit dem Computer (Fortsetzung) Bei der Arbeit an Komponenten im Inneren des Computers Vor dem Öffnen des Systemgehäuses führen Sie die folgenden Schritte in der angegebenen Reihenfolge aus. WARNUNG: Führen Sie nur Wartungsarbeiten aus, die in der Onlinedokumentation oder einer anderen Dokumentation von Dell beschrieben werden. Halten Sie sich stets strikt an die Installationsanweisungen und Wartungsanleitungen.
Arbeiten mit dem Computer (Fortsetzung) Schutz vor elektrostatischen Entladungen Statische Elektrizität kann die empfindlichen Komponenten im Computer beschädigen. Um derartige Schäden zu vermeiden, muss die statische Elektrizität aus dem Körper abgeleitet werden, bevor Sie elektronische Komponenten im System (z. B. den Mikroprozessor) berühren. Berühren Sie dazu eine nicht lackierte Metallfläche am Computergehäuse.
w w w. d e l l . c o m | s u p p o r t . e u r o . d e l l . c o m Erste Schritte und Einrichten des Computers WARNUNG: Lesen Sie die Sicherheitshinweise auf Seite 61 gründlich, und befolgen Sie diese, wenn Sie die nachfolgenden Schritte durchführen. VORSICHT: Schalten Sie den Computer erst dann ein, wenn alle vorbereitenden Schritte zum Einrichten des Systems abgeschlossen sind.
VORSICHT: Stellen Sie den Computer nicht ohne Gehäusestandrahmen senkrecht auf den Schreibtisch, damit eine ausreichende Belüftung gewährleistet ist. Weitere Informationen hierzu finden Sie unter Anbringen des Standrahmens. VORSICHT: Blockieren Sie die Belüftungsöffnungen nicht, damit eine ausreichende Belüftung gewährleistet ist. 2 Einsetzen eines Gerätes in den Modulschacht HINWEIS: Entfernen Sie die Festplattenabdeckung, damit Sie auf den Modulverriegelungsschalter zugreifen können.
w w w. d e l l . c o m | s u p p o r t . e u r o . d e l l . c o m 3 Anbringen des Standrahmens HINWEIS: Bringen Sie erst alle Kabel an, bevor Sie für die Montage unter einer Tisch- oder Schreibtischplatte den Standrahmen befestigen. Weitere Informationen hierzu finden Sie unter „Befestigen des Standrahmens am Montageblech“ auf Seite 73. 1 Die selbstsichernde Schraube lösen und die Gehäusestandrahmenleiste in einen von drei Montage-Einschüben auf der Rückseite des Computers schieben.
Anschließen des Netzadapters 4 HINWEIS: Wenn der Adapter richtig an die Stromversorgung angeschlossen bzw. in die Steckdose eingesteckt ist, leuchtet die LED des Netzadapters. 1 Den Netzadapter an den Anschluss auf der Rückseite des Computers anschließen. 2 Das Netzkabel mit dem Netzadapter verbinden. VORSICHT: Der folgende Abschnitt gilt nur für Japan.
w w w. d e l l . c o m | s u p p o r t . e u r o . d e l l . c o m 5 Anschließen von externen Geräten HINWEIS: Schließen Sie nur eine Tastatur und eine Maus an. WARNUNG: Um Stromschläge zu vermeiden, dürfen nur die mitgelieferten Netzteile und -kabel verwendet werden. Außerdem muss sichergestellt sein, dass die Anschlüsse ordnungsgemäß geerdet sind.
Anschließen eines VGA-Bildschirms Wenn Sie einen VGA-Bildschirm besitzen und der Computer auf der Rückseite mit einem DVI-Anschluss ausgestattet ist, verbinden Sie den VGA-DVI-Adapter mit dem DVI-Anschluss und das Bildschirmkabel mit dem Adapter, wie in der Abbildung gezeigt wird.
w w w. d e l l . c o m | s u p p o r t . e u r o . d e l l . c o m 4 Die beiden Haken der oberen Hälfte der Kabelabdeckung an den zwei Öffnungen auf der Rückseite des Computers ausrichten. 5 Die Haken in die Öffnungen einführen und das Teil entsprechend der Abbildung in Richtung Diagnoseanzeigen schieben. 6 Gegebenenfalls eine Schutzvorrichtung im Sicherungskabeleinschub anbringen. Sicherungskabeleinschub Stellen Sie den Computer nicht auf der Gehäusefront auf.
Entfernen Sie gegebenenfalls eine im Sicherungskabeleinschub installierte Schutzvorrichtung, um die Kabelabdeckung zu entfernen. 1 Die obere Hälfte der Kabelabdeckung bis zum Anschlag nach links schieben und abnehmen. 2 Den Hebel drücken und die untere Hälfte der Kabelabdeckung bis zum Anschlag nach links schieben und anschließend abnehmen.
w w w. d e l l . c o m | s u p p o r t . e u r o . d e l l . c o m 3 Den Computer und den Standrahmen anheben und den Standrahmen in das Montageblech einführen. Anschließend den Standrahmen nach hinten schieben, bis der Freigabehebel in den Einschub des Montageblechs einrastet. 4 Die Kabelabdeckung gegebenenfalls wieder anbringen.
Informationsquellen und Unterstützung Wonach suchen Sie? Hier finden Sie es. • Ein Diagnoseprogramm für den Computer. • Treiber für den Computer • Die Dokumentation für den Computer • Die Dokumentation für das Gerät Die Drivers and Utilities-CD (diese wird auch als ResourceCD bezeichnet).
w w w. d e l l . c o m | s u p p o r t . e u r o . d e l l . c o m Wonach suchen Sie? Hier finden Sie es.
Weitere Informationen über Service-Kennnummer und die Expressdienst-Codenummer finden Sie unter „Informationsquellen und Unterstützung“ auf Seite 75. Expressdienst-Codenummer:___________________________ Service-Kennnummer:___________________________ Tools zur Fehlerbehebung Mit den Tests des Programms „Dell Diagnostics“ werden verschiedene Systemkomponenten getestet. Sie unterstützen Sie bei der Fehlersuche.
w w w. d e l l . c o m | s u p p o r t . e u r o . d e l l . c o m Treiber für Ihren Computer Führen Sie folgende Schritte aus, um eine Liste der Treiber für Ihren Computer anzuzeigen: 1 Im Listenfeld Thema auf die Option My Drivers (Geeignete Treiber) klicken. Die Drivers and Utilities-CD prüft die Hardwarekonfiguration des Computers und das Betriebssystem und zeigt dann eine Liste der Gerätetreiber an, die für Ihre Systemkonfiguration am besten geeignet sind.
5 Das Testfenster schließen, um zum Bildschirm Main Menu (Hauptmenü) zurückzukehren. Um das Programm „Dell Diagnostics“ zu verlassen und den Computer neu zu starten, das Fenster des Hauptmenüs schließen. Von der Drivers and Utilities-CD aus: 1 Die Drivers and Utilities-CD in das Laufwerk einlegen. 2 Den Computer herunterfahren und erneut starten. Wenn das DELL-Logo angezeigt wird, sofort drücken.
w w w. d e l l . c o m | s u p p o r t . e u r o . d e l l . c o m 2 Wenn F2 = Setup in der rechten oberen Ecke des Bildschirms angezeigt wird, die Tastenkombination drücken. 3 Die Anweisungen auf dem Bildschirm befolgen. Im Benutzerhandbuch den Abschnitt „Probleme mit dem Festplattenlaufwerk“ lesen, wenn das Laufwerk ausgefallen ist. Zulassungsbestimmungen Elektromagnetische Interferenz (EMI) ist ein Signal oder eine Emission, die in den freien Raum abgegeben bzw.
Sistemi Dell™ OptiPlex™ SX Guida di installazione e consultazione rapida Modello DCT w w w. d e l l . c o m | s u p p o r t . e u r o . d e l l .
Note, avvisi e messaggi di attenzione NOTA: una NOTA evidenzia informazioni importanti per un uso ottimale del computer. AVVISO: un AVVISO può indicare un potenziale danno a livello di hardware o una perdita di dati e consiglia come evitare il problema. ATTENZIONE: un messaggio di ATTENZIONE indica un rischio di danni alla proprietà, lesioni personali o morte. Abbreviazioni ed acronimi Per un elenco completo delle abbreviazioni e degli acronimi, vedere la sezione Glossario nella Guida dell’utente.
Sommario Informazioni sulla guida Funzioni . . . . . . . . . . . . . . . . . . . . . . 85 . . . . . . . . . . . . . . . . . . . . . . . . . . . . . . . 85 ATTENZIONE: Istruzioni di sicurezza . . . . . . . . . . . . . . . 87 . . . . . . . . . . . . . . . . . . . . . . 87 . . . . . . . . . . . . . . . . . . . . . . . . . . 89 Informazioni generali Uso del computer Interventi sui componenti interni del computer . . . . . . . . . 90 . . . . . . . . . . . . 91 . . . . . . . . . . . . . . . . .
84 Sommario
Informazioni sulla guida Il presente documento contiene informazioni introduttive e di configurazione, sulla sicurezza, sulle normative e sulla garanzia relative al computer Dell™ OptiPlex™. Per accedere alle versioni più recenti dei documenti presenti sul disco rigido, visitare il sito Web del supporto tecnico di Dell all’indirizzo support.dell.com.
w w w. d e l l . c o m | s u p p o r t . e u r o . d e l l .
ATTENZIONE: Istruzioni di sicurezza Per proteggere il computer e l’ambiente di lavoro da eventuali danni e per la sicurezza personale, attenersi alle seguenti indicazioni di sicurezza. Informazioni generali • Non cercare di riparare il computer da soli se non si è un addetto esperto al supporto tecnico. Seguire sempre attentamente le istruzioni di installazione.
w w w. d e l l . c o m | s u p p o r t . e u r o . d e l l . c o m ATTENZIONE: Istruzioni di sicurezza (cont.) • Se il computer è dotato di modem, il cavo usato con il modem deve avere dimensioni minime pari a 26 AWG (American Wire Gauge) e un connettore modulare RJ-11 conforme alle normative FCC. • Prima di eseguire la pulizia del computer, scollegarlo dalla presa elettrica. Pulire il computer con un panno morbido inumidito con acqua.
Uso del computer Durante l’utilizzo del computer, attenersi alle seguenti indicazioni di sicurezza. ATTENZIONE: non usare il computer senza le relative coperture di protezione, inclusi i coperchi del computer, il pannello frontale, le staffe di copertura, gli inserti del pannello frontale, ecc. • Il computer Dell viene fornito con una delle opzioni di alimentazione descritta di seguito. – Alimentatore a tensione fissa.
w w w. d e l l . c o m | s u p p o r t . e u r o . d e l l . c o m Uso del computer (cont.) Interventi sui componenti interni del computer Prima di aprire il coperchio del computer, eseguire la procedura descritta rispettando la sequenza indicata. ATTENZIONE: non eseguire interventi di riparazione sul computer da soli se non attenendosi alle istruzioni fornite nella documentazione Dell™ in linea o in altro modo indicate da Dell. Seguire sempre attentamente le istruzioni di installazione e di riparazione.
Uso del computer (cont.) Protezione dalle scariche elettrostatiche L’elettricità statica può danneggiare i componenti interni più delicati del computer. Per evitare possibili danni, scaricare l’elettricità statica dal proprio corpo prima di toccare un qualsiasi componente elettronico del computer, ad esempio il microprocessore. A tale scopo è sufficiente toccare una superficie metallica non verniciata sul telaio del computer.
w w w. d e l l . c o m | s u p p o r t . e u r o . d e l l . c o m Operazioni preliminari e installazione ATTENZIONE: prima di eseguire le procedure descritte in questa sezione, seguire le istruzioni di sicurezza descritte a pagina 87. AVVISO: non accendere il computer prima del completamento della procedura di installazione.
2 Installazione di una periferica nell’alloggiamento dei moduli NOTA: per individuare l’interruttore di accesso all’alloggiamento dei moduli, rimuovere il coperchio del disco rigido. Dell fornisce il computer con un’unità a dischetti o un modulo di riempimento installato nell’alloggiamento dei moduli. Per installare un’unità CD, DVD o un secondo disco rigido nell’alloggiamento dei moduli, rimuovere prima il modulo di riempimento.
w w w. d e l l . c o m | s u p p o r t . e u r o . d e l l . c o m 3 Installazione del sostegno NOTA: se il computer viene installato sotto il piano di una scrivania o di un tavolo, collegare prima tutti i cavi quindi montare il sostegno alla piastra di montaggio (vedere “Montaggio del sostegno alla piastra di montaggio” a pagina 99). 1 Sollevare la vite prigioniera e fare scivolare il sostegno del telaio in una delle tre guide di montaggio sul retro del computer.
Collegamento dell’adattatore c.a. 4 NOTA: l’indicatore dell’adattatore di alimentazione si illumina quando l’adattatore è correttamente collegato a una presa di corrente e al computer. 1 Collegare l’adattatore di alimentazione al connettore sul retro del computer. 2 Collegare il cavo di alimentazione all’adattatore di alimentazione. AVVISO: la seguente procedura è applicabile solo al Giappone.
w w w. d e l l . c o m | s u p p o r t . e u r o . d e l l . c o m 5 Connessione di periferiche esterne NOTA: collegare solo una tastiera e un mouse. ATTENZIONE: per evitare scariche elettriche, usare solo l’adattatore e il cavo di alimentazione forniti e assicurarsi di collegarli a una fonte di alimentazione correttamente messa a terra.
Collegamento di un monitor VGA Se si dispone di un monitor VGA e sul retro del computer è presente un connettore DVI, collegare l’adattatore VGA-DVI al connettore DVI e il cavo del monitor all’adattatore, come illustrato di seguito.
w w w. d e l l . c o m | s u p p o r t . e u r o . d e l l . c o m 3 Inserire le linguette negli slot e fare scorrere il pezzo di protezione verso gli indicatori di diagnostica (come illustrato in figura) in modo che risulti saldamente fissato. 4 Allineare le due linguette del pezzo superiore della protezione per i cavi ai due slot sul pannello posteriore del computer.
Per rimuovere la protezione per i cavi, rimuovere il dispositivo di sicurezza (se usato) installato nello slot per il cavo di sicurezza. 1 Afferrare il pezzo superiore della protezione per i cavi e farlo scorrere verso sinistra fino ad arresto, quindi sollevarlo e rimuoverlo. 2 Per rimuovere il pezzo inferiore della protezione per i cavi, farlo scorrere verso sinistra fino ad arresto mentre si tiene premuta la levetta, quindi sollevarlo e rimuoverlo.
w w w. d e l l . c o m | s u p p o r t . e u r o . d e l l . c o m 3 Sollevare il computer e il sostegno, inserire il sostegno nella staffa di montaggio e farlo scivolare finché la linguetta di rilascio scatta nello slot della piastra di montaggio. 4 Montare la protezione per i cavi (se usata).
Tipo di informazioni Dove cercare • Un programma di diagnostica per il computer • Driver per il computer • Documentazione per il computer • Documentazione per le periferiche CD Drivers and Utilities (noto anche come ResourceCD) • Codice di servizio espresso e numero di servizio • Etichetta della licenza di Microsoft® Windows® Codice di servizio espresso e numero di identificazione del prodotto • Procedure di rimozione e sostituzione di componenti • Specifiche tecniche • Procedure di configurazione del
w w w. d e l l . c o m | s u p p o r t . e u r o . d e l l .
Soluzione di problemi Dell fornisce una serie di strumenti per assistere l’utente se il computer non funziona nel modo previsto. Per ottenere le informazioni più aggiornate per la risoluzione dei problemi, visitare il sito Web del supporto tecnico di Dell all’indirizzo support.dell.com. Una descrizione degli strumenti di diagnostica di Dell è disponibile nella sezione “Assistenza” della Guida dell’utente in linea.
w w w. d e l l . c o m | s u p p o r t . e u r o . d e l l . c o m Uso del CD Dell Drivers and Utilities Per usare il CD Dell Drivers and Utilities durante l’esecuzione del sistema operativo Microsoft® Windows®, seguire la procedura descritta. NOTA: per accedere ai driver di periferica e alla documentazione per l’utente, è necessario usare il CD Drivers and Utilities mentre sul computer è in esecuzione un sistema operativo Windows.
Esecuzione del programma Dell Diagnostics Dell Diagnostics è una programma usato per verificare diversi componenti del computer. Eseguirlo quando si verifica un problema con il computer per identificarne la fonte. Il programma Dell Diagnostics può essere eseguito dal disco rigido o dal CD Drivers and Utilities.
w w w. d e l l . c o m | s u p p o r t . e u r o . d e l l . c o m 3 Quando viene visualizzato l’elenco delle unità di avvio, evidenziare IDE CD-ROM Device (unità IDE CD-ROM) e premere . 4 Scegliere l’opzione IDE CD-ROM Device (periferica IDE CD-ROM) dal menu di avvio del CD. 5 Scegliere l’opzione Boot from CD-ROM (avvio da CD-ROM) dal menu visualizzato. 6 Digitare 1 per avviare il menu di ResourceCD. 7 Digitare 2 per avviare Dell Diagnostics.
Informazioni sulle normative Con interferenza elettromagnetica (EMI) si indica un qualsiasi segnale o emissione, irradiato nello spazio o trasmesso tramite cavi di alimentazione o di segnale, che può compromettere il funzionamento di dispositivi di navigazione radio o servizi di sicurezza di altro tipo, o che in modo significativo disturba, attenua o interrompe ripetutamente un servizio di radiocomunicazione a norma di legge.
108 Guida di installazione e consultazione rapida w w w. d e l l . c o m | s u p p o r t . e u r o . d e l l .
Sistemas Optiplex™ SX de Dell™ Guía de instalación y de referencia rápida DCT del modelo w w w. d e l l . c o m | s u p p o r t . e u r o . d e l l .
Notas, avisos y precauciones NOTA: Una NOTA proporciona información importante que le ayuda a utilizar su equipo de la mejor manera posible. AVISO: Un AVISO indica un posible daño en el hardware o la pérdida de datos y le explica cómo evitar el problema. PRECAUCIÓN: una PRECAUCIÓN indica un posible daño material, lesión corporal o muerte. Abreviaturas y acrónimos Para obtener una lista completa de abreviaturas y acrónimos, consulte el “Glosario” de la Guía del usuario.
Contenido Acerca de esta guía Características . . . . . . . . . . . . . . . . . . . . . . . . 113 . . . . . . . . . . . . . . . . . . . . . . . . . . 113 PRECAUCIÓN: Instrucciones de seguridad General . . . . . . . . . . . 115 . . . . . . . . . . . . . . . . . . . . . . . . . . . . 115 Cuando utilice el equipo . . . . . . . . . . . . . . . . . . . . . Al trabajar en el interior de su equipo . . . . . . . . . . . . . 119 . . . . . . . . . . . . . . . . . . 119 . . . . . . . . . . . . . . .
112 Contenido
Acerca de esta guía Este documento contiene una introducción, así como información sobre configuración, solución de problemas, seguridad, regulaciones y condiciones de la garantía de su ordenador OptiPlex™ de Dell™. Para obtener la versión más actualizada de los documentos en la unidad de disco duro, vaya al sitio Web de Dell | Support en support.dell.com.
w w w. d e l l . c o m | s u p p o r t . e u r o . d e l l .
PRECAUCIÓN: Instrucciones de seguridad Utilice las siguientes pautas de seguridad para garantizar su propia seguridad personal así como la protección de su equipo y del entorno de trabajo ante posibles daños. General • No intente reparar el equipo usted mismo a menos que sea un técnico de mantenimiento cualificado. Siga fielmente las instrucciones de instalación en todo momento.
w w w. d e l l . c o m | s u p p o r t . e u r o . d e l l . c o m PRECAUCIÓN: Instrucciones de seguridad (continuación) • Para proteger el equipo contra las subidas y bajadas de tensión transitorias, utilice un supresor de sobrevoltajes, un acondicionador de línea o un sistema de energía ininterrumpida (UPS). • Asegúrese de que no haya nada sobre los cables del equipo y que éstos no estén situados donde se puedan pisar o sea fácil tropezar con ellos.
Cuando utilice el equipo Cuando utilice el equipo, observe las siguientes pautas de seguridad. PRECAUCIÓN: no ponga en funcionamiento el sistema sin las cubiertas (incluidas las cubiertas del ordenador, los biseles, los cubrerranuras, los protectores del panel frontal, etc.). • El sistema viene equipado con lo siguiente: – Un suministro de energía de voltaje fijo.
w w w. d e l l . c o m | s u p p o r t . e u r o . d e l l . c o m Cuando utilice el equipo (continuación) Al trabajar en el interior de su equipo Antes de abrir la cubierta del ordenador, siga estos pasos en el mismo orden en que se indican. PRECAUCIÓN: No intente reparar el equipo usted mismo, salvo si lo hace tal y como se explica en la documentación o las instrucciones de Dell™ proporcionadas en línea o en otro soporte. Siga exactamente las instrucciones de instalación y servicio.
Cuando utilice el equipo (continuación) Protección contra descargas electrostáticas La electricidad estática puede dañar los delicados componentes que hay en el interior del ordenador. Para evitar el daño por descargas electrostáticas, antes de tocar cualquiera de los componentes electrónicos del equipo, descargue la electricidad estática de su cuerpo. Para ello, toque una superficie metálica no pintada en el chasis del equipo.
w w w. d e l l . c o m | s u p p o r t . e u r o . d e l l . c o m Introducción e instalación PRECAUCIÓN: antes de realizar cualquiera de los procedimientos enumerados a continuación, lea y siga las instrucciones de seguridad de la página 115. AVISO: No encienda el equipo hasta haber completado todos los pasos de configuración.
2 Instalación de un dispositivo en el compartimiento modular NOTA: Para buscar el interruptor de bloqueo del módulo, quite la cubierta de la unidad de disco duro. El ordenador Dell se comercializa con una unidad de disquete o un compartimiento de unidad en el compartimiento modular. Para instalar una unidad de CD, DVD u otro tipo en este compartimento, quite primero el compartimento de unidad y, a continuación, instale el dispositivo.
w w w. d e l l . c o m | s u p p o r t . e u r o . d e l l . c o m 3 Acoplamiento del soporte NOTA: Si va a instalar el ordenador bajo una mesa o escritorio, conecte primero todos los cables y., a continuación, acople el soporte a la placa de montaje (consulte la sección “Acoplamiento del soporte a la placa de montaje” en la página 127). 1 Eleve el tornillo cautivo y deslice la regleta del soporte del chasis a una de las tres ranuras de montaje situadas en la parte posterior del ordenador.
Conexión del adaptador de CA 4 NOTA: El LED del adaptador de alimentación se enciende cuando el adaptador está correctamente conectado a la toma de corriente y al ordenador. 1 Conecte el adaptador de alimentación al conector de la parte posterior del ordenador. 2 Conecte el cable de alimentación al adaptador de alimentación. AVISO: Los siguientes pasos sólo se aplican a Japón.
w w w. d e l l . c o m | s u p p o r t . e u r o . d e l l . c o m 5 Conexión de dispositivos externos NOTA: Conecte sólo un teclado y un ratón. PRECAUCIÓN: Para evitar en lo posible descargas eléctricas, use únicamente el adaptador de corriente y el cable de alimentación proporcionados y asegúrese de que están enchufados a una fuente de alimentación conectada a tierra.
Conexión del monitor VGA Si tiene un monitor VGA y un conector DVI en la parte posterior del ordenador, conecte el adaptador VGA-DVI al conector DVI y conecte el cable del monitor al adaptador, tal como se muestra. 6 Acoplamiento de la cubierta del cable AVISO: Si va a instalar el ordenador debajo de un escritorio o una mesa, no conecte el cable hasta que el ordenador esté conectado firmemente a la placa de montaje (consulte el paso 7, “Acoplamiento del soporte a la placa de montaje” en la página 127).
w w w. d e l l . c o m | s u p p o r t . e u r o . d e l l . c o m 4 Agarre la pieza superior de la cubierta del cable y alinee las dos lengüetas con las dos ranuras del panel posterior del equipo. 5 Inserte las lengüetas en las ranuras y deslice la pieza hacia los indicadores de diagnóstico (consulte la ilustración). 6 Instale un dispositivo de seguridad en la ranura del cable de seguridad (opcional).
Para retirar la cubierta del cable, retire el dispositivo instalado en la ranura para el cable de seguridad, si lo hay. 1 Sujete la pieza superior de la cubierta del cable, deslícela hacia la izquierda hasta que se detenga y, a continuación, levántela y retírela. 2 Para extraer la pieza inferior de la cubierta del cable, mientras mantiene presionada la palanca, deslice la pieza hacia la izquierda hasta que se detenga y, a continuación, levántela y retírela.
w w w. d e l l . c o m | s u p p o r t . e u r o . d e l l . c o m 3 Eleve el ordenador y el soporte, inserte este último en el soporte de montaje y deslice el soporte hasta que la lengüeta de la palanca de desacoplamiento quede encajada en la ranura de la placa de montaje. 4 Conecte la cubierta del cable (si la utiliza).
Localización de información y ayuda Si busca • • • • Un programa de diagnóstico para el equipo E l C D D r i v e r s a n d U t i l i t i e s ( C o n t r o l a d o r e s y utilidades), también conocido como el CD Controladores para el equipo de recursos La documentación del ordenador Puede utilizar este CD para acceder La documentación del dispositivo a la documentación, volver a instalar los controladores o ejecutar las herramientas de diagnóstico.
w w w. d e l l . c o m | s u p p o r t . e u r o . d e l l .
Solución de problemas Dell proporciona una serie de herramientas para ayudarle en el caso de que el ordenador no funcione como es de esperar. Para obtener la información más actualizada sobre solución de problemas de su ordenador, consulte el sitio Web de asistencia técnica de Dell en support.dell.com. También encontrará descripciones de las herramientas de solución de problemas de Dell en la sección “Obtención de ayuda” de la Guía del usuario en línea.
w w w. d e l l . c o m | s u p p o r t . e u r o . d e l l . c o m Utilización del CD Drivers and Utilities (Controladores y utilidades) de Dell Para utilizar el CD Drivers and Utilities (Controladores y utilidades) de Dell mientras trabaja con el sistema operativo Microsoft® Windows®, lleve a cabo estos pasos: NOTA: Para acceder a los controladores del dispositivo y a la documentación del usuario, debe utilizar el CD Drivers and Utilities (Controladores y utilidades) mientras ejecuta Windows.
Cómo ejecutar los Diagnósticos Dell Diagnósticos Dell es un programa que prueba varios componentes del ordenador. Ejecute este programa siempre que tenga un problema con el ordenador para ayudarle a identificar el origen del problema. Diagnósticos Dell se puede ejecutar desde la unidad de disco duro o desde el CD Drivers and Utilities (Controladores y utilidades).
w w w. d e l l . c o m | s u p p o r t . e u r o . d e l l . c o m 3 Cuando aparezca la lista de dispositivos de inicio, seleccione IDE CD-ROM Device (Dispositivo CD-ROM IDE) y presione . 4 Seleccione la opción IDE CD-ROM Device (Dispositivo CD-ROM IDE) en el menú de inicio del CD. 5 Seleccione la opción Boot from CD-ROM (Iniciar desde el CD-ROM) en el menú que aparece. 6 Escriba 1 para abrir el menú ResourceCD (CD de recursos). 7 Escriba 2 para iniciar los Diagnósticos Dell.
Información sobre normativas Una interferencia electromagnética (EMI, Electromagnetic Interference) es cualquier señal o emisión, radiada en el espacio o conducida a través de un cable de alimentación o señal, que pone en peligro el funcionamiento de la navegación por radio u otro servicio de seguridad, o degrada seriamente, obstruye o interrumpe de forma repetida un servicio de comunicaciones por radio autorizado.
136 Guía de instalación y de referencia rápida w w w. d e l l . c o m | s u p p o r t . e u r o . d e l l .
Dell™ OptiPlex™ SX Systems Kurulum ve Hızlı Başvuru Kılavuzu Model DCT w w w. d e l l . c o m | s u p p o r t . e u r o . d e l l .
Not, Uyarı ve Dikkat başlıklı açıklamalar NOT: NOT başlıklı açıklamalar, bilgisayarınızı daha iyi kullanmanıza yardımcı olacak önemli bilgileri belirtir. UYARI: UYARI başlıklı açıklamalar, donanımınızda meydana gelebilecek bir hasarı veya veri kaybını belirtir ve sorunu nasıl önleyebileceğinizi anlatır. DİKKAT: DİKKAT başlıklı açıklamalar, meydana gelebilecek yaralanma, mal veya can kaybını belirtir. Kısaltmalar ve Kısaadlar Kısaltmaların ve kısaadların tam listesi için bkz.
İçindekiler Bu Kılavuz Hakkında Özellikleri . . . . . . . . . . . . . . . . . . . . . 141 . . . . . . . . . . . . . . . . . . . . . . . . . . . 141 DİKKAT: Güvenlik Talimatları . Genel . . . . . . . . . . . . . . . . 143 . . . . . . . . . . . . . . . . . . . . . . . . . . . 143 Bilgisayarınızı Kullanırken . . . . . . . . . . . . . . . . . . Bilgisayarınızın İçiyle Uğraşırken . . . . . . . . . . . . . . . 147 . . . . . . . . . . . . . . . . . . . . . . . 147 İşe Koyulma/Kurulum . . . . . .
140 İ ç i nd ek i l er
Bu Kılavuz Hakkında Bu belgede, Dell™ OptiPlex™ bilgisayarınızla ilgili işe koyulma, kurulum, sorun çözme, güvenlik, yasal ve garanti konularında bilgi verilmiştir. Sabit sürücünüzdeki belgelerin son sürümlerini elde etmek için, support.dell.com adresindeki Dell Support (Dell Destek) Web sitesine gidin.
w w w. d e l l . c o m | s u p p o r t . e u r o . d e l l .
DİKKAT: Güvenlik Talimatları Aşağıdaki güvenlik yönergelerine uymanız, kişisel güvenliğinizi sağlamanıza ve hem bilgisayarınızı hem de çalışma ortamınızı olası tehlikelerden korumanıza yardımcı olacaktır. Genel • Eğitimli servis teknisyeni değilseniz, bilgisayarınızın bakım ve onarımını kendiniz yapmaya çalışmayın. Kurulum talimatlarına daima harfiyen uyun. • Elektrik çarpmasından korunmak için, bilgisayar ve aygıt güç kablolarını, düzgün şekilde topraklanmış elektrik prizlerine takın.
w w w. d e l l . c o m | s u p p o r t . e u r o . d e l l . c o m DİKKAT: Güvenlik Talimatları (devam) • Bilgisayarınızı elektrik gücünde kısa süreli ani yükselme ve düşmelerden korumak için, aşırı gerilim baskılayıcı, hat stabilizatörü veya kesintisiz güç kaynağı (UPS) kullanın. • Bilgisayarınızın kabloları üzerine herhangi bir şey konmamasına, bunların, üzerine basılabilecek veya ayağa takılabilecek yerlerden geçmemesine dikkat edin. • Bilgisayarınızın deliklerine herhangi birey sokmayın.
Bilgisayarınızı Kullanırken Bilgisayarınızı kullandığınız sırada, aşağıdaki güvenli kullanım yönergelerine uyun. DİKKAT: Bilgisayarınızı, herhangi bir kapağı (bilgisayar kapakları, çerçeveler, dolgu destekleri, ön panel geçmeleri vb.) açıkken kullanmayın.
w w w. d e l l . c o m | s u p p o r t . e u r o . d e l l . c o m Bilgisayarınızı Kullanırken (devam) Bilgisayarınızın İçiyle Uğraşırken Bilgisayar kapağını açmadan önce, belirtilen sırayla, aşağıdakileri uygulayın. DİKKAT: Çevrimiçi Dell™ belgelerinizde veya size Dell tarafından sağlanmış olan diğer talimatlarda belirtilen durumlar dışında bilgisayarınızın bakım veya onarımını kendiniz yapmaya çalışmayın. Kurulum ve servis talimatlarına daima harfiyen uyun.
Bilgisayarınızı Kullanırken (devam) Elektrostatik Boşalıma Karşı Korunma Statik elektrik, bilgisayarınızın içindeki hassas bileşenlere zarar verebilir. Statik hasarını önlemek için, bilgisayarınızın içindeki, mikroişlemci gibi elektronik bileşenlerden birine dokunmadan önce vücudunuzdaki statik elektriği boşaltın. Bunun, bilgisayar şasisindeki boyalı olmayan bir metal yüzeye dokunarak yapabilirsiniz.
w w w. d e l l . c o m | s u p p o r t . e u r o . d e l l . c o m İşe Koyulma/Kurulum DİKKAT: Aşağıda sıralanan işlemleri gerçekleştirmeden önce sayfa 143 güvenlik talimatlarını okuyup yerine getirin. UYARI: Bütün kurulum aşamaları tamamlanıncaya kadar bilgisayarınızı açmayın. 1 Bilgisayarın Yerinin ve Yerleştirme Şeklinin Belirlenmesi NOT: Bilgisayarınızı dikey veya yatay olarak masa altına veya üstüne yerleştirmek istiyorsanız, bkz.
2 Modül Bölmesine Aygıt Kurulması NOT: Modül aygıt kilitleme mandalına ulaşmak için, sabit sürücü kapağını açın. Dell bilgisayarınızı satın aldığınızda içinde ya disket sürücü ya da havalandırma bölmesi vardır. Modül bölmesine CD, DVD veya ikinci sabit sürücü takmak için, önce havalandırma bölmesini çıkartın.
w w w. d e l l . c o m | s u p p o r t . e u r o . d e l l . c o m 3 Tabanın Takılması NOT: Bilgisayarı masa altına veya üstüne kuruyorsanız, önce tüm kabloları takın, sonra da tabanı montaj plakasına takın (bkz. "Tabanın Montaj Plakasına Takılması" sayfa 155). 1 Tutucu vidayı gevşetip şasi tabanı çubuğunu, bilgisayarın arkasındaki üç montaj yuvasından birine sokun. 2 Taban yerine oturduğunda vidayı sıkıştırın.
AC Adaptörünün Bağlanması 4 NOT: Adaptör duvar prizine ve bilgisayara düzgün olarak takıldığında, güç adaptörünün LED ışığı yanar. 1 Güç adaptörünü, bilgisayarın arkasındaki bağlayıcıya takın. 2 Güç kablosunu güç adaptörüne takın. UYARI: Aşağıdaki adımlar yalnızca Japonya için geçerlidir.
w w w. d e l l . c o m | s u p p o r t . e u r o . d e l l . c o m 5 Harici Aygıtların Takılması NOT: Yalnızca bir klavye ve bir fare takın. DİKKAT: Elektrik çarpmasını önlemek için, bilgisayarınızla birlikte gelen güç adaptörü ve güç kablosundan başkasını kullanmayın ve bunların düzgün şekilde topraklanmış bir güç prizine takılmasına dikkat edin.
VGA Monitörün Bağlanması Bilgisayarınızın arkasında VGA monitör ve DVI bağlayıcısı varsa, VGA-DVI adaptörünü DVI bağlayıcısına takın ve monitör kablosunu aşağıda gösterildiği gibi adaptöre bağlayın. 6 Kablo Kapağının Takılması UYARI: Bilgisayarı masa altına veya üstüne kuruyorsanız, bilgisayarı montaj plakasına tam olarak monte etmeden kabloları takmayın (bkz. 7. Bölüm, "Tabanın Montaj Plakasına Takılması" sayfa 155). UYARI: Bilgisayarınızdaki tabanı kullanacaksanız tabanı kablo kapağından önce takın.
w w w. d e l l . c o m | s u p p o r t . e u r o . d e l l . c o m 4 Kablo kapağının üst parçasını tutarak, iki kanatçığı, bilgisayarın arka panelindeki iki yarığın üzerine getirin. 5 Kanatçıkları yarıklara sokun ve parçayı, tanı ışıklarına doğru itin (resme bakın). 6 Güvenlik kablo yuvasına, güvenlik aygıtını takın (isteğe bağlı). güvenlik kablosu yuvası Bilgisayarı, ön yüzünün üstüne, yüzü koyun koymayın.
Kablo kapağını açmak için, kullanıldıysa, güvenlik kablo yuvasına takılı aygıtı çıkartın. 1 Kablo kapağının üst parçasını tutup, gittiği yere kadar, sola doğru kaydırın ve kaldırarak açın. 2 Kablo kapağının alt parçasını açmak için, kola bastırarak, parçayı gittiği yere kadar, sola doğru kaldırın ve kaldırarak açın. 7 Tabanın Montaj Plakasına Takılması UYARI: Bilgisayarı asılı konumda kurarken, kullanıcının bacağının veya sandalyenin çarpabileceği yerlere kurmaktan kaçının.
w w w. d e l l . c o m | s u p p o r t . e u r o . d e l l . c o m 3 Bilgisayarı ve tabanı kaldırın, tabanı montaj desteğine sokun ve serbest bırakma kolu kanatçığı montaj plakasındaki yarığa girene kadar kaydırın. 4 (Kullanıldıysa) kablo kapağını takın.
Bilgi ve Yardım Alma Aradığınız Ne? Burada Bulabilirsiniz • • • • D r i v e r s a n d U t i l i t i e s ( S ü r ü c ü l e r v e Ya r d ı m c ı Programlar CD'si) ResourceCD (Kaynak CD'si) olarak da bilinir) Bilgisayarım için bir tanı programı Bilgisayarım için sürücüler Bilgisayarımın belgeleri Aygıt(lar)ımın belgeleri • Acele Hizmet Kodu ve Servis Etiketi Numarası • Microsoft Windows Lisans Etiketi Bu CD'yi, belgelere erişmekte, sürücüleri yeniden kurmakta veya tanı araçlarını çalıştırmakta kullanab
w w w. d e l l . c o m | s u p p o r t . e u r o . d e l l .
Sorunların Çözülmesi Dell, sisteminiz beklendiği şekilde çalışmadığı taktirde size yardımcı olmak üzere birçok araç sunmuştur. Sisteminiz için hazırlanmış olan en son sorun giderme bilgileri için, support.dell.com adresindeki Dell Support (Dell Destek) Web sitesine bakın. Ayrıca, çevrimiçi Kullanma Kılavuzu'nuzun "Getting Help" (Yardım Alma) başlıklı bölümünde de Dell sorun giderme araçlarının açıklamalarını bulabilirsiniz.
w w w. d e l l . c o m | s u p p o r t . e u r o . d e l l . c o m Dell Drivers and Utilities (Sürücüler ve Yardımcı Programlar) CD'sinin Kullanımı Microsoft Windows işletim sistemini çalıştırırken Dell Drivers and Utilities (Sürücüler ve Yardımcı Programlar) CD'sini kullanmak için, aşağıdakileri yapın: NOT: Aygıt sürücülerine ve kullanma belgelerine erişmek için, Drivers and Utilities (Sürücüler ve Yardımcı Programlar) CD'sini, Windows içinden kullanmanız gerekir.
Sabit Sürücüden: UYARI: Sabit sürücünüz hata verirse, Dell IDE Hard-Drive Diagnostics (Dell IDE Sabit Sürücü Tanıları) programını çalıştırın (bkz. "Dell IDE Hard-Drive Diagnostics (Dell IDE Sabit Sürücü Tanıları) Programının Çalıştırılması" sayfa 162). 1 Bilgisayarı kapatıp yeniden başlatın. 2 Ekranda DELL™ logosu çıkar çıkmaz tuşuna basın.
w w w. d e l l . c o m | s u p p o r t . e u r o . d e l l . c o m 6 ResourceCD (KaynakCDsi) menüsünü başlatmak 1 girin. 7 Dell Diagnostics’i (Dell Tanıları) başlatmak için 2 girin. 8 Numaralı listeden Run the 32 Bit Dell Diagnostics (32 Bit Dell Tanıları’nı çalıştır) seçeneğini seçin. Birden çok sürüm sıralanmışsa, kendi platformunuza uygun olan sürümü seçin. 9 Dell Diagnostics Main Menu (Dell Tanıları Ana Menüsü) belirdiğinde, çalıştırmak istediğiniz testi seçin.
Yasal Bilgiler Elektromanyetik Enterferans (EMI), açık alanda yayılan ya da güç veya sinyal hatları üzerinden gönderilen ve bir radyo navigasyonunun veya başka bir güvenlik hizmetinin işleyişini tehlikeye sokan, ya da lisanslı bir radyo iletişim hizmetini ciddi şekilde zayıflatan, engelleyen veya tekrar tekrar kesintiye uğratan her türlü sinyal veya yayındır.
164 Kurul u m ve H ı z l ı B a ş vu ru K ı lavu z u w w w. d e l l . c o m | s u p p o r t . e u r o . d e l l .