Intel® Active Management Technology v6.
Back to Contents Page Overview Intel® Active Management Technology (Intel AMT) allows companies to easily manage their networked computers. Discover computing assets on a network regardless of whether the computer is turned on or off – Intel AMT uses information stored in nonvolatile system memory to access the computer. The computer can even be accessed while it is powered off (also called out-of-band or OOB access).
Back to Contents Page Out of Box Experience The following materials are available with an Intel™ Active Management Technology (Intel AMT) computer: Factory installation Intel AMT 6.0 is shipped in the factory-default state from Dell factories. Setup and Quick Reference Guide Intel AMT overview with link to the Dell Technology Guide. Dell Technology Guide High-level Intel AMT overview, setup, provisioning, and support. Backup media Firmware and critical drivers are available on the Resource CD.
Back to Contents Page Operational Modes Earlier versions of Intel ® AMT supported two operational modes – Small and Medium Business (SMB) and Enterprise. In the current version, their functionality has been integrated to exhibit the functionality of the earlier Enterprise mode. The new configuration options for SMB customers are: Manual Setup and Configuration and Automatic Setup and Configuration. Setting Intel AMT 5.0 Default Intel AMT 6.
Back to Contents Page Setup and Configuration Overview The following is a list of important terms related to the Intel® AMT setup and configuration. Setup and configuration — The process that populates the Intel AMT-managed computer with usernames, passwords, and network parameters that enable the computer to be administered remotely. Configuration service — A third-party application that completes the Intel AMT provisioning.
connection with the AMT computer. These 52-character keys can be created by the SCS, and then deployed on the AMT computer with a desk-side visit in one of two ways: The key can be manually typed into the MEBx. The SCS can create a list of custom keys, and put them onto a specially formatted USB thumb drive. Then each AMT computer retrieves a custom key from the specially formatted USB thumb drive during BIOS boot as detailed in the Configuration Service section of this document.
Back to Contents Page MEBx Settings Overview The Intel® Management Engine BIOS Extension (MEBx) provides platform-level configuration options for you to configure the behavior of the Management Engine (ME) platform. Options include enabling and disabling individual features and setting power configurations. This section provides details about MEBx configuration options and constraints, if any. NOTE: All the ME Platform Configuration setting changes are not cached in MEBx.
The main menu presents three function selections: Intel ME General Settings Intel AMT Configuration Exit NOTE: Intel MEBx will display only detected options. If one or more of these options do not appear, verify that the system supports the relevant missing feature. Changing the Intel ME Password The default password is admin and is the same on all newly deployed platforms. You must change the default password before changing any feature configuration options.
ME General Settings To navigate to the Intel® Management Engine (ME) Platform Configuration page, follow these steps: 1. Under the Management Engine BIOS Extension (MEBx) main menu, select Intel ME General Settings. Press . 2. The following message appears: Acquiring General Settings configuration The ME General Configuration page appears. This page allows the IT administrator to configure the specific functionality of the Intel ME, such as password, power options, and so on.
Previous Menu Set PRTC Power Control Intel ME ON in Host Sleep Idle Time Out Previous Menu Intel ME State Control When the ME State Control option is selected on the ME Platform Configuration menu, the ME State Control menu appears. You can disable ME to isolate the ME computer from the main platform until the end of the debugging process. The Intel ME State Control option (enable/disable) provides the ability to disable the Intel ME for debugging purposes.
Password Policy This option determines when the user is allowed to change the Intel MEBx password through the network. NOTE: The Intel MEBx password can always be changed via the Intel MEBx user interface. Description of these options.
Default Password Only — The Intel MEBx password can be changed through the network interface if the default password has not been changed yet. During Setup and Configuration — The Intel MEBx password can be changed through the network interface during the setup and configuration process but at no other time. Once the setup and configuration process is complete, the Intel MEBx password cannot be changed via the network interface.
2. Domain Name Under the Intel ME Network Name Settings, select Domain Name and press Enter. A domain name can be assigned to the Intel AMT machine. 3.
Under the Intel ME Network Name Settings, select Shared/Dedicated FQDN and press Enter. This setting determines whether the Intel ME Fully Qualified Domain Name (FQDN) (that is, the "HostName.DomainName") is shared with the host and identical to the operating system machine name or dedicated to the Intel ME. Option Description Dedicated The FQDN domain name is dedicated to ME Shared The FQDN domain name is shared with the Host 4.
If Dynamic DNS Update is enabled, then the firmware will actively try to register its IP addresses and FQDN in DNS using the Dynamic DNS Update protocol. If DDNS Update is disabled, then the firmware will not make an attempt to update DNS using DHCP option 81 or Dynamic DNS update.
NOTE: This option is only available when Dynamic DNS Update is enabled. Defines the interval at which the firmware DDNS Update client will send periodic updates. It should be set according to corporate DNS scavenging policy. Units are minutes. A value of 0 disables periodic update. The value set should be equal or greater than 20 minutes. The default value for this property is 24 hours - 1440 minutes. 6. TTL 1. Under the Intel ME Network Name Settings, select TTL and press Enter. 2.
NOTE: This option is only available when Dynamic DNS Update is enabled. This setting allows configuring the TTL time in seconds. This number should be greater than zero. If set to zero, the firmware uses its internal default value, which is 15 min or 1/3 of lease time for DHCP. 7. Previous Menu 1. Under the Intel ME Network Name Settings, select Previous Menu and press Enter. 2. The Intel ME Network Name Settings menu changes to the Intel Network Setup page. TCP/IP Settings 1.
1. DHCP Mode Under Wired LAN IPv4 Configuration, select DHCP Mode and press Enter. The TCP/IP Settings menu changes to the Wired LAN IPv4 Configuration page. ENABLED: If DHCP Mode is enabled, TCP/IP settings will be configured by a DHCP server. More options will be displayed on the screen. Select ENABLED and press Enter, no additional steps are required. DHCP mode enabled.
Select DISABLED and press Enter. If you disable DHCP, more options will be displayed. DHCP mode disabled. 2. IPv4 Address Select IPv4 Address and press Enter. Type the IPv4 Address in the address column and press Enter.
3. Subnet Mask Address Select Subnet Mask Address and press Enter. Type the Subnet Mask Address in the address column and press Enter. 4. Default Gateway Address Select Default Gateway Address and press Enter. Type the Default Gateway Address in the address column and press Enter.
5. Preferred DNS Address Select Preferred DNS Address and press Enter. Type the Preferred DNS Address in the address column and press Enter. 6. Alternate DNS Address Select Alternate DNS Address and press Enter. Type the Alternate DNS Address in the address column and press Enter.
7. Previous Menu Under the Wired LAN IPv4 Configuration, select Previous Menu and press Enter. The Wired LAN IPv4 Configuration menu changes to the TCP/IP Settings menu. Wired LAN IPv6 Configuration Under the TCP/IP Settings, select Wired LAN IPv6 Configuration and press Enter. The TCP/IP Settings menu changes to the Wired LAN IPv6 Configuration page. The Intel ME IPv6 addresses are dedicated and not shared with the host operating system.
ENABLED: select 'Enabled' and press Enter. IPv6 Feature Selection is enabled as more configuration is allowed. 2. IPv6 Interface ID Type Under the Wired LAN IPv6 Configuration, select IPv6 Interface ID Type and press Enter. The auto-configured IPv6 address consists of two parts; the IPv6 Prefix set by the IPv6 router is the first part and the interface ID is the second part (64 bits each).
Option Description Random ID The IPv6 Interface ID is automatically generated using a random number as described in RFC 3041. This is the default. Intel ID The IPv6 Interface ID is automatically generated using the MAC address. Manual ID The IPv6 Interface ID is configured manually. Selecting this type requires that the Manual Interface ID is set with a valid value. 3. IPv6 Address Under the Wired LAN IPv6 Configuration, select IPv6 Address and press Enter. Type the IPv6 Address and press Enter.
4. IPv6 Default Router Under the Wired LAN IPv6 Configuration, select IPv6 Default Router and press Enter. Type the IPv6 Default Router and press Enter. 5.
Under the Wired LAN IPv6 Configuration, select Preferred DNS IPv6 Address and press Enter. Type the Preferred DNS IPv6 Address and press Enter. 6. Alternate DNS IPv6 Address Under the Wired LAN IPv6 Configuration, select Alternate DNS IPv6 Address and press Enter. Type the Alternate DNS IPv6 Address and press Enter.
7. Previous Menu Under the Wired LAN IPv6 Configuration, select Previous Menu and press Enter. The Wired LAN IPv6 Configuration menu changes to the TCP/IP Settings menu. Wireless LAN IPv6 Configuration Under the TCP/IP Settings, select Wireless LAN IPv6 Configuration and press Enter. The TCP/IP Settings menu changes to the Wireless LAN IPv6 Configuration page. 1. IPv6 Feature Selection Under the Wireless LAN IPv6 Configuration, select IPv6 Feature Selection and press Enter.
2. IPv6 Interface ID Type Under the Wired LAN IPv6 Configuration, select IPv6 Interface ID Type and press Enter. The auto-configured IPv6 address consists of two parts; the IPv6 Prefix set by the IPv6 router is the first part and the interface ID is the second part (64 bits each). Option Description Random ID The IPv6 Interface ID is automatically generated using a random number as described in RFC 3041. This is the default.
3. Previous Menu Under the Wireless LAN IPv6 Configuration, select Previous Menu and press Enter. The Wireless LAN IPv6 Configuration menu changes to the TCP/IP Settings menu. Unconfigure Network Access 1. Under the Intel ME Platform Configuration menu, select Unconfigure Network Access and press Enter. NOTE: This will cause Intel ME to transition to the PRE-provisioning state.
2. Select Y to unconfigure. 3. Select Full Unprovisioning and press Enter.
4. Unprovisioning in progress. Remote Setup and Configuration Under the Intel ME Platform Configuration menu, select Automated Remote Setup and Configuration and press Enter. The Intel ME Platform Configuration menu changes to the Automated Remote Setup and Configuration page.
Current Provisioning Mode Under Automated Setup and Configuration, select Current Provisioning Mode and press Enter. Current Provisioning Mode – Displays the current provisioning TLS Mode: None, PKI, or PSK.
Under Automated Setup and Configuration, select Provisioning Record and press Enter. Provisioning Record – Displays the system’s provision PSK/PKI record data. If the data has not been entered, the Intel MEBx displays a message stating “Provision Record not present”. If the data is entered, the Provision record will display as below: Option Description TLS provisioning mode Displays the current configuration mode of the system: None, PSK or PKI.
Under the Intel Automated Remote Setup and Configuration menu, select RCFG and press Enter. The Intel Automated Remote Setup and Configuration menu changes to the Intel Remote Configuration page. Start Configuration Under the Intel Remote Configuration menu, select Start Configuration and press Enter. If Remote Configuration is not activated, Remote configuration cannot occur. To activate (enable) remote configuration, select Y.
Previous Menu Under the Intel Remote Configuration menu, select Previous Menu and press Enter. The Intel Remote Configuration menu changes to the Intel Automated Setup and Configuration page. Provisioning Server IPv4/IPv6 Under the Intel Automated Setup and Configuration menu, select Provisioning Server IPv4/IPv6 and press Enter. 1. Type the provisioning server address and press Enter. 2. Type the provisioning server port number and press Enter.
Provisioning Server FQDN Under the Intel Automated Remote Setup and Configuration menu, select Provisioning Server FQDN and press Enter. Type the FQDN of the provisioning server and press Enter. FQDN of the provisioning server mentioned in the certificate (PKI only). This is also the FQDN of the server that AMT sends hello packets to for both PSK and PKI.
TLS PSK Under the Intel Automated Setup and Configuration menu, select TLS PSK and press Enter. The Intel Automated Remote Setup and Configuration menu changes to the Intel TLS PSK Configuration page. This submenu contains the settings for TLS PSK configuration settings Set PID and PPS Under the Intel TLS PSK Configuration menu, select Set PID and PPS and press Enter. Type PID and press Enter. Type PPS and press Enter.
Setting the PID/PPS will cause a partial unprovision if the setup and configuration is “In-process”. The PID and PPS should be entered in the dash format. (Ex. PID: 1234-ABCD ; PPS: 1234-ABCD-1234-ABCD-1234-ABCD-1234-ABCD). NOTE: A PPS value of ‘0000-0000-0000-0000-0000-0000-0000-0000’ will not change the setup configuration state. If this value is used, the setup and configuration state will remain ‘Not-started’.
Previous Menu Under the Intel TLS PSK Configuration menu select Previous Menu and press Enter. The Intel TLS PSK Configuration menu changes to the Intel Automated Setup and Configuration page. TLS PKI Under the Intel Automated Setup and Configuration menu, select TLS PKI and press Enter. The Intel Automated Remote Setup and Configuration menu changes to the Intel Remote Configuration page. Remote Configuration Under the Intel Remote Configuration menu, select Remote Configuration and press Enter.
PKI DNS Suffix Under the Intel Remote Configuration menu, select PKI DNS Suffix and press Enter. Type the PKI DNS Suffix and press Enter.
Under the Intel Remote Configuration menu, select Manage Hashes and press Enter. Selecting this option will enumerate the hashes in the system and display the Hash Name and the active and default state. If the system does not contain any hashes yet, Intel MEBx will display the following screen. Answering ‘Yes’ will begin the process of adding customized hash. Please see the next section below. The Manage Certificate Hash screen provides keyboard controls for managing the hashes on the system.
Adding Customized Hash When the Insert key is pressed in the Manage Certificate Hash screen, the following screen is displayed: To add a customized certificate hash: Type the hash name (up to 32 characters). When you press Enter, you are prompted to enter the certificate hash value. The Certificate hash value is a hexadecimal number (for SHA-1 it is 20 bytes for SHA-2 it is 32 bytes).
‘Enter’, you are prompted to set the active state of the hash. Your response sets the active state of the customized hash as follows: Yes – The customized hash will be marked as active. No (Default) – The customized hash will add to the EPS but will not be active. Deleting a Hash When the Delete key is pressed in the Manage Certificate Hash screen, the following screen is displayed: NOTE: A certificate hash that is set to Default cannot be deleted.
This option allows deleting of the selected certificate hash. Yes – Intel MEBx sends the firmware a message to delete the selected hash. No – Intel MEBx does not delete the selected hash, and returns to Remote Configuration. Changing the Active State When the ‘+’ key is pressed in the Manage Certificate Hashes screen, the following screen is displayed: Answering Y toggles the active state of the currently selected certificate hash.
The details of the selected certificate hash are displayed to the user and include the following: Hash Name Certificate Hash Data Active and Default States Previous Menu Under the Intel Remote Configuration menu, select Previous Menu and press Enter. The Intel Remote Configuration menu changes to the Intel Automated Setup and Configuration page. FW Update Settings Under the Intel ME Platform Configuration menu, select FW Update Settings and press Enter.
Local FW Update Under the FW Update Settings menu, select Local FW Update and press Enter. Intel ME Firmware Local Update provides the capability to allow or prevent firmware local update in the field. When the “Enabled” option is selected, the IT-admin is able to update the Intel ME firmware locally via the local Intel Management Engine interface or via the local secure interface. This local firmware update does not require an administrator user name and password.
a local update is needed. Secure FW Update Under the FW Update Settings menu, select Secure FW Update and press Enter. This option allows the user to enable or disable secure firmware updates. The Secure Firmware Update function requires an administrator user name and password. If the administrator user name and password are not supplied, the firmware cannot be updated. When the Secure Firmware Update feature is enabled, the IT administrator can update the firmware using the secure method.
Valid date range: 1/1/2004 – 1/4/2021. Setting the PRTC value is used for virtually maintaining PRTC during the power-off (G3) state. Type PRTC in GMT (UTC) format (YYYY:MM:DD:HH:MM:SS) and press Enter. Power Control Under the Intel ME Platform Configuration menu, select Power Control and press Enter. The Intel ME Platform Configuration menu changes to the Intel Power Control page.
To comply with ENERGY STAR* and EUP LOT6 requirements, the Intel ME can be turned off in various sleep states. The Intel ME Power Control menu configures the Intel ME platform power-related policies. Intel ME ON in Host Sleep States Under the Intel ME Power Control menu, select Intel ME ON in Host Sleep States and press Enter. The selected power package determines when the Intel ME is turned ON. The default power package can be modified by using FITC or by FPT.
This setting is used to enable the Intel ME Wake on and to define the Intel ME idle timeout in M3 state. The value should be entered in minutes. The value indicates the amount of time that the Intel ME is allowed remain idle in M3 before transitioning to the M-off state. NOTE: If the Intel ME is in M0, it will NOT transition to M-off. Previous Menu Under the Intel ME Platform Configuration menu, select Previous Menu and press Enter.
Back to Contents Page AMT Configuration After you completely configure the Intel® Management Engine (ME) feature, you must reboot before configuring the Intel AMT for a clean system boot. Select the Intel AMT configuration option from the Management Engine BIOS Extension (MEBx) main menu. This feature allows you to configure an Intel AMT-capable computer to support the Intel AMT management features.
When the Manageability Feature Selection is enabled, the Intel ME manageability feature menu will be shown. Leaving it disabled means that manageability will not be enabled. SOL/IDER Under the Intel AMT Configuration page (with Intel AMT enabled), select SOL/IDER and press Enter. The Intel AMT Configuration page changes to the SOL/IDER page. Username and Password Under the SOL/IDER page select, Username and Password and press Enter. This option provides the user authentication for SOL/IDER session.
SOL allows the console input/output of an Intel AMT-managed client to be redirected to a management server console (if the client system supports SOL). If the system does not support SOL, this value cannot enable it. Option Description Enabled SOL is enabled Disabled SOL is disabled. NOTE: Disabling SOL does not remove this feature but only blocks it from being used. IDER Under the SOL/IDER page, select IDER and press Enter.
IDE-R allows an Intel AMT-managed client to be booted by a management console from a remote disk image. If the client system does not support IDE-R, this value cannot enable it. Option Description Enabled IDER is enabled Disabled IDER is disabled. NOTE: Disabling IDER does not remove this feature but only blocks it from being used. Redirection Mode Under the SOL/IDER page select, Redirection Mode and press Enter.
Legacy Redirection Mode controls how the redirection works. If set to disabled, the console needs to open the redirection ports before each session. This is meant for enterprise consoles and new SMB consoles that support opening the redirection ports. The old SMB consoles (before Intel AMT 6.0) which do not support opening the redirection ports function need to manually turn on the redirection port through this Intel MEBx option.
Enabled same as what used to be SMB mode in previous projects. Old (before Intel AMT 6.0) SMB consoles will need this mode to succeed opening redirection sessions. Previous Menu Under the SOL/IDER page, select Previous Menu and press Enter. The SOL/IDER page changes to the Intel AMT Configuration page. KVM Configuration Under the Intel AMT Configuration page, select KVM Configuration and press Enter. The Intel AMT Configuration page changes to the KVM Configuration page.
The following options can be selected: Local User Consent is not required for remote establishment of KVM session Local User Consent is required for remote establishment of KVM session Opt-in Configurable from remote IT Under the IKVM Configuration page, select Opt-in Configurable from remote IT and press Enter.
Option Description Disable Remote Control of KVM Opt-in Policy This option disables the Remote User’s ability to select User OPT-IN Policy. In this case only the local user can control the opt-in policy. Enable Remote Control of KVM Opt-in Policy Enables Remote User’s ability to select User OPT-IN Policy. Previous Menu Under the KVM Configuration page, select Previous Menu and press Enter. The KVM Configuration page changes to the Intel AMT Configuration page.
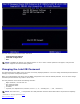
Back to Contents Page Intel® Fast Call Intel® Fast Call for help is a feature that is available for VPro SKUs. An Intel Fast Call for help connection allows the end user to request assistance if the VPro system is outside the corporate network. If the BIOS allows an Intel Fast Call for help connection, the user can press the hot key/button () while the system is loading to initiate an Intel Fast Call connection. It is recommended to press F12 and select Fast Call for Help.
ME General Settings The following table lists the default settings for the Intel® Management Engine BIOS Extension (MEBx) on general settings page.
Activate Network Access Y/N Unconfigure Network Access Y/N Remote Setup and Configuration Current Provisioning Mode Provisioning Record RCFG Start Configuration Y/N Provisioning Server IPv4/IPv6 blank Provisioning Server FQDN blank TLS PSK Set PID and PPS blank Delete PID and PPS Y/N TLS PKI Remote Configuration Disabled Enabled * PKI DNS Suffix blank Manage Hashes FW Update Settings FW Update Settings Local FW Update Qualifier Always Open * Never Open Restricted Secure FW Update D
AMT Configuration The following table lists the default settings for the Intel® Management Engine BIOS Extension (MEBx) on AMT configuration page.
Back to Contents Page Setup and Configuration Methods Overview As discussed in the Setup and Configuration Overview section, the computer has to be configured before the Intel AMT capabilities are ready to interact with management application.
Back to Contents Page Configuration Service--Using a USB Device This section discusses Intel® AMT setup and configuration using a USB storage device. You can set up and locally configure password, provisioning ID (PID), and provisioning passphrase (PPS) information with a USB drive key. This is also called USB provisioning. USB provisioning allows you to manually set up and configure computers without the problems associated with manually typing in entries.
Back to Contents Page USB Device Procedure The default console package provided is the Dell™ Client Management (DCM) application. This section provides the procedure to set up and configure Intel® AMT with the DCM package. As mentioned earlier in the document, several other packages are available through third-party vendors. The computer must be configured and seen by the DNS server before you begin this process.
4. Click the <+> to expand the Intel AMT Getting Started section.
5. Click the <+> to expand the Section 1. Provisioning section.
6. Click the <+> to expand the Basic Provisioning (without TLS) section.
7. Select Step 1. Configure DNS. The notification server with an out-of-band management solution installed must be registered in DNS as "ProvisionServer.
8. Click Test on the DNS Configuration screen to verify that DNS has the ProvisionServer entry and that it resolves to the correct Intel setup and configuration server (SCS).
The IP address for the ProvisionServer and Intel SCS are now visible.
9. Select Step 2. Discovery Capabilities.
10. Verify that the setting is Enabled. If Disabled, click the checkbox next to Disabled and click Apply.
11. Select Step 3. View Intel AMT Capable Computers.
Any Intel AMT-capable computers on the network are visible in this list.
12. Select Step 4. Create Profile.
13. Click the '+'' symbol to add a new profile.
On the General tab, the administrator can modify the profile name and description along with the password. The administrator sets a standard password for easy maintenance in the future. Select the manual radio button and type a new password.
The Network tab provides the option to enable ping responses, VLAN, WebUI, Serial over LAN, and IDE Redirection. If you are configuring Intel AMT manually, all these settings are also available in the MEBx. The TLS (Transport Layer Security) tab provides the ability to enable TLS. If enabled, several other pieces of information are required including the certificate authority (CA) server name, CA common name, CA type, and certificate template.
The Power Policy tab has configuration options to select the sleep states for Intel AMT as well as an Idle Timeout setting. It is recommended that Idle timeout is always set to 0 for optimal performance. CAUTION: The setting for the Power Policy tab can potentially impact a computer's ability to remain E-Star 4.0 compliant. 14. Select Step 5. Generate Security Keys.
15. Select the icon with the arrow pointing out to Export Security Keys to USB Key.
16. Select the Generate keys before export radio button.
17. Type the number of keys to generate (depends on the number of computers that need to be provisioned). The default is 50. 18. The Intel ME default password is admin. Configure the new Intel ME password for the environment. 19. Click Generate. Once the keys have been created, a link appears to the left of the Generate button.
20. Insert the previously formatted USB device into a USB connector on the Provisioning Server. 21. Click the Download USB key file link to download setup.bin file to the USB device. The USB device is recognized by default; save the file to the USB device. NOTE: If additional keys are needed in the future, the USB device must be reformatted before saving the setup.bin file to it.
a. Click Save in the File Download dialog box. b. Verify the Save in: location is directed to the USB device. Click Save.
c. Click Close in the Download complete dialog box. The setup.bin file is now visible in the drive Explorer window. 22. Close the Export Security Keys to USB Key and drive Explorer windows to return to the Altiris Console. 23. Take the USB device to the computer, insert the device, and turn on the computer. The USB device is recognized immediately and you are prompted to Continue with Auto Provisioning (Y/N) Press .
Press any key to continue with system boot... 24. Once complete, turn off the computer and move back to the management server. 25. Select Step 6. Configure Automatic Profile Assignments.
26. Verify that the setting is enabled. In the Intel AMT 2.0+ dropdown, select the profile created previously. Configure the other settings for the environment.
27. Select Step 7. Monitor Provisioning Process.
The computers for which the keys were applied begin to appear in the system list. At first the status is Unprovisioned, then the system status changes to In provisioning, and finally it changes to Provisioned at the end of the process.
28. Select Step 8. Monitor Profile Assignments.
The computers for which profiles were assigned appear in the list. Each computer is identified by the FQDN, UUID, and Profile Name columns.
Once the computers are provisioned, they are visible under the Collections folder in All configured Intel AMT computers.
Back to Contents Page
Back to Contents Page System Deployment Once you are ready to deploy a computer to a user, plug the computer into a power source and connect it to the network. Use the integrated Intel® 82566DM NIC. Intel Active Management Technology (Intel AMT) does not work with any other NIC solution. When the computer is turned on, it immediately looks for a setup and configuration server (SCS).
Back to Contents Page Operating System Drivers Within the operating system, the AMT Unified driver must be installed to remove unknown devices in the Device Manager. The driver is discussed below. Unlike previous versions (3, 4, or 5) where there were two separate HECI and LMS/SOL drivers from customer re-install stand-point, the current version provides both drivers in a common package called AMT Unified Driver.
Back to Contents Page Intel AMT WebGUI The Intel® AMT WebGUI is a Web browser-based interface for limited remote computer management. The WebGUI is often used as a test to determine if Intel AMT setup and configuration was performed properly on a computer. A successful remote connection between a remote computer and the host computer running the WebGUI indicates proper Intel AMT setup and configuration on the remote computer.
Back to Contents Page AMT Redirection Overview Intel® AMT makes it possible to redirect serial and IDE communications from a managed client to a management console regardless of the boot and power state of the managed client. The client need only have the Intel AMT capability, a connection to a power source, and a network connection. Intel AMT supports Serial Over LAN (SOL, text/keyboard redirection) and IDE Redirection (IDER, CD-ROM redirection) over TCP/IP.
Back to Contents Page Intel® Management and Security Status Application Intel® Management and Security Status (IMSS) is an application that displays information about a platform‘s Intel® Active Management Technology (Intel AMT) and Intel® Standard Manageability services. The Intel Management and Security Status icon indicates whether Intel AMT and Intel Standard Manageability are running on the platform. The icon is located in the notification area.
Back to Contents Page Troubleshooting This page describes a few basic troubleshooting steps to follow if problems are experienced with the Intel® AMT configuration. Remember to always check DSN for more troubleshooting options. Return to Default Return to default is also known as un-provisioning. An Intel AMT setup and configured computer can be un-provisioned using the Intel AMT Configuration screen and the Un-Provision option. Follow the steps below to un-provision a computer: 1.