
Specifications


Connecting the Console Port
The switch provides an RS-232 serial port that enables a connection to a computer or terminal for monitoring and configuring the switch. This port is a male
DB-9 connector, implemented as a data terminal equipment (DTE) connection.
To use the console port, you need the following equipment:
l A terminal or a computer with both a serial port and the ability to emulate a terminal
l A null modem or crossover RS-232 cable with a female DB-9 connector for the console port on the switch
To connect a terminal to the console port:
1. Connect the female connector of the RS-232 cable directly to the console port on the switch, and tighten the captive retaining screws.
2. Connect the other end of the cable to a terminal or to the serial connector of a computer running terminal emulation software.
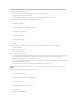
Set the terminal emulation software as follows:
a. Select the appropriate serial port (COM port 1 or COM port 2).
b. Set the data rate to 9600 baud.
c. Set the data format to 8 data bits, 1 stop bit, and no parity.
d. Set flow control to none.
e. Under Properties, select VT100 for Emulation mode.
f. Select Terminal keys for Function, Arrow, and Ctrl keys. Ensure that you select Terminal keys (not Windows keys).
3. After you have correctly set up the terminal, plug the power cable into the power receptacle on the back of the switch. The boot sequence appears in
the terminal.
After the boot sequence completes, the console login screen displays. If you have not logged into the command line interface (CLI) program, the default
user names are admin and guest, and the corresponding passwords are admin and guest.
l If you log in as guest, the CLI displays the Console> prompt to indicate that you are using the CLI in normal access (Normal Exec) mode.
l If you log in as admin, the CLI displays the Console# prompt to indicate that you are using the CLI in privileged access (Privileged Exec) mode.
4. Enter the commands to complete your desired tasks. Many commands require Privileged Exec-level access.
CLI commands for most common tasks are provided in "Management Interface." See the Command Line Reference on the documentation CD for a list of
all commands and additional information on using the CLI.
5. When you have completed your tasks, exit the session with the Quit command.
Password Protection
To proceed through the CLI initial login screen, you must enter a password. If you have not logged into the CLI program, the default user names are admin
and guest, and the corresponding passwords are admin and guest. If you log in as guest, you have access to the Normal Exec level. If you log in as admin, you
have access to the Privileged Exec level.
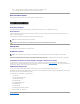
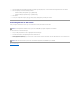
User Access Verification
Username: admin
Password:
CLI session with the PowerConnect 5212 is opened.
To end the CLI session, enter [Exit].
NOTICE: When you use HyperTerminal with the Microsoft®Windows®2000 operating system, ensure that you have Windows 2000 Service Pack 2 or
later installed. Windows 2000 Service Pack 2 allows you to use arrow keys in HyperTerminal's VT100 emulation. See www.microsoft.com for
information on Windows 2000 service packs.