
User's Manual


Defining Authentication Method and Server Addresses
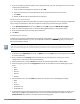
1. Define the authentication method and server addresses.
2. Navigate to Configuration > Advanced Services > VPN Services and click the IPSEC tab.
3. To enable L2TP, select Enable L2TP (this is enabled by default).
4. Select the authentication method for IKEv1 clients. Currently supported methods are:
n Password Authentication Protocol (PAP)
n Extensible Authentication Protocol (EAP)
n Challenge Handshake Authentication Protocol (CHAP)
n Microsoft Challenge Handshake Authentication Protocol (MSCHAP)
n Microsoft Challenge Handshake Authentication Protocol version 2 (MSCHAPv2)
5. Configure the IP addresses of the primary and secondary Domain Name System (DNS) servers and primary
and secondary Windows Internet Naming Service (WINS) Server that is pushed to the VPN client.
Defining Address Pools
Next, define the pool from which the clients are assigned addresses.
1. In the Address Pools section of the IPSEC tab, click Add to open the Add Address Pool page.
2. Specify the pool name, the start address, and the end address.
3. Click Done.
Enabling Source NAT
In the Source NAT section of the IPSEC tab, select Enable Source NAT if the IP addresses of clients need to
be translated to access the network. If you enabled source NAT, click the NAT pool drop-down list and select
an existing NAT pool. If you have not yet created the NAT pool you want to use:
1. Navigate to Configuration > IP > NAT Pools.
2. Click Add.
3. In the Pool Name field, enter a name for the new NAT pool, up to 63 alphanumeric characters.
4. In the Start IP address field, enter the dotted-decimal IP address that defines the beginning of the range
of source NAT addresses in the pool.
5. In the End IP address field, enter the dotted-decimal IP address that defines the end of the range of source
NAT addresses in the pool.
6. In the Destination NAT IP Address field, enter the destination NAT IP address in dotted-decimal format.
If you do not enter an address into this field, the NAT pool uses the destination NAT IP 0.0.0.0.
7. Click Done to close the NAT pools tab.
8. Navigate to Configuration > Advanced Services > VPN Services and click the IPSEC tab to return to the
IPSEC window.
9. Click the NAT Pool drop-down list and select the NAT pool you just created.
Selecting Certificates
To configure the VPN to support machine authentication using certificates, define the IKE Server certificates for
VPN clients using IKEv2. Note that these certificate must be imported into the controller, as described in
Management Access on page 778.
1. Select the IKEv2 server certificate for client machines using IKEv2 by clicking the IKEv2 Server Certificate
drop-down list and selecting an available certificate name.
2. If you are configuring a VPN to support IKEv2 clients using certificates, you must also assign one or more
trusted CA certificates to VPN clients.
Dell Networking W-Series ArubaOS 6.4.x | User Guide Virtual Private Networks | 347