
Users Guide


Perform the following procedure to assign a dedicated hot spare disk:
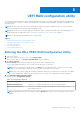
1. Enter the BIOS configuration utility. See Entering the BIOS configuration utility on page 21.
2. In the Main Menu screen, select the Manage Hot Spare and press Enter.
3. Select Assign Dedicated Hot Spare. Press Enter.
4. Use the up or down arrow key to select a physical disk for use as a dedicated hot spare and press Insert.
5. Press Enter to add the dedicated hot spare.
6. Press the C key to confirm the action.
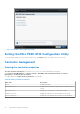
Unassign hot spare disks
1. Enter the BIOS Configuration utility. See Entering the BIOS configuration utility on page 21.
2. In the Main Menu screen, select the Manage Hot Spare and press Enter.
3. Select Unassign Hot Spare. Press Enter.
4. Use the up or down arrow key to select the physical disk to delete as a hot spare.
5. Press Insert. To delete the hot spare, press Enter
6. Press the C key to confirm the action.
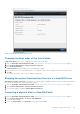
Viewing the physical disks details
1. Enter the BIOS Configuration Utility. See Entering the BIOS configuration utility on page 21.
2. In the Main Menu screen, select View Physical Disk Details and press <Enter>.
3. Use the arrow keys to choose a physical disk.
4. The following details of the physical disks are displayed:
a. Physical disk number
b. Channel number
c. Physical disk size
d. Physical disk status: Non-RAID/Ready/Online
e. Amount of free space
f. Manufacturer and model number
g. World Wide Address
h. SATA Cache Policy (Enabled or Disabled)
i. S.M.A.R.T. State: Error (if a disk with a S.M.A.R.T. error is discovered)
5. Press <Esc> to return to the main window.
Viewing the virtual disks details
1. Enter the BIOS Configuration Utility. See Entering the BIOS configuration utility on page 21.
2. In the Main Menu screen, select View Virtual Disk Details and press <Enter>.
3. Use the arrow keys to choose a virtual disk.
4. The following details of the virtual disks are displayed:
a. Virtual disk number
b. RAID Level
c. Size
d. Status (Read Ahead/Write Back, No Read Ahead/Write Back, Read Ahead/Write Through, No Read Ahead/
Write Through)
5. Press <Esc> to return to the main window.
NOTE: The Physical Disks field indicates the physical disks that are in the virtual disk, highlighted by green text.
BIOS Configuration Utility 25