
Users Guide


NOTE: It is recommended to select the unit before specifying the disk size value. Changing the unit after entering the
value may change the disk size.
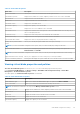
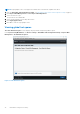
14. Select the Read Cache Policy.
15. Select the Write Cache Policy.
16. Select the Physical Disk Write Cache.
17. Click Create Virtual Disk.
The virtual disk is ready.
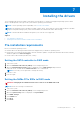
Configuring Linux RAID
NOTE: The Linux RAID feature is supported on all the 14th generation systems. To enable RAID mode for NVMe PCIe SSDs,
see Setting the NVMe PCIe SSDs to RAID mode on page 39. For more information on installing SLES 15 see SUSE Support.
1. Enter the Dell PERC S140 Configuration Utility. See Entering the DELL PERC S140 Configuration Utility on page 27.
2. Click Controller Management → Convert to RAID Capable Disk.
3. Select the RAID type Linux RAID.
NOTE: If the option to choose Linux RAID is disabled, convert the disk to a non-RAID disk, see Converting physical disk
to Non-RAID disk and then convert it back to a RAID capable disk, see Converting physical disk to RAID capable disk.
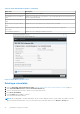
4. Select the Interface Type. The options are SATA and NVMe.
5. Select the physical disk and click Apply Changes.
A confirmation screen is displayed.
6. Click Yes to continue.
7. Click Back to return to the configuration options screen.
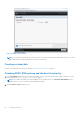
8. After converting the physical disks, click the Virtual Disk Management in the Configuration Options screen, and click
Create Virtual Disks.
9. Select the required Linux operating system.
NOTE:
If you select the RHEL operating system, the entire physical disk space is used in the Virtual Disk Size field.
With RHEL, you can create virtual disks only on the entire physical disk space.
NOTE: If you select SLES as the operating system, you can create virtual disks on both full and partial physical disk
space.
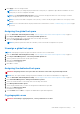
10. Click Select the Physical Disk.
11. Select the interface type, media type, sector size, and the physical disks.
12. Click Apply Changes.
13. Click Create Virtual Disk.
The virtual disk is ready.
UEFI RAID configuration utility
31