
Users Guide


Installing the drivers
The PowerEdge RAID Controller (PERC) S140 requires software drivers to operate with supported operating systems. Which
drives to install depends on the type of the system and the operating system installed.
NOTE: To check operating system compatibility, see www.dell.com/manuals.
NOTE: If the operating system is installed on a PERC or BOSS device, ensure that the software RAID OS driver is installed
using the Dell Update Package (DUP) while SATA and NVMe are in RAID mode while in BIOS settings.
NOTE: Software RAID driver installation through life cycle controller is not supported.
Topics:
• Pre-installation requirements
• Creating the device driver media for Windows driver installation
Pre-installation requirements
Before you install the operating system:
● Read the Microsoft Getting Started document that shipped with your Windows operating system.
● Ensure that your system has the latest BIOS, firmware, and driver updates. If required, download the latest BIOS, firmware,
and driver updates from dell.com/support.
● Create a device driver media (USB drive, CD, or DVD).
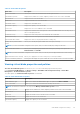
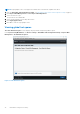
Setting the SATA controller to RAID mode
1. Turn on the system.
2. When the Dell Power-On Self-Test (POST) screen is displayed, press F2.
3. When the Dell PowerEdge System window is displayed, scroll to SATA Settings and press Enter.
In the sub-screen, confirm that the SATA Controller is set to a RAID mode.
NOTE: If necessary, use the space bar to change the setting.
4. Press Esc to exit.
5. Press Esc again.
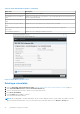
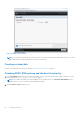
Setting the NVMe PCIe SSDs to RAID mode
WARNING: Changing mode to RAID mode will cause a data loss in the NVMe PCIe SSD.
NOTE: Ensure SATA settings is on RAID mode.
1. Turn on the system.
2. When the Dell Power-On Self-Test (POST) screen is displayed, press F2.
3. When the System Setup window is displayed, click System BIOS.
4. Click NVMe Settings.
5. Select RAID mode.
6. Click Back.
7. Click Finish.
7
Installing the drivers 39