
Owners Manual
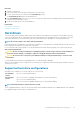
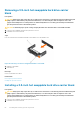
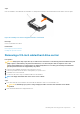
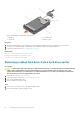

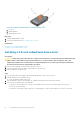
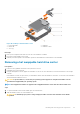
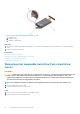
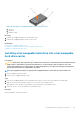
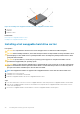

Figure 33. Installing a hot swappable hard drive into a hot swappable hard drive carrier
1. screw (4)
2. hard drive
3. hard drive carrier
Related tasks
Removing a hot swappable hard drive carrier
Installing a hot swappable hard drive carrier
Installing a hot swappable hard drive carrier
Prerequisites
CAUTION:
Use only hard drives that have been tested and approved for use with the hard drive backplane.
CAUTION: When installing a hard drive, ensure that the adjacent drives are fully installed. Inserting a hard drive carrier
and attempting to lock its handle next to a partially installed carrier can damage the partially installed carrier's shield
spring and make it unusable.
CAUTION: To prevent data loss, ensure that your operating system supports hot-swap drive installation. See the
documentation supplied with your operating system.
CAUTION: When a replacement hot swappable drive is installed and the system is powered on, the drive automatically
begins to rebuild. Ensure that the replacement drive is blank or contains data that you wish to overwrite. Any data on
the replacement drive is immediately lost after the drive is installed.
NOTE: Hot swappable hard drives are supplied in hot swappable hard drive carriers that fit in the hard drive slots.
1. If installed, remove the front bezel.
2. If installed, remove the hard drive carrier blank.
3. Install a hot swappable hard drive into the hot swappable hard drive carrier.
Steps
1. Press the release button on the front of the hot swappable hard drive carrier and open the hot swappable hard drive carrier handle.
2. Insert the hot swappable hard drive carrier into the hard drive slot, and push the hot swappable hard drive carrier until it comes in
contact with the backplane.
3. Close the hot swappable hard drive carrier handle to lock the hot swappable hard drive carrier in place.
70
Installing and removing system components