
Owners Manual


2. Follow the procedure listed in the Before working inside your system section.
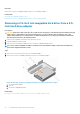
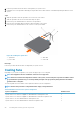
3. If installed, remove the optical drive blank by pressing the blue release tab at the back of the blank and pushing the blank out of the
system.
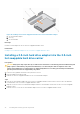
Steps
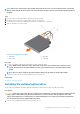
1. Align the optical drive with the optical drive slot on the front of the chassis.
2. Slide the optical drive into the slot until the latch snaps into place.
3. Connect the power and data cables to the back of the optical drive.
4. Route the power and data cables through the cable routing latch of the system.
5. Connect the power and data cables to the connectors on the system board.
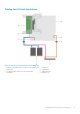
Figure 44. Installing the optical drive
1.
optical drive 2. data cable
3. power cable 4. release tab
Next steps
Follow the procedure listed in the After working inside your system section.
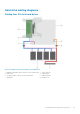
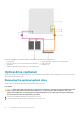
Cooling fans
Depending on your system configuration, your system can support up to four cooling fans.
NOTE:
Hot swappable removal or installation of the fans is not supported.
NOTE: Each fan is listed in the management software of the system, referenced by the respective fan number. If there
is a problem with a particular fan, you can easily identify and replace the proper fan by noting down the fan numbers
provided on the cooling fans.
The following table shows the number of fans required for different system configurations:
NOTE:
Ensure that you install a cooling fan blank in an empty cooling fan bracket.
Table 22. Number of fans based on system configuration
System configuration Number of fans
Systems with four 3.5-inch hot swappable or cabled hard drives and expansion card 4
Systems with four 3.5-inch hot swappable or cabled hard drives and without expansion card 3
Systems with two 2.5-inch cabled hard drives and expansion card 3
Systems with two 2.5-inch cabled hard drives and without expansion card 2
80 Installing and removing system components