
Owners Manual

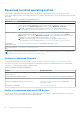
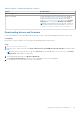


Table Of Contents
- Dell EMC PowerEdge R6525 Installation and Service Manual
- Contents
- About this document
- System overview
- Initial system setup and configuration
- Installing and removing system components
- Safety instructions
- Before working inside your system
- After working inside your system
- Recommended tools
- Cable routing
- RIO card
- Tube clip
- Optional front bezel
- System cover
- Drive backplane cover
- Control panel
- VGA module
- Air shroud
- Cooling fan
- Drives
- Drive backplane
- Rear drive module
- Front PERC module
- System memory
- Processor and heat sink
- Expansion cards and expansion card risers
- Optional serial COM port
- Optional IDSDM module
- MicroSD card
- M.2 SSD module
- BOSS S2 card (optional)
- System battery
- Optional internal USB card
- Intrusion switch module
- Optional OCP card
- Power supply unit
- Trusted Platform Module
- System board
- LOM card and rear I/O board
- Upgrade Kits
- Jumpers and connectors
- System diagnostics and indicator codes
- Getting help
- Documentation resources

Table 9. Interfaces to set up iDRAC IP address (continued)
Interface Documentation links
see KB article https://www.dell.com/support/article/
sln308699.
OpenManage Deployment Toolkit OpenManage Deployment Toolkit User's Guide available at
https://www.dell.com/openmanagemanuals > Open Manage
Deployment Toolkit.
Lifecycle Controller
Lifecycle Controller User’s Guide at https://www.dell.com/
idracmanuals or for system specific Lifecycle Controller
User’s Guide, go to https://www.dell.com/poweredgemanuals
> Product Support page of your system > Manuals &
documents.
NOTE: To determine the most recent iDRAC release
for your platform and for latest documentation version,
see KB article https://www.dell.com/support/article/
sln308699.
Server LCD panel LCD panel section.
iDRAC Direct and Quick Sync 2 (optional) Integrated Dell Remote Access Controller User's Guide at
https://www.dell.com/idracmanuals or for system specific
Integrated Dell Remote Access Controller User's Guide,
go to https://www.dell.com/poweredgemanuals > Product
Support page of your system > Manuals & documents.
NOTE: To determine the most recent iDRAC release
for your platform and for latest documentation version,
see KB article https://www.dell.com/support/article/
sln308699.
NOTE: To access iDRAC, ensure that you connect the ethernet cable to the iDRAC9 dedicated network port or use iDRAC
Direct port by using the USB cable. You can also access iDRAC through the shared LOM mode, if you have opted for a
system that has the shared LOM mode enabled.
Options to log in to iDRAC
To log in to the iDRAC Web User Interface, open a browser and enter the IP address.
You can log in to iDRAC as:
● iDRAC user
● Microsoft Active Directory user
● Lightweight Directory Access Protocol (LDAP) user
In the log in screen displayed, if you have opted for secure default access to iDRAC, enter the iDRAC secure default password
available on back side of the Information Tag. If you have not opted for secure default access to iDRAC, enter the default user
name and password – root and calvin. You can also log in by using your Single Sign-On or Smart Card.
NOTE: Ensure that you change the default username and password after setting up the iDRAC IP address.
For more information about logging in to the iDRAC and iDRAC licenses, see the latest Integrated Dell Remote Access Controller
User's Guide at www.dell.com/idracmanuals.
NOTE:
To determine the most recent iDRAC release for your platform and for latest documentation version, see KB article
https://www.dell.com/support/article/sln308699.
You can also access iDRAC using command-line protocol - RACADM. For more information, see the iDRAC with Lifecycle
Controller RACADM CLI Guide available at www.dell.com/idracmanuals.
You can also access iDRAC using automation tool - Redfish API. For more information, see the iDRAC9 with Lifecycle Controller
Redfish API Guide available at https://www.dell.com/idracmanuals.
Initial system setup and configuration
23