
Setup Guide
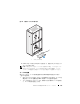


Table Of Contents
- Installation Guide
- Contents
- Safety Instructions
- Installation Instructions
- Rack Installation
- Before You Begin
- Installation Tasks
- Recommended Tools and Supplies
- Removing and Replacing the Rack Doors
- Removing the Front Door
- Replacing the Front Door
- Opening and Removing the Back Doors
- Replacing the Back Doors
- Removing the Side Panels
- Replacing the Side Panels
- Reversing the Front Door (optional)
- Securing the Rack Leveling Feet
- Installing the Rack Stabilizer Feet
- Routing Cables
- Removing the Door Panels From the Optional Door Kit
- Coupling Two Racks
- Index
- Guide d'installation
- Table des matières
- Consignes de sécurité
- Consignes d'installation
- Installation du rack
- Avant de commencer
- Étapes d'installation
- Outils et fournitures recommandés
- Retrait et remise en place des portes du rack
- Retrait de la porte avant
- Remise en place de la porte avant
- Ouverture et retrait des portes arrière
- Remise en place des portes arrière
- Retrait des panneaux latéraux
- Remise en place des panneaux latéraux
- Inversion de la porte avant (optionnel)
- Fixation des cales du rack
- Installation des pieds stabilisateurs du rack
- Acheminement des câbles
- Retrait des panneaux de la porte du kit de porte optionnel
- Association de deux racks
- Index
- Installationshandbuch
- Inhalt
- Sicherheitshinweise
- Installationsanweisung
- Rackinstallation
- Vorbereitung
- Montagearbeiten
- Empfohlene Werkzeuge und Zubehörteile
- Entfernen und Einsetzen der Racktüren
- Entfernen der Vordertür
- Einsetzen der Vordertür
- Öffnen und Entfernen der Hintertüren
- Einsetzen der Hintertüren
- Entfernen der Seitenwände
- Austauschen der Seitenwände
- Umdrehen der Vordertür (optional)
- Einstellen der höhenverstellbaren Füße des Racks
- Befestigen der Rack-Stabilisierungsstandfüße
- Kabelführung
- Entfernen der Türverkleidung aus dem zusätzlichen Türen-Bausatz
- Verbinden von zwei Racks
- Stichwortverzeichnis
- インストールガイド
- Guía de instalación
- Contenido
- Instrucciones de seguridad
- Instrucciones de instalación
- Instalación de estantes
- Antes de comenzar
- Tareas de instalación
- Herramientas y materiales recomendados
- Extracción y sustitución de las puertas del estante
- Extracción de la puerta frontal
- Sustitución de la puerta frontal
- Abrir y extraer laspuertas posteriores
- Sustitución de las puertas posteriores
- Extraer los paneles laterales
- Sustitución de los paneles laterales
- Invertir la puerta frontal (opcional)
- Asegurar las patas niveladorasdel estante
- Instalación de las patas estabilizadoras del estante
- Canalización de cables
- Retirar los paneles de la puerta del kit de puerta opcional
- Acoplar dos estantes
- Índice

122 Dell™ PowerEdge™ 4210 インストールガイド
2 つのラックのカップリング
警告 : ラックキャビネットは大きくて重量もあるので、自分一人でラックキャビ
ネットをカップリングしようとしないでください。
1
梱包を開き、両方のラックを据え付けます。
2
カップリングキットの梱包を
図
1-13
に示すように開きます。
ラックカップリングキットには以下のものがあります。
•4
枚のガスケット
•4
個の六角形スペーサ
•8
個の六角ネジ
•
スパナ
•T
型ハンドル六角レンチ
図 1-13. ラックカップリングキット
3
ドアおよび側面パネルを両方のラックから取り外します。「前面ドアの取り
外し」、「背面ドアの開放と取り外し」および「側面パネルの取り外し」を参
照してください。
4
六角スペーサをラックに取り付ける箇所が
4
つあります。その
4
箇所に隣
接する
1
つのラックに保護裏地を取り外したガスケットを置きます
(図
1-14
を参照)。
1
ガスケット(4)
2
六角形スペーサ(4)
3
六角ネジ(8)
4
スパナ
5
T
型ハンドル六角レンチ
1
2
3
4
5