
Users Guide
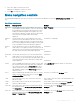


Table 7. Parameters — description
Parameter Description
RAID Level Species whether the virtual disk is RAID 0, 1, 5, 6, 10, 50, or 60. The number of disks, disk capacity,
requirements for fault tolerance, performance, and capacity should be considered when selecting the
RAID level.
Stripe Element Size Species the size of the segments written to each physical disk in a RAID 0, 1, 5, 6, 10, 50, and 60 virtual
disk. You can set the stripe element size to 64 KB 128 KB, 256 KB, 512 KB, or 1 MB. The default and
recommended stripe element size is 64 KB.
A larger stripe element size provides better read performance if your system mostly does sequential
reads.
Write Policy Species the controller write policy. You can set the write policy to Write-Back or Write-Through.
In Write-Back caching, the controller sends a data transfer completion signal to the host when the
controller cache has received all the data in a transaction.
NOTE: If a Battery Backup Unit (BBU) is present, the default cache setting is Write-Back. If
no BBU is present, the default cache policy default setting is Write-Through.
NOTE: If Write-Back is enabled and the system is turned o and then on, the controller may
pause as the system ushes cache memory. Controllers have a battery backup default to
Write-Back caching.
In Write-Through caching, the controller sends a data transfer completion signal to the host when
the disk subsystem has received all the data in a transaction.
Read Policy Read-Ahead enables the read-ahead feature for the virtual disk. You can set the parameter to Read-
Ahead or No-Read-Ahead. The default is Read-Ahead.
Read-Ahead species that the controller uses Read-Ahead for the current virtual disk. Read-Ahead
capability allows the controller to read sequentially ahead of requested data and store the additional data
in the cache memory, anticipating that the data is required soon.
No-Read-Ahead species that the controller does not use read ahead for the current virtual disk.
BIOS Conguration Utility menu options
The rst menu that is displayed when you access the BIOS Conguration Utility <Ctrl> <R> is the main menu screen. It lists the controller,
controller number, and other information, such as the slot number. On the screen, you can use the arrow keys to select the RAID controller
you want to congure. Press <Enter> to access the controller
This section describes the options for the BIOS Conguration Utility (<Ctrl> <R>) for each of the major menus:
• Virtual Disk Management (VD Mgmt) menu
• Physical Disk Management (PD Mgmt) menu
• Controller Management (Ctrl Mgmt) menu
• Foreign Conguration View (Foreign View) menu
Most menus consist of two panels:
• A left panel with the menu options
• A right panel with details of the items selected in the left panel
The following sections describe the menu and submenu options for each of the major menus:
BIOS
Conguration Utility 65