
Users Guide


Checking data consistency
Select the Consistency Check (CC) option in the conguration utility to verify the redundancy data in virtual disks that use RAID levels 1,
5, 6, 10, 50, and 60 (RAID 0 does not provide data redundancy).
If you attempt to run a Consistency Check on a virtual disk that has not been initialized, the following error message is displayed:
The virtual disk has not been initialized. Running a consistency check may result in
inconsistent message in the log. Are you sure you want to continue?
• Select Yes to proceed with running a CC.
• Select No to terminate the operation.
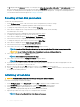
Running a data consistency check
To perform a data consistency check:
1 Press <Ctrl> <N> to access the VD Mgmt menu screen.
2 Press the down-arrow key to highlight Virtual Disk #.
3 Press <F2> to display the menu of available actions.
4 Press the down-arrow key to select Consistency Check.
5 Press the right-arrow key to display the available actions (Start, Stop).
6 Select Start and press <Enter> to run a Consistency Check.
The Consistency Check runs and checks the redundancy data in the virtual disks.
Importing or clearing foreign congurations using the VD
mgmt menu
When a foreign conguration exists, the BIOS screen displays the message Foreign configuration(s) found on adapter. In
addition, a foreign conguration is displayed on the right side of the Ctrl Mgmt screen.
You can use the VD Mgmt menu to import the existing conguration to the RAID controller or clear the existing conguration. In addition,
you can view the foreign conguration from the Foreign View tab without importing the conguration.
NOTE
: The controller does not allow import of congurations that results in more than 64 virtual disks.
NOTE: To import a secured foreign conguration, see Security Key And RAID Management.
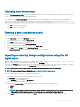
Perform the following steps to import or clear foreign congurations:
1 During bootup, press <Ctrl> <R> when prompted by the BIOS screen.
The VD Mgmt screen is displayed by default.
2 On the VD Mgmt screen, highlight the Controller #.
3 Press <F2> to display the available actions.
4 Navigate to the Foreign Cong option and press the right arrow key to display the available actions:
a Import
b Clear
NOTE
: Ensure that your virtual disk has all the physical disks by verifying that there are no physical disks marked as
Missing in the foreign view page and that all the disks appear as expected before importing them.
5 Select Import to import the foreign conguration or Clear to delete the foreign conguration and then press <Enter>.
BIOS
Conguration Utility 73