
Users Guide


4 Select Clear Cong.
A pop-up window is displayed prompting for conrmation to delete all virtual disks.
5 Select YES to delete the virtual disks or NO to retain the congurations.
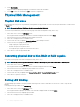
Physical Disk Management
Physical disk erase
Physical Disk Erase is the process of permanently erasing all data on a physical disk. You must execute Physical Disk Erase on a drive that is
in Ready state.
NOTE: By executing Physical Disk Erase, the data on your physical disk is lost.
To execute Physical Disk Erase, perform the following steps in the BIOS Conguration Utility (<Ctrl> <R>):
1 Press <Ctrl> <N> to access the PD Mgmt screen.
A list of physical disks are displayed. The status of each disk is displayed under the heading State.
2 Press the down-arrow key to highlight the physical disk to be erased.
3 Press <F2> to display the menu of available actions.
4 Use the down-arrow key to highlight Physical Disk Erase option and press <Enter>.
5 Use the arrow keys to highlight the type of erase.
• Simple: Single pass, single pattern write
• Normal: Three pass, three patterns write
• Thorough: Nine pass, repeats the normal write three times
6 Press <Enter> to erase the physical disk data.
Converting physical disk to Non-RAID or RAID capable
Perform the following steps in the BIOS Conguration Utility (<Ctrl> <R>):
NOTE
: You can only convert a physical disk that is in Ready or Uncongured good state to Non-RAID or RAID capable.
1 Press <Ctrl> <N> to access the PD Mgmt screen.
A list of physical disks are displayed. The status of each disk is displayed under the heading State.
2 Press the down-arrow key to highlight the physical disk to be converted.
3 Press <F2> to display the menu of available actions.
4 Use the down-arrow key to highlight either Convert to Non-RAID or Convert to RAID Capable option.
5 Press <Enter> to perform conversion.
Setting LED blinking
The LED blinking option indicates when physical disks are being used to create a virtual disk. You can choose to start or stop the LED
blinking.
Following the below procedures to set LED Blinking:
1 Press <Ctrl> <N> to access the PD Mgmt screen.
A list of physical disks is displayed. The status of the each disk is displayed under the heading State.
2 Press the down-arrow key to highlight a physical disk.
3 Press <F2> to display the menu of available actions.
78
BIOS Conguration Utility