
Users Guide


NOTE: For more information in all the options, click Help that is available on the top right-hand corner of the browser
screen. Help information for individual option menus can also be viewed by scrolling down on each option.
NOTE: Some of the options within the UEFI RAID conguration utility are not present if the controller does not support
the corresponding feature. Options may also be grayed out if the feature is supported in existing conguration.
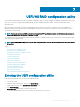
Exiting the UEFI conguration utility
To exit the UEFI conguration utility, perform the following steps:
1 Click Finish at the bottom-right corner on the System Setup Main Menu screen.
Displays a warning message to conrm your choice.
2 Click Yes to exit the conguration utility.
Navigating to Dell PERC 9 conguration utility
1 Enter the UEFI conguration Utility. See Entering the UEFI conguration utility.
The Device Settings screen displays a list of NIC ports and the Dell PERC 9 conguration utility.
2 To enter PERC 9 conguration utility, click Dell PERC 9 Conguration Utility.
Displays the list of Conguration Options:
• Controller Management — allows you to congure, manage, and view the controller properties.
• Virtual Disk Management — allows you to congure, manage, and view the virtual disk properties
• Physical Disk Management — allows you to congure, manage, view and perform varied operations on the physical disk
properties.
Conguration management
Creating virtual disks
1 Enter the Dell PERC 9 Conguration Utility. See Navigating to PERC 9 Conguration Utility.
2 Click Conguration Management > Create Virtual Disks.
3 Select the RAID level by selection the radio button next to the available RAID congurations.
4 If you want to create a secured virtual disk, select Secure Virtual Disk.
NOTE
: The Secure Virtual Disk option is enabled and selected by default, only if the security key has been congured.
Only SED physical disks are listed.
5 Select one of the following physical disk capacities:
• Uncongured Capacity: Creates a virtual disk on uncongured physical disks.
• Free Capacity: Utilizes unused physical disk capacity that is already part of a virtual disk.
6 To select the physical disks from which the virtual disks are being created, click Select Physical Disks. This option is displayed if you
select Uncongured Capacity as your physical disk capacity.
7 To select the disk groups from which the virtual disks are being created, click Select Disk Group. This option is displayed if you select
Free Capacity as your physical disk capacity.
8 Specify the name for the virtual disk in the Virtual Disk Name eld.
9 Specify the size of the virtual disk in the Virtual Disk Size eld.
10 Select the unit for the virtual disk size.
11 Specify the read policy for the virtual disk. The options for read policy are:
• No Read Ahead
• Read Ahead
84
UEFI/HII RAID conguration utility