
Users Guide


Viewing disk group properties
1 Enter the Dell PERC 9 Conguration Utility. See Navigating to PERC 9 Conguration Utility.
2 Click Conguration Management > View Global Hot Spares.
All the hot spare disks that are assigned to the RAID controller are displayed.
Viewing disk group properties
1 Enter the Dell PERC 9 Conguration Utility. See Navigating to PERC 9 Conguration Utility.
2 Click Conguration Management > View Disk Group Properties.
3 You can view the following properties of the disk group:
Option Description
Capacity Allocation Displays the associated virtual disks for the disk group and the available free capacity, if any.
Secured Indicates if the disk group is secured.
Assigned Dedicated Hot Spare Displays information about the hot spares dedicated to the disk group.
NOTE: A single hot spare disk can be assigned to multiple disk groups.
Managing foreign congurations on a RAID controller
1 Enter the Dell PERC 9 Conguration Utility. See Navigating to PERC 9 Conguration Utility.
2 Click Conguration Management > Manage Foreign Conguration > Preview Foreign Conguration.
The list of the existing congurations are displayed.
3 Click Import Foreign Conguration to import all the foreign congurations.
A screen is displayed asking if you are sure you want to perform the operation.
4 Click Yes to continue.
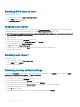
Deleting existing congurations on a RAID controller
1 Enter the Dell PERC 9 Conguration Utility. See Navigating to PERC 9 Conguration Utility.
2 Click Conguration Management > Clear Conguration.
3 Click OK.
A screen is displayed asking if you are sure you want to perform the operation.
4 Click Yes to continue.
Controller management
Restoring factory settings for the controller
1 Enter the Dell PERC 9 Conguration Utility. See Navigating to PERC 9 Conguration Utility.
2 Click Controller Management > Set Factory Defaults.
3 Click OK.
A screen is displayed asking if you are sure you want to perform the operation.
86
UEFI/HII RAID conguration utility