
Users Guide


If there is more than one controller, the main menu screen is displayed.
2 Select a controller, and press <Enter>.
The Virtual Disk Management screen is displayed for the selected controller.
3 Use the arrow keys to highlight the Disk Group number.
4 Press <F2> to display a menu of the available actions.
5 Highlight the Secure Disk Group option and press <Enter>.
NOTE: If you select to secure a Disk Group, all VDs part of the Disk Group are secured.
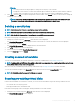
Importing or clearing secured foreign congurations and
secure disk migration
Secured virtual disks created on a PERC 9 card can be migrated to another PERC 9 series card. A virtual disk secured with a security key
dierent from the current controller security key cannot be imported without authentication of the original passphrase used to secure
them. When importing secured virtual disk(s) created with a dierent security key, the secured foreign conguration(s) do not show in the
Foreign Conguration View screen. Follow the steps below to import or clear a foreign secured virtual disk.
NOTE: If you are importing secured and unsecured virtual disks, you are prompted to resolve the secured foreign conguration
rst.
NOTE: The PERC 9 series of cards need to have a security key present before being able to import a secured virtual disk.
NOTE: Any unsecured virtual disks imported are still unsecured.
NOTE: If you are importing a virtual disk originally secured with a local key management (LKM), you are prompted for the
passphrase used to secure that virtual disk.
Perform the following steps when importing a secured foreign virtual disk:
1 During the host system bootup, press <Ctrl> <R> when the BIOS screen is displayed.
The Virtual Disk Management screen is displayed.
If there is more than one controller, the main menu screen is displayed.
2 Select a controller, and press <Enter>.
The Virtual Disk Management screen is displayed for the selected controller.
3 Press <F2> to display a menu of available actions.
4 Select Import to import the foreign conguration or Clear to delete the foreign conguration. Press <Enter>.
NOTE
: To Clear, you need to Secure Erase foreign congurations secured with a dierent security key.
5 If you select to Import the conguration, the Secure Foreign Import screen is displayed.
NOTE
: The key identier for the passphrase used to secure the foreign secured virtual disks is displayed under the
Secured Drives option.
6 Enter the passphrase that was used to secure the foreign conguration.
7 Press <Tab> and select OK to nish importing the secured foreign conguration or select Cancel to exit this menu.
If you select Cancel for the secured foreign import, the disks remain inaccessible until imported or secure erased. See Secure erase.
Secure erase
Secure Erase is the process of permanently erasing all data on an encryption-capable physical disk and resetting the security attributes. You
need to execute Secure Erase on SEDs that are inaccessible (blocked) due to a lost or forgotten passphrase.
CAUTION
: By executing Secure Erase, the data on your encryption-capable physical disk is lost.
96 Security key and RAID management