
Users Guide
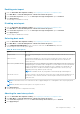


NOTE: If the drive installed is ISE or SED capable, then only the Cryptographic erase option is displayed.
5. Click Go.
A screen is displayed asking if you are sure you want to perform the operation.
6. Select the Confirm option.
7. Click Yes.
The Cryptographic erase operation is completed successfully.
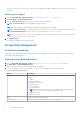
Physical disk erase
To use the Physical Disk Erase feature from the HII Configuration Utility, perform the following steps:
1. Enter the Dell PERC 10 Configuration Utility. See Navigating to Dell PERC 10 configuration utility.
2. Click Main Menu > Physical Disk Management.
The list of physical disks is displayed.
3. Select a physical disk.
4. From the Operations drop-down menu, select Physical Disk Erase.
NOTE: If the drive installed is neither SED or ISE capable, then only the Physical Disk Erase option is displayed.
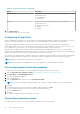
5. Click Go.
A screen is displayed asking if you are sure you want to perform the operation.
6. Select the Confirm option.
7. Click Yes.
The physical disk erase operation is completed successfully.
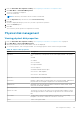
Assigning global hot spare
To assign a global hot spare from the HII Configuration Utility, perform the following steps:
1. Enter the Dell PERC 10 Configuration Utility. See Navigating to Dell PERC 10 configuration utility.
2. Click Main Menu > Physical Disk Management.
The list of physical disks is displayed.
3. Select the physical disk.
4. From the Operations drop-down menu, select Assign Global Hot Spare.
5. Click Go.
A screen is displayed asking if you are sure you want to perform the operation.
6. Select the Confirm option.
7. Click Yes.
The global hot spare disk is created successfully.
Assigning dedicated hot spare
To assign a dedicated hot spare from the HII Configuration Utility, perform the following steps:
1. Enter the Dell PERC 10 Configuration Utility. See Navigating to Dell PERC 10 configuration utility.
2. Click Main Menu > Physical Disk Management.
The list of physical disks is displayed.
3. Select the physical disk.
4. From the Operations drop-down menu, select Assign Dedicated Hot Spare.
5. Click Go.
A screen is displayed asking if you are sure you want to perform the operation.
6. Select the Confirm option.
7. Click Yes.
The dedicated hot spare disk is created successfully.
HII configuration utility
67