
Install Guide

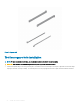
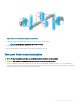

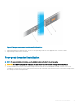

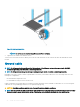
Table Of Contents
- S5148F-ON Installation Guide January 2019
- About this guide
- S5148F-ON switch
- Site preparations
- NEBS compliance
- S5148F-ON switch installation
- Power supplies
- Fans
- Management ports
- Specifications
- Chassis physical design
- IEEE standards
- Agency compliance
- USA Federal Communications Commission statement
- European Union EMC directive conformance statement
- Japan VCCI compliance for class A equipment
- Korean certification of compliance
- Safety standards and compliance agency certifications
- Electromagnetic compatibility
- Product recycling and disposal
- Dell EMC support

4 Remove all packing material.
5 Inspect the product and accessories for damage.
Rack or cabinet hardware installation
You may either place the switch on a rack shelf or mount the switch directly into a 19" wide, EIA-310- E-compliant rack. Rack mounting
includes four-post, two-post, or threaded mounts. The ReadyRails system is provided for 1U front-rack and two-post installations.
The ReadyRails system includes separately packaged rail assemblies.
CAUTION: Your switch is not NEBS Earthquake Z4-compliant if you use the 1U tool-less square-hole or two-post installation
methods.
WARNING: This document is a condensed reference. Read the safety instructions in your
Safety, Environmental, and Regulatory
information booklet before you begin.
NOTE: The illustrations in this document are not intended to represent a specic switch.
NOTE: Do not the use the mounted ReadyRails as a shelf or a workplace.
Rack mount safety considerations
• Rack loading—Overloading or uneven loading of racks may result in shelf or rack failure, possibly damaging the equipment and causing
personal injury. Stabilize racks in a permanent location before loading begins. Mount the components starting at the bottom of the rack,
then work to the top. Do not exceed your rack’s load rating.
• Power considerations—Connect only to the power source specied on the unit. When you install multiple electrical components in a
rack, ensure that the total component power ratings do not exceed the circuit capabilities. Overloaded power sources and extension
cords present re and shock hazards.
• Elevated ambient temperature—If installed in a closed rack assembly, the operating temperature of the rack environment may be
greater than the room ambient temperature. Use care not to exceed the 45°C (113°F) maximum ambient temperature of the switch.
• Reduced air ow—Install the equipment in the rack so that the amount of airow required for safe operation of the equipment is not
compromised.
• Reliable earthing—Maintain reliable earthing of rack-mounted equipment. Pay particular attention to the supply connections other than
the direct connections to the branch circuit, for example, use of power strips.
• Do not mount the equipment with the back panel facing downward.
ReadyRails installation
To easily congure your rack for installation of your S5148F-ON switch, use the ReadyRails rack mounting system provided.
You can install the ReadyRails system using the 1U tool-less method or one of three possible 1U tooled methods—two-post ush mount,
two-post center mount, or four-post threaded mount.
CAUTION
: Do not use the two-post methods if you need your switch to be NEBS Earthquake Z4-compliant.
To begin installation, separate each rail assembly by sliding the inside rail out of the outside rail.
NOTE
: For more installation instructions, see the installation labels attached to the rail assembly.
S5148F-ON switch installation 21